Make Your Own Milk Glass with Spray Paint

How to Turn Thrifted Glass into Vintage-Style Decor
If you’ve ever admired those creamy white or soft green milk glass vases at antique shops, you already know how timeless they are. They have that perfect blend of vintage charm and modern simplicity. Unfortunately, true milk glass and jadeite pieces can be surprisingly expensive, especially if you want a matching set.
That’s why this simple DIY is one of my absolute favourites. With a few inexpensive glass vases and one can of spray paint, you can recreate the look of milk glass in minutes. It’s fast, affordable, and looks stunning displayed on a mantel, dining table, or shelf.
Whether you’re decorating for spring or just want to refresh your space, this project is the kind of quick win that makes your home feel instantly more polished.
What Is Milk Glass?
Milk glass is a type of opaque glass that became popular in the 19th and early 20th centuries. It was often used for decorative vases, bowls, and dishware, especially during the Depression era. The glass was produced in both white and jade green varieties, and the green version, known as jadeite, has become highly collectible.
The problem is that true vintage jadeite can be difficult to find and quite costly. Even a small vase can sell for £30-£50, while larger pieces often go for far more. By contrast, this DIY gives you the same delicate, milky look for a fraction of the price, using affordable materials you can find at almost any hardware store or on Amazon.
What You’ll Need
Here are the supplies you’ll want on hand before starting:
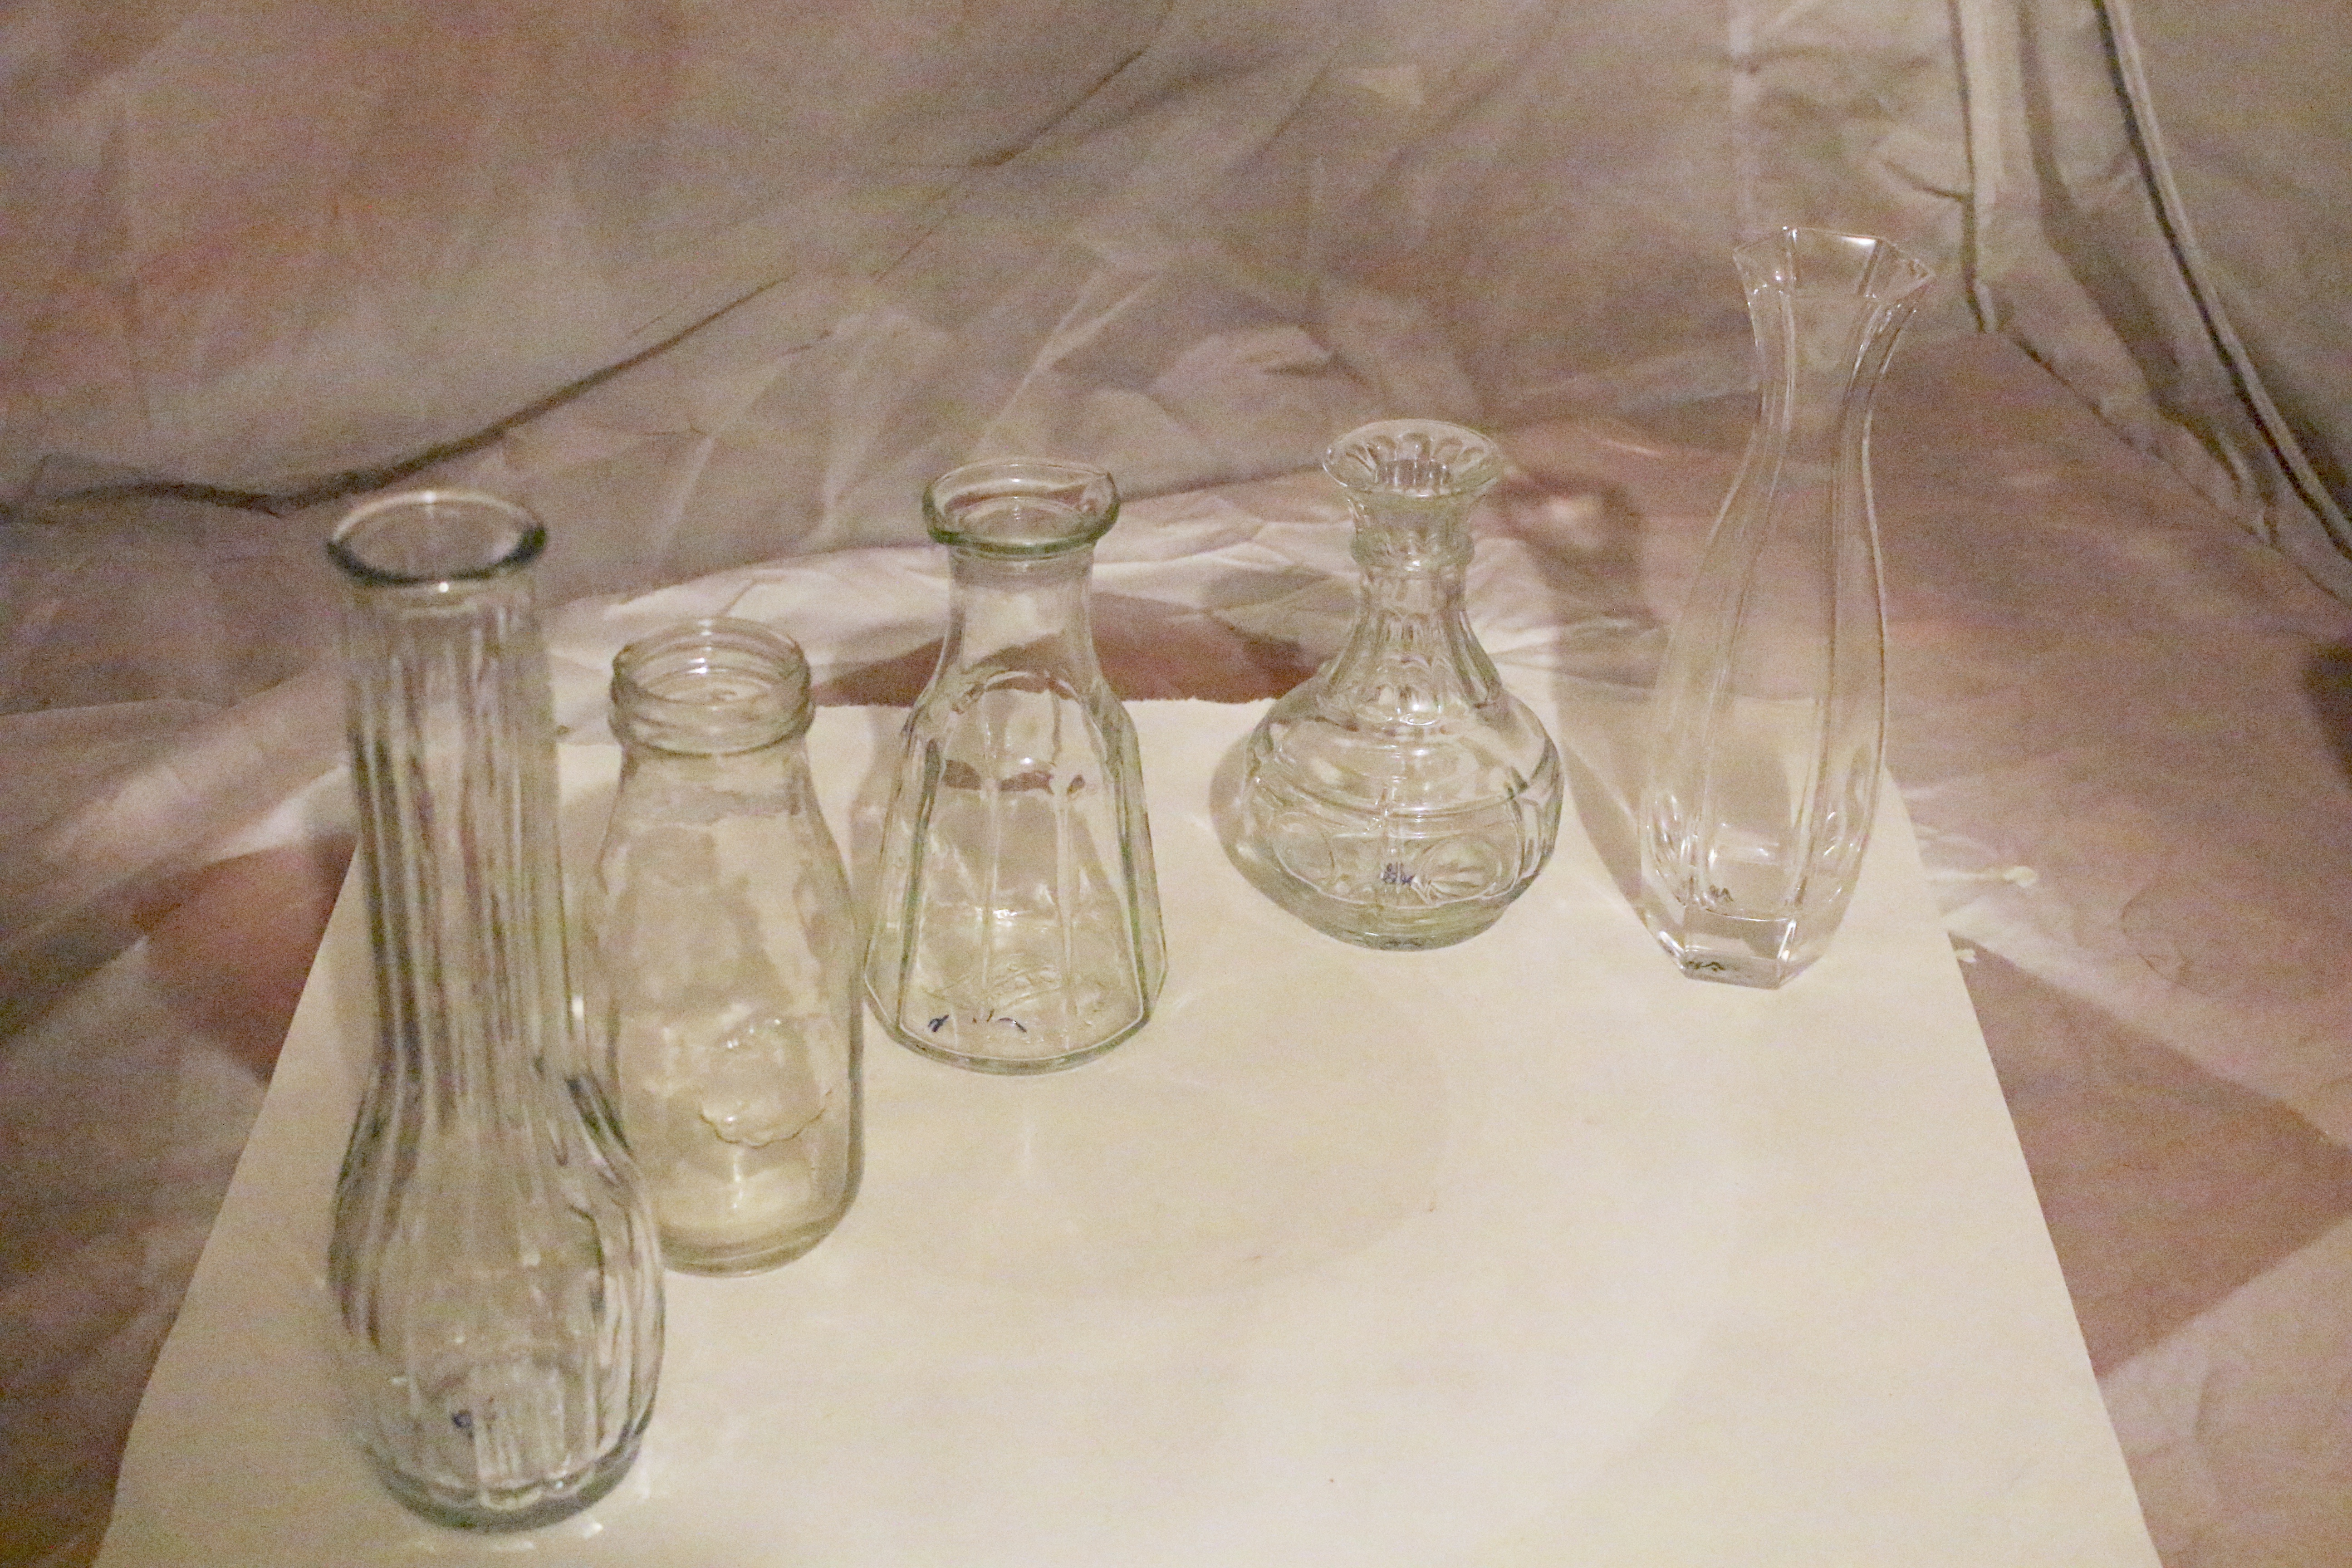
- Glass vases or jars – Thrift stores, charity shops, or your own cupboards are perfect sources. Look for interesting shapes and patterns. If you prefer to start fresh, try this set of clear glass bud vases.
- Spray paint for glass – The key ingredient. I used the Valspar version, but it's been discontinued. You can also use Rust-Oleum frosted glass spray in green for a softer look or this white glass spray paint if you prefer a classic milk glass finish.
- Protective gloves – A pair of disposable nitrile gloves will save you from having paint-covered hands.
- Drop cloth or old newspaper – Lay this down to protect your workspace. Disposable plastic sheets work perfectly.
- Rubbing alcohol or Goo Gone – Great for removing stubborn labels and residue.
- Optional: a lazy Susan spray stand to make even coats easier.
Step 1: Clean and Prepare Your Glass
Start by washing your vases thoroughly. Any dust, dirt, or oil can prevent the paint from sticking properly. Remove all stickers and residue, then dry everything completely.
If your glass has been sitting for a while, wipe it with rubbing alcohol to remove any leftover oils or fingerprints. This extra step helps the spray paint adhere evenly and prevents peeling later.
Step 2: Set Up a Safe Painting Space
You’ll want to work in a well-ventilated area such as your garage with the door open, or outside on a dry, calm day. Lay down your drop cloth or an old cardboard box to protect the surface.
It’s best to elevate the vases slightly while painting so you can easily reach all sides. A small turntable, lazy Susan, or even an upside-down bowl can help.
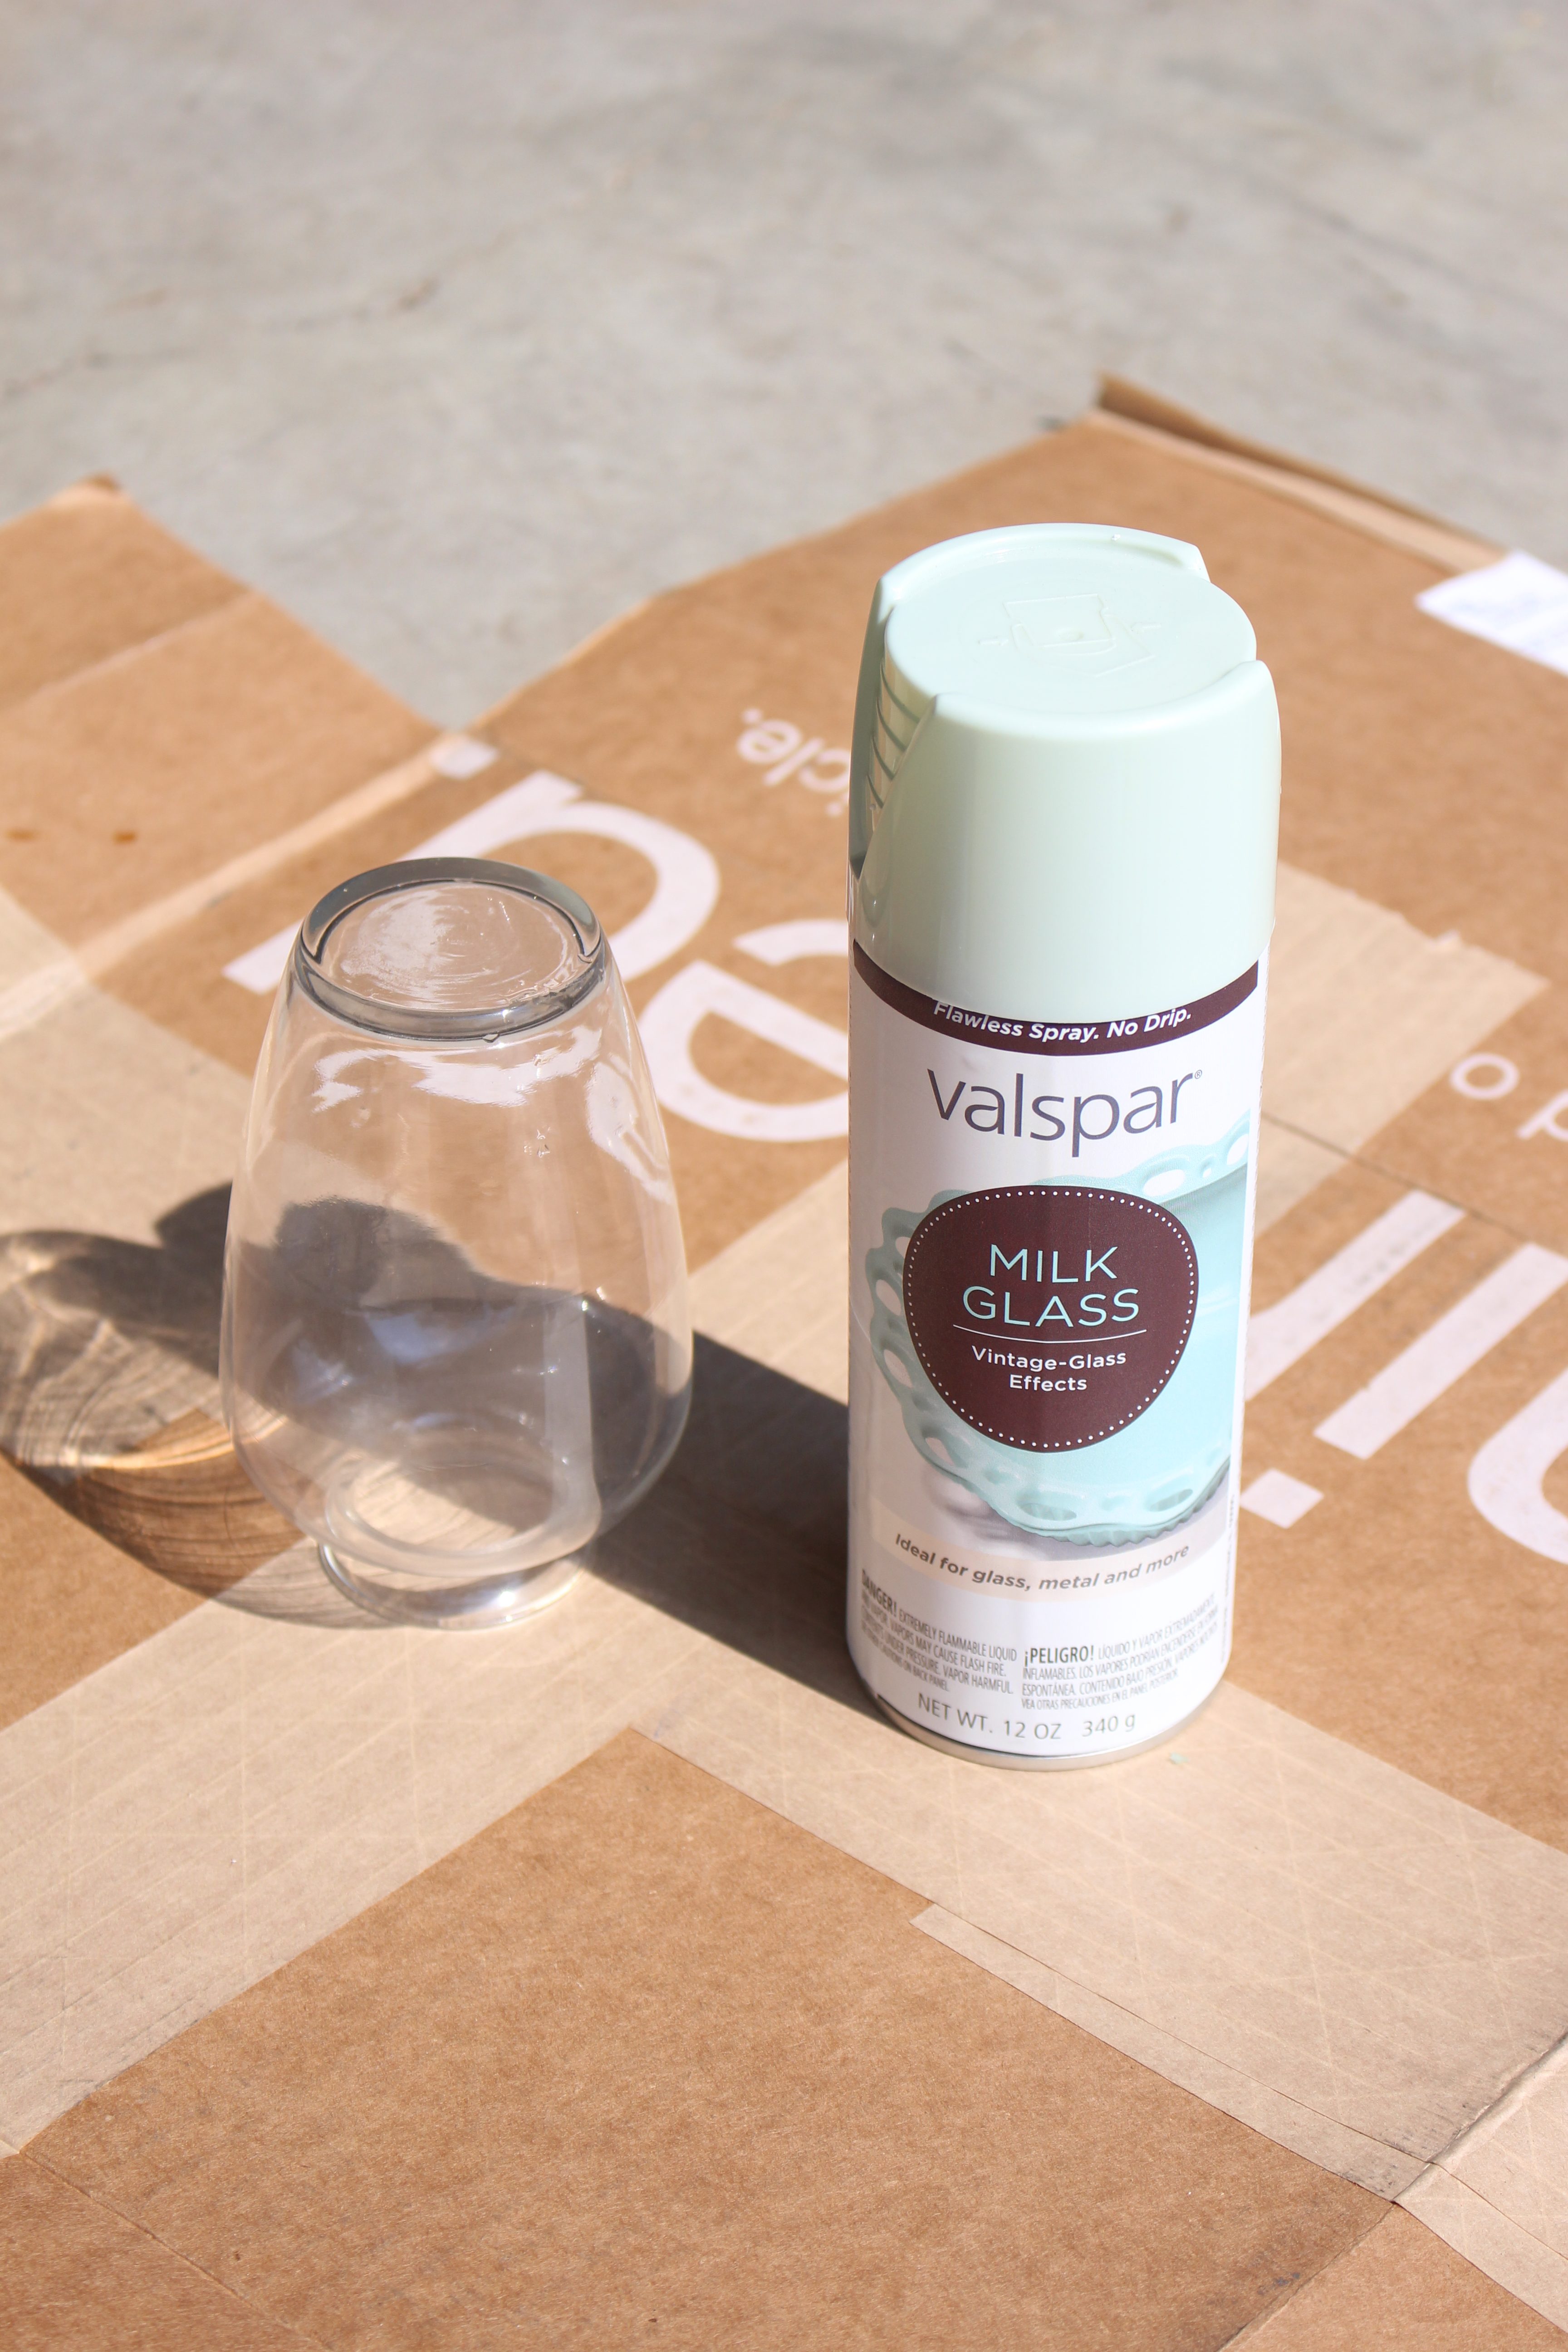
Step 3: Apply the Spray Paint
Shake your spray paint can for at least one minute before use. Hold it about 8 to 10 inches away from the glass and begin spraying in smooth, sweeping motions.
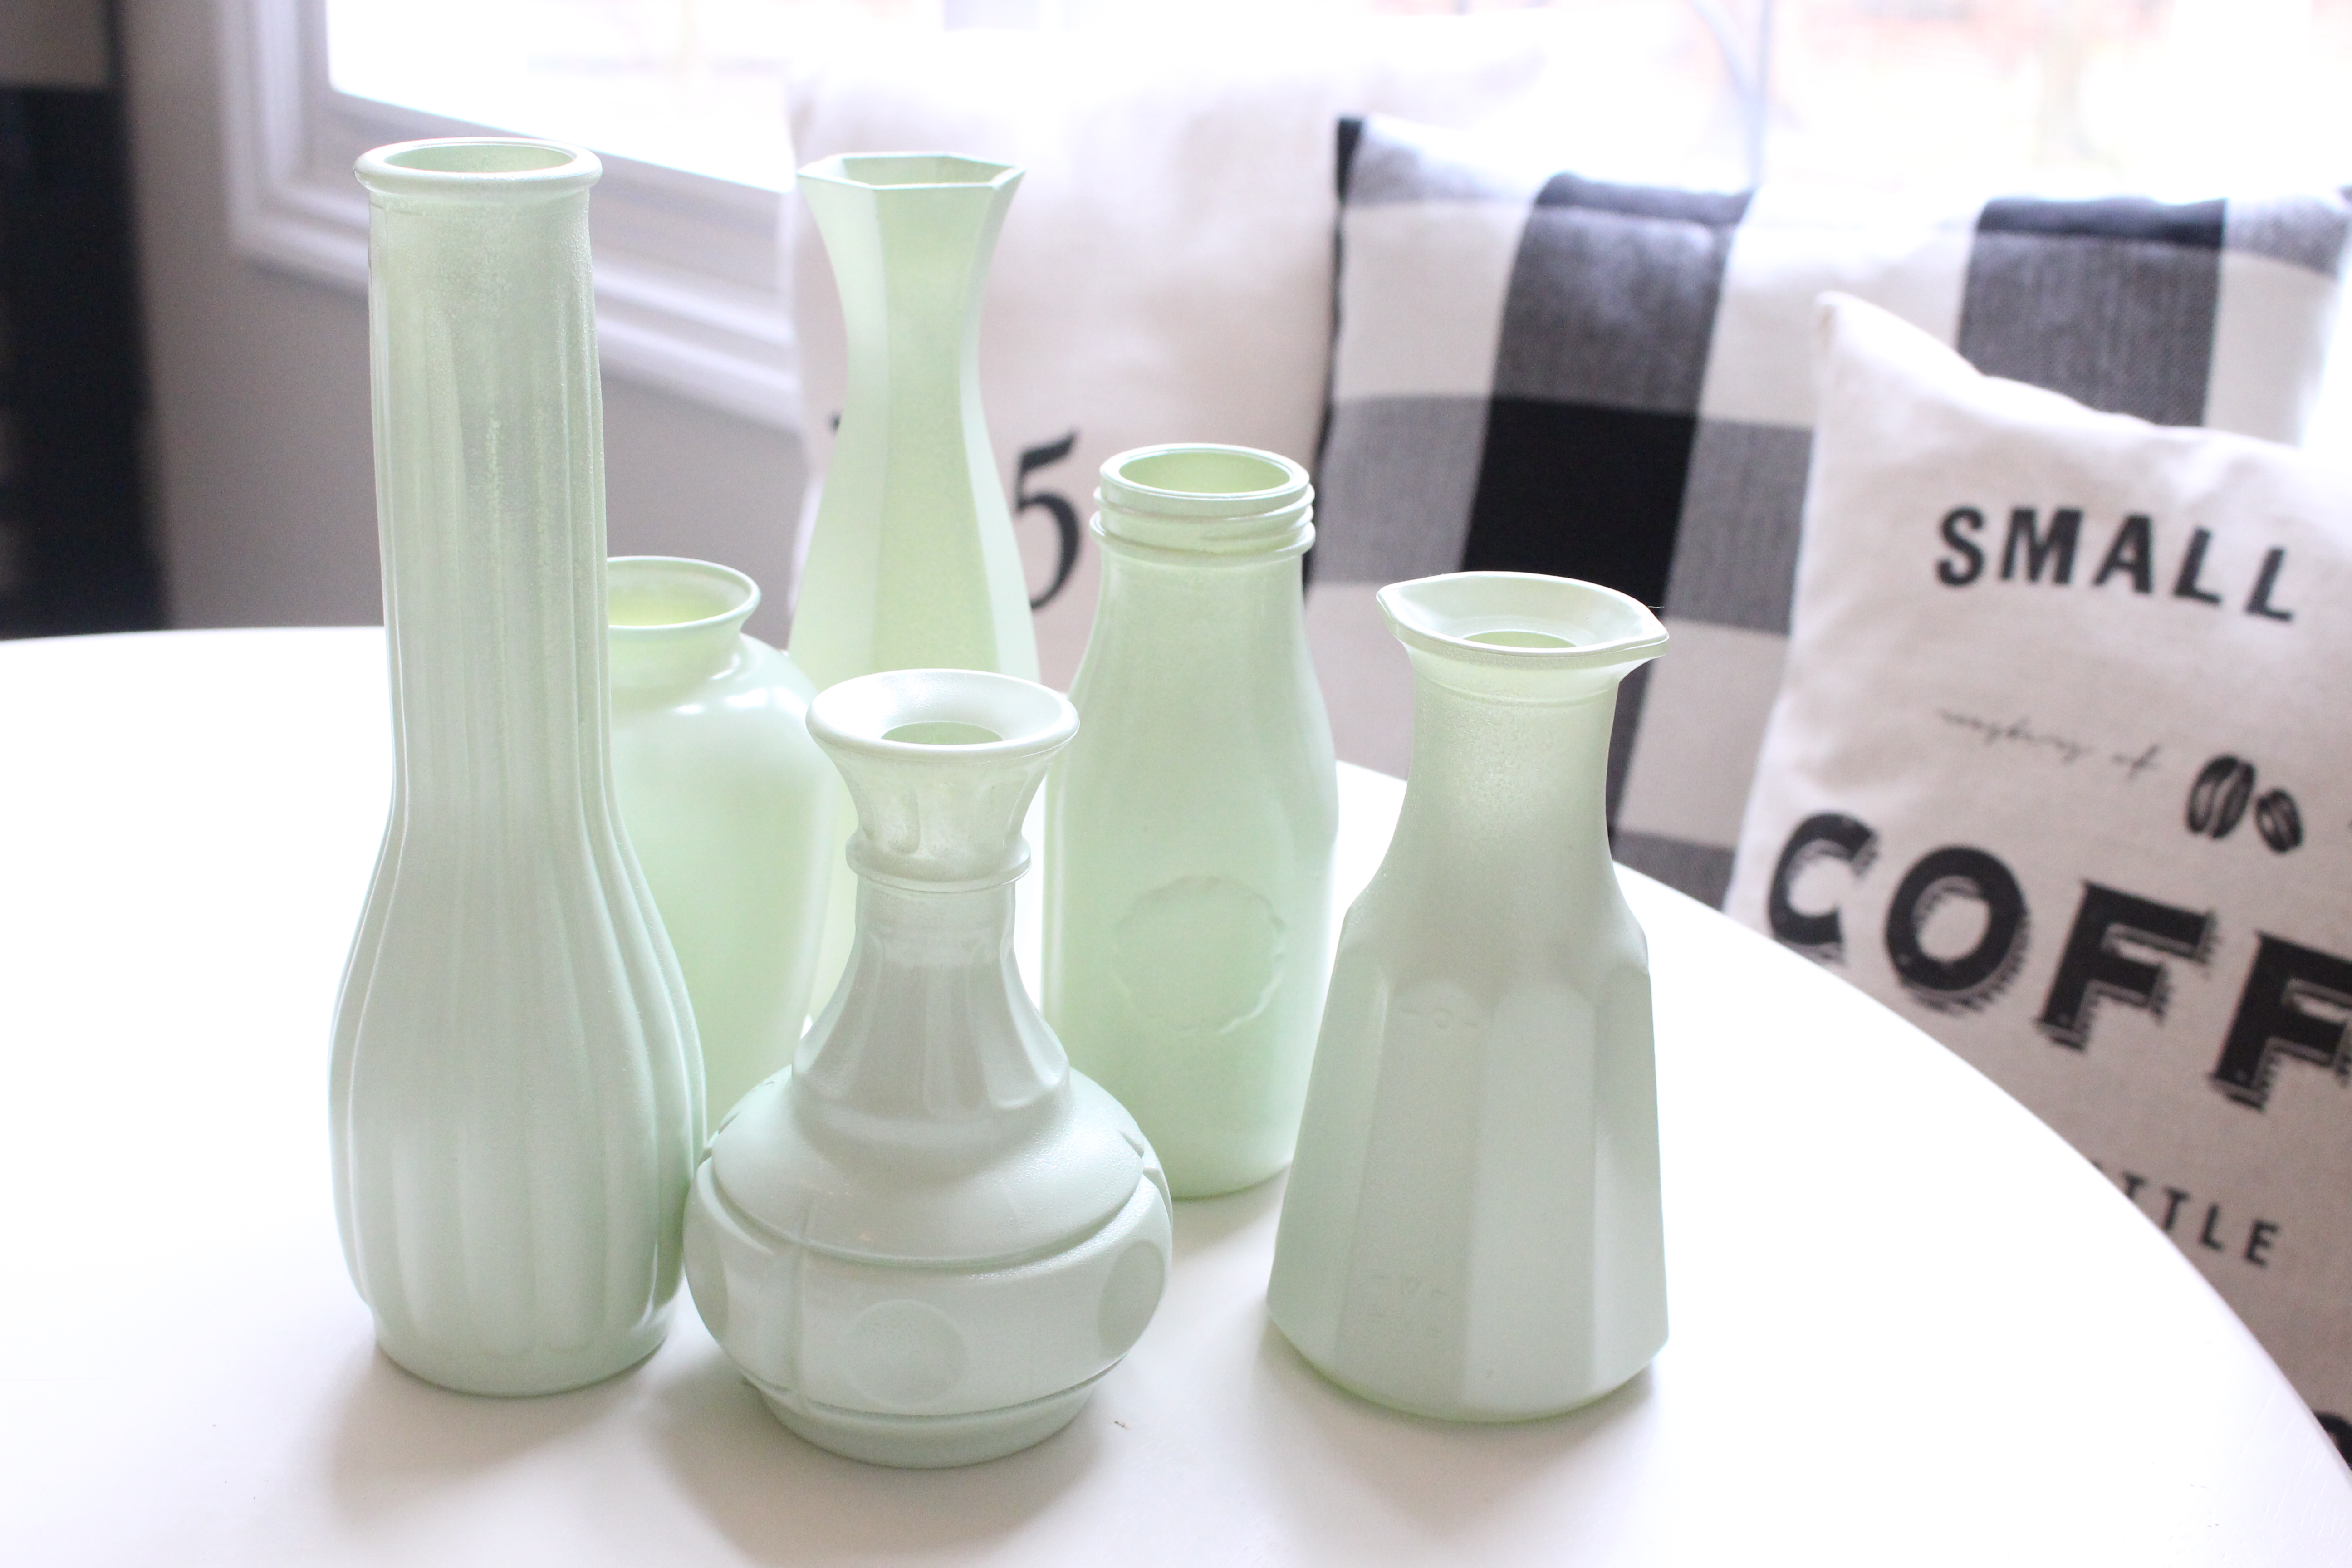
The key here is light coats. Don’t try to cover everything at once. Several thin layers will give you that beautiful, milky opacity without any drips or heavy texture. Allow each coat to dry for about 10 minutes before adding the next.
Depending on the brand of paint you use, you might need three to five coats to achieve a fully opaque finish. The transformation happens quickly, and you’ll start to see that glossy, semi-translucent look after just the first layer or two.
Step 4: Let Them Dry Completely
Once you’re happy with the colour and coverage, leave the vases to dry fully. Most spray paints will be touch-dry within an hour, but it’s best to let them cure overnight before handling.
If you’d like a little extra shine or durability, you can finish with a light coat of clear gloss spray. Just make sure your base colour is completely dry before applying it.
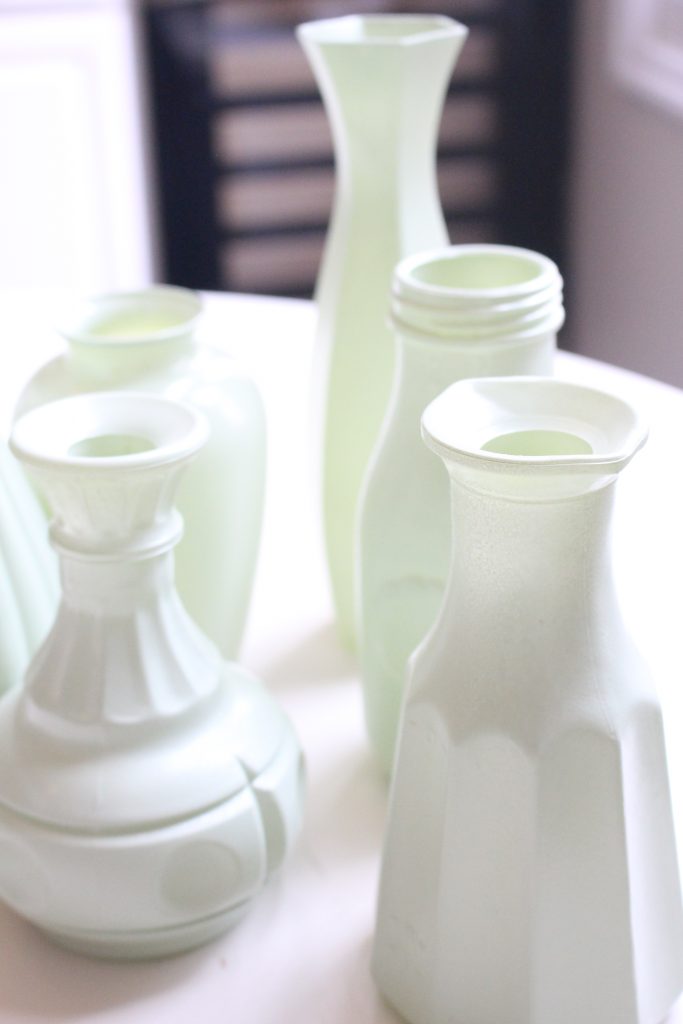
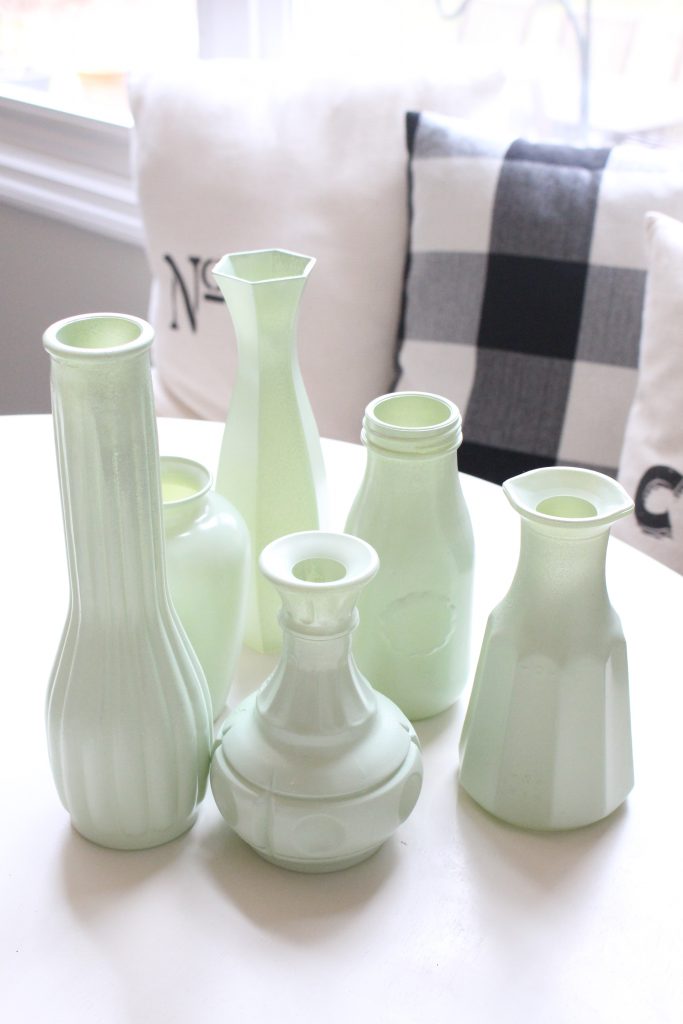
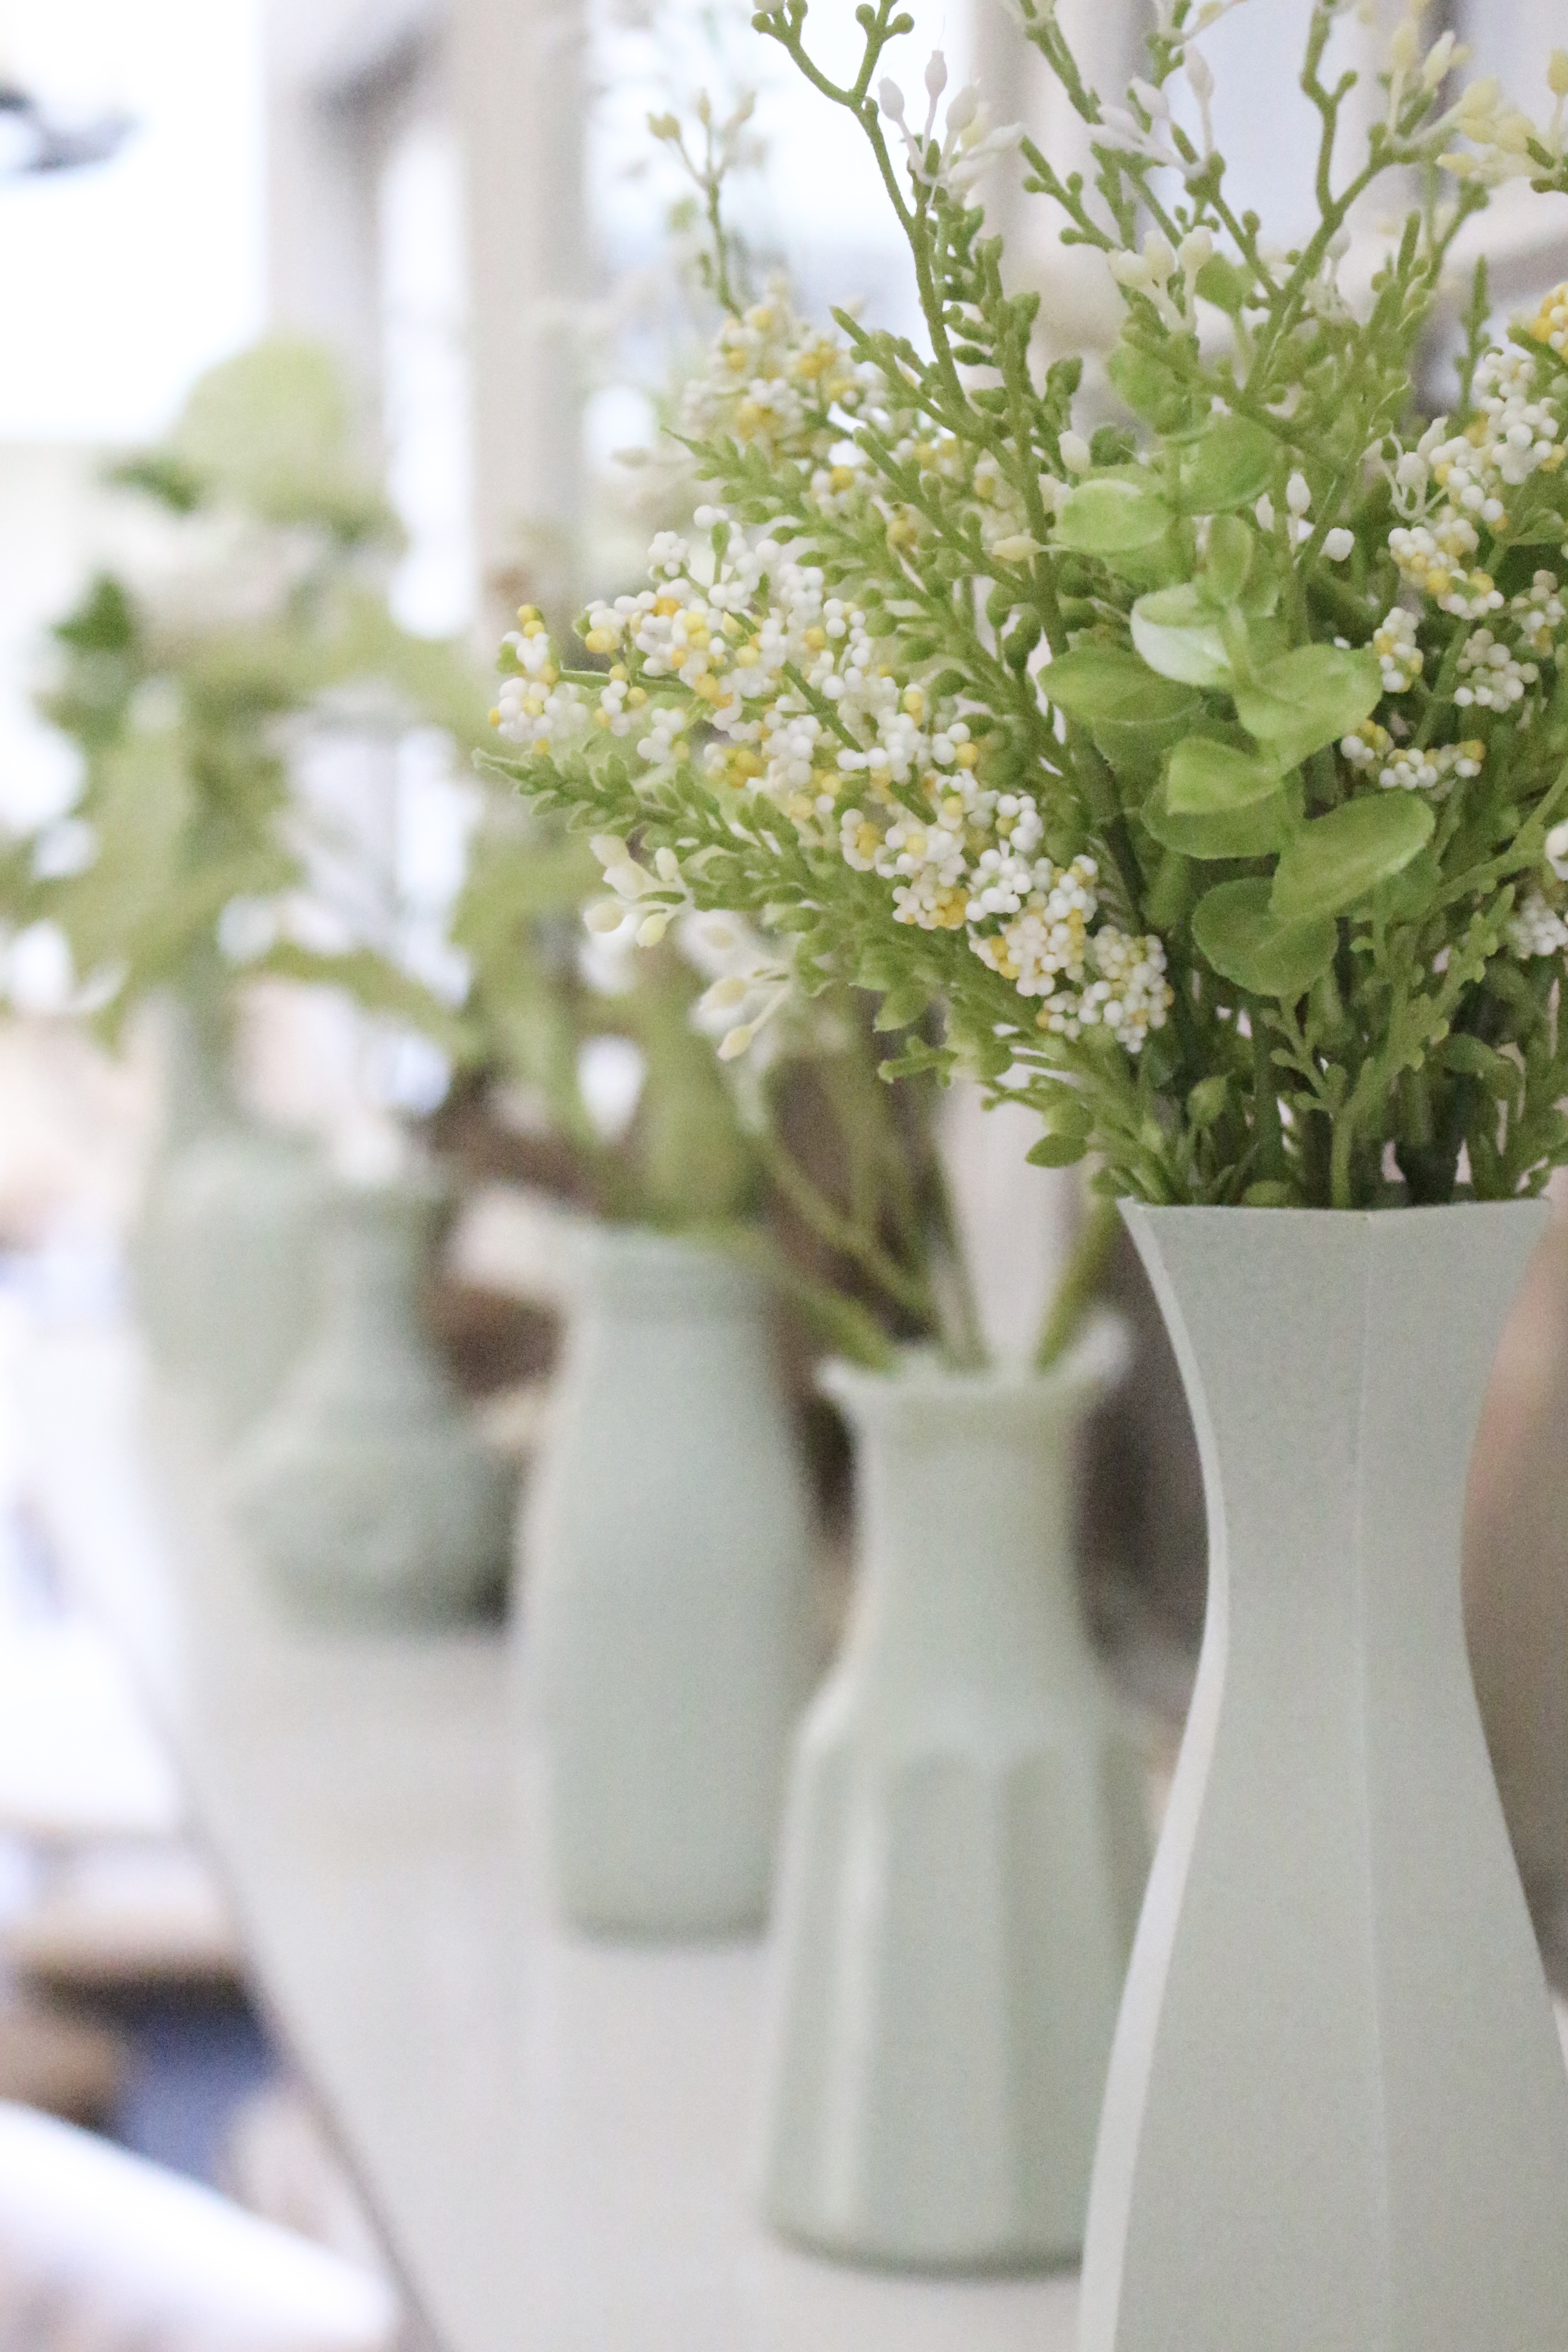
Step 5: Style Your Finished Milk Glass
This is the fun part. Arrange your new milk glass pieces anywhere you want to add a little brightness. They look beautiful grouped together on a mantel, shelf, or sideboard. You can mix and match heights and shapes for a collected, curated look.
For spring, I like to fill mine with soft pastel flowers like tulips, hydrangeas, or peonies. In autumn, you can add dried grasses or eucalyptus for a more neutral palette. Even empty, these vases have a sculptural quality that looks elegant all year round.
If you’re decorating a dining table, group several together with candles and greenery. A few battery-operated LED candles create a gentle glow without worrying about heat near the paint.

How to Get the Best Results
- Always spray several thin coats instead of one thick one. It may take longer, but it prevents drips and gives a smoother finish.
- Avoid painting in humid or windy conditions. A still, dry day will give you a cleaner result.
- Keep your can moving as you spray, starting and ending each pass slightly off the vase to prevent pooling.
- If you notice any imperfections, let the paint dry completely, lightly sand the area with fine-grit sandpaper, and reapply a thin coat.
- Do not put freshly painted vases in the dishwasher or fill them with water until they’ve cured for at least 24 hours.
Why This DIY Works So Well
What makes this project so satisfying is how achievable it is for anyone. You don’t need special tools, artistic skills, or expensive materials. It’s the kind of craft that looks far more impressive than the effort it takes.
It’s also incredibly affordable. I picked up my vases from a local charity shop for 50 pence each. Combined with a single can of spray paint, the total cost was under £10. When you compare that to the price of authentic milk glass, it’s easy to see why this has become one of my go-to home décor hacks.
Plus, it’s endlessly customisable. If you love colour, try layering different shades to create an ombre effect. For a modern twist, you can tape off sections to make colour-blocked designs or dip the bottoms in gold spray paint for a bit of luxury.
Styling Inspiration
Once you’ve made your faux milk glass vases, you’ll probably find yourself using them everywhere. A few ideas to get you started:
- Spring Mantel: Line up a trio of vases filled with fresh daffodils and greenery for a cheerful, seasonal display.
- Bedroom Decor: Use one or two on your nightstand with dried lavender or faux stems for a calming touch.
- Bathroom Accent: A small milk glass vase looks lovely next to a stack of folded towels or bath salts.
- Table Centrepiece: Mix different sizes down the centre of your dining table and weave in fresh foliage for an elegant tablescape.
They also make thoughtful, inexpensive gifts. Fill one with flowers for Mother’s Day or give a small set as a hostess present. The hand-painted finish adds a personal touch that feels far more special than store-bought décor.
Shop This Project
If you want to recreate this look yourself, here are some of my favourite materials and tools for easy shopping:
| Product | Description | Shop |
|---|---|---|
| Rust-Oleum frosted glass spray (green) | Perfect soft green tone for that vintage jadeite look | Buy on Amazon |
| White Glass Spray Paint | Classic milk glass finish, opaque and smooth | Buy on Amazon |
| Set of Clear Bud Vases | Great for mantels, shelves, or small table arrangements | Buy on Amazon |
| Disposable Nitrile Gloves | Keeps hands clean while painting | Buy on Amazon |
| Lazy Susan Spray Stand | Makes it easy to rotate vases while spraying | Buy on Amazon |
| Disposable Plastic Sheets | Keeps things clean as you work | Buy on Amazon |
| Rubbing Alcohol or Goo Gone | Great for removing labels and excess dirt | Buy on Amazon |
Final Thoughts
I love how something so simple can completely change the look of your home. These faux milk glass vases have the same nostalgic charm as true vintage pieces but cost a fraction of the price and can be customised to suit your space.
It’s also a great beginner-friendly project to try with friends or family. In just one afternoon, you can create an entire collection of vases that look straight out of an antique shop.
If you’re planning to style them on your mantel or coffee table, make sure to check out my full Spring Mantel Styling Guide here where I share how to mix these with florals and greenery for a fresh seasonal look.
I hope you give this project a try. It’s simple, inexpensive, and one of those little transformations that makes your home feel more intentional and full of character.
Leave a Reply
The Sunday Letter
Most Sundays, once the house has gone quiet and it's edging towards nine, a letter goes out. It's the one I'd write to a friend with good taste and not nearly enough time: one thing worth reading, one thing worth buying, and one thing to skip. No noise, no pressure to spend, just the considered version of what I've actually been using, loving, or quietly sending back.
If you like the sort of recommendation that still holds up six months later, leave your email below and I'll write to you on Sunday.

[…] Click here to go to the original Make Your Own Milk Glass post with the tutorial […]
[…] Easy Spray Paint Ideas: This is milk glass painted with spray paint. Spray paints surely give us some amazing and astonishing results. Have a look at these beautiful milk glasses painted with spray-painted so effortlessly. Changing the appearance of things is so satisfying and gives us immense pleasure. here! […]
Did you paint the insides of the vases as well?
Hi there! No I did not.
[…] Being my first and oh so special bloom, I cut it and brought it right in. It is looking beautiful right in my entryway among a pretty little vignette. It looks especially cute in my faux milk glass vase. You can see how to make your own milk glass, HERE LINK […]
[…] Click here to go to the original Make Your Own Milk Glass post with the tutorial […]
[…] 8. HOW TO MAKE FAUX MILK GLASS VASES […]
[…] tutorial for creating your own DIY Milk glass. […]
Such a great new product! The vases are so pretty! I love them on your lovely mantel which, by the way, go’s live tonight on my small Spring Mantel Tour. Thanks for sharing your mantel with me and this new product with all of us at the #HomeMattersParty!
Jeannee
Thank you, Jeannee! I couldn’t believe it when I saw this product. Such a great find!!
Hi Amy! We just wanted to let you know that we loved your post on Fake Look Milk Glass so much when you shared it at the #homemattersparty last week that we are Highlighting it this week! Please check it out when you have a chance here http://ourcraftymom.com/home-matters-linky-party-129/
Michelle-Our Crafty Mom
Thank you so much, Michelle!! I’m so thrilled!
[…] Make Your Own Milk Glass With Spray Paint from Amy @ My Life From Home […]
[…] Make Your Own Milk Glass With Spray Paint from Amy @ My Life From Home […]
[…] Make Your Own Milk Glass With Spray Paint from Amy @ My Life From Home […]
I love milk glass! This is a great idea–didn’t know there was milk glass spray paint! Thanks for linking it up with Funtastic Friday!
[…] My Life From Home // Faux milk glass with spray paint […]
[…] DIY Faux Milk Glass / My Life from Home […]
Amy I looove these! I had no idea there was a spray paint that could do this now… Oh you have opened up a whole new world of ideas!! 🙂 Thanks so much for sharing at the Inspiration Galore Project Party. Shared and pinned.
Thank you, Lisa! I know. I was so happy when I found it myself!
Wow, they’re really inventing some great colors for spray paint. Thank you for sharing at the Creative Muster party. PINNED
Robin | Fluster Buster
Great idea and so perfect for spring !
is it not awesome what will come out of a spray can?? I was not aware of this one. I did know about the chalkboard and marble effect
come see us at http://shopannies.blogspot.com
Love them! I will have to look for this spray paint! Thanks so much for sharing at Snickerdoodle. Pinned 🙂
so gorgeous Amy, I love them and the final image on the mantle is just beautiful. Thanks for sharing with us at #OvertheMpon link party. I’ve pinned and shared.
I LOVE milk glass but never knew there was a special spray paint. Will definitely grab a can on my next trip to the hardware store! Visiting from Made By You Mondays party.
I am so excited about this project. I did not know of the spray paint. The woman of my family have milk glass from the depression and it is very scratched. I am glad I can now take clear items and make them look like the vintage I love.
Thank you for this cute craft. Susan @ Craftingafamily.com
Oh that’s great, Susan! I’m so glad I found it myself and that you can enjoy it also!
These turned out so cute. I love being able to DIY things. Not only does it save you money but it also makes your home decor pieces uniquely you. Something that is so important for any home’s decor.
Thank you, Charlotte! It was a fun little upcycle.
Those look real cool!
Thank you, Amy! I’m so glad you like them. 🙂
I love how easy this is!! I’ve never tried this kind of spray paint, but I’ll be looking for it now!
Thank you, Emily! I couldn’t believe it myself. I’m so glad I grabbed it.
Amy, I love this idea! My grandma had milk glass and I can remember it in a cabinet in her living room. I always thought it was so pretty!
Pinning and using this tutorial in the near future, for sure!
Randi 🙂
I know, Randi! Me too. I remember it and it brings back so many fond memories. I’m so happy I found this spray paint!