Halloween is just around the corner, and I've been noticing these adorable Halloween ornaments popping up in craft stores everywhere. Have you seen them? They're absolutely charming, with that perfect blend of spooky and cute! So, of course, I couldn't resist picking up a few. At first, I wasn't entirely sure what I'd do with them, but I knew I wanted something different—something unique from the traditional Halloween decorations you see every year.
Inspiration Strikes: A Non-Traditional Tree
I’ve always loved the idea of a seasonal tree, but I wanted something distinct from the Christmas-type trees we often see repurposed for Halloween. I was aiming for a rustic vibe—something a bit rough around the edges, natural, and imperfect. And then, as if on cue, inspiration struck! I realized that the perfect solution was literally growing in my backyard: branches.
There’s something so satisfying about using natural elements in decor, especially when it’s free! My husband often jokes that my creative inspirations are rarely budget-friendly, and honestly, he’s not wrong. But this time, I was determined to prove him wrong.
Gathering Materials: The Essentials for Your Rustic Halloween Tree
To bring this idea to life, I started by heading outside and gathering a variety of branches. The different sizes and shapes would give the tree a more organic, whimsical look. Once I had my branches, I needed something to anchor them in. I found the cutest vase, which was the perfect base for my project. To hold the branches in place, I used some green craft foam.
The trickiest part was getting the branches arranged just right. At first, I struggled a bit to balance them; they toppled over a couple of times, which made me realize that I had to pay closer attention to the weight distribution. After a few tries (and a few frustrated sighs), I finally got them balanced perfectly.
Decorating the Tree: Adding the Ornaments
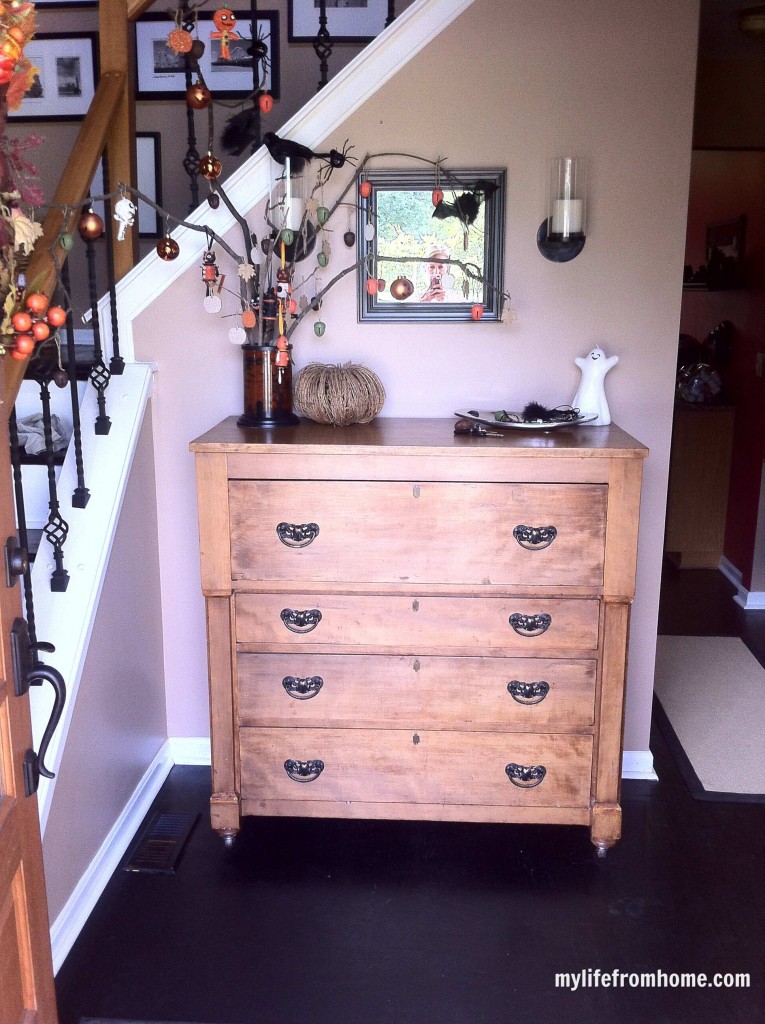
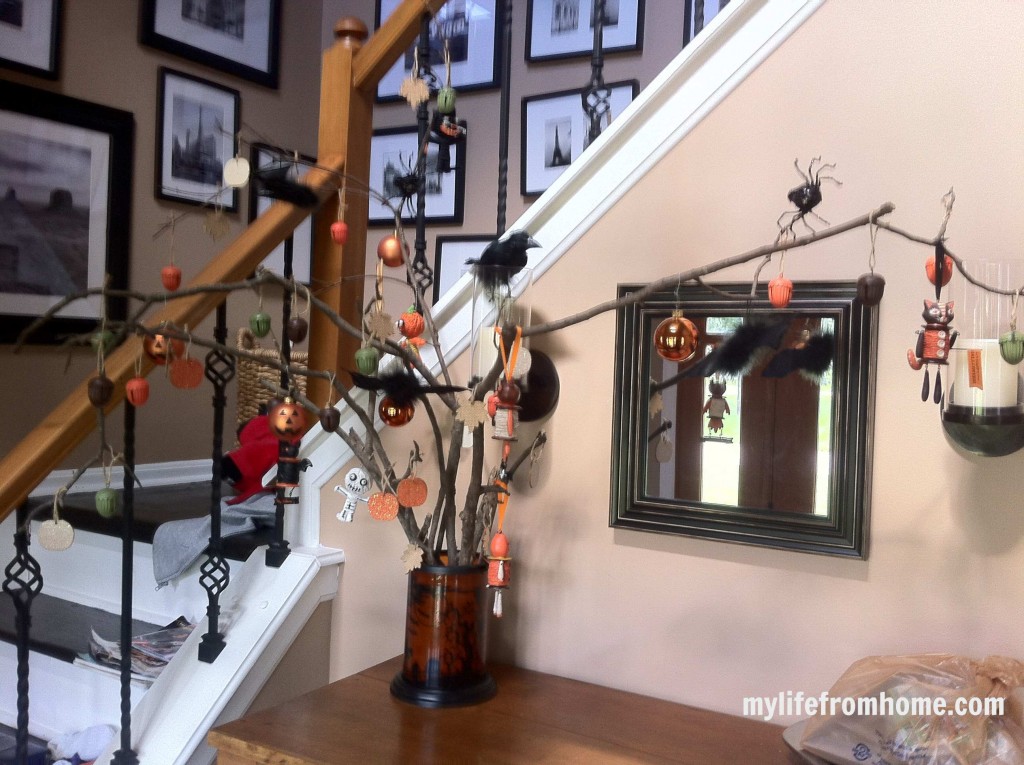
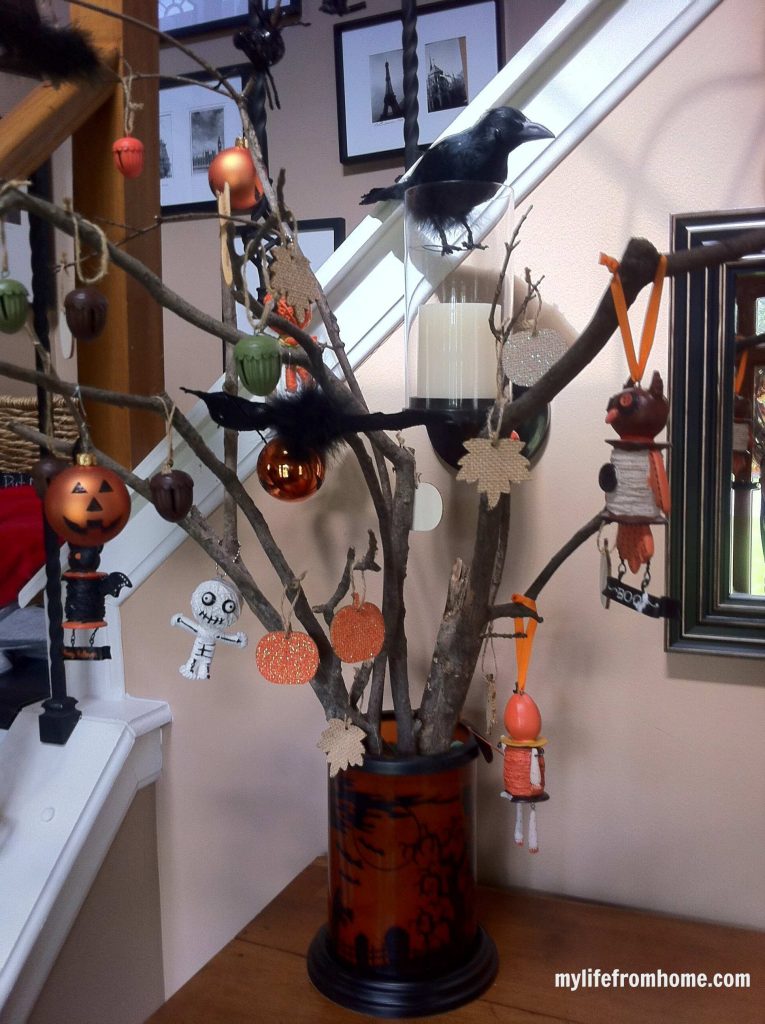
Now came the fun part: decorating! I took the Halloween ornaments I had picked up and started hanging them on the branches. Each ornament added its own unique touch to the tree. The result was better than I had imagined—a rustic, whimsical Halloween tree that was perfectly imperfect. The mix of branches, the natural texture, and the quirky ornaments came together beautifully. I was so pleased with how it turned out that I decided to place it as the centerpiece on my foyer console, where it became an instant conversation starter.
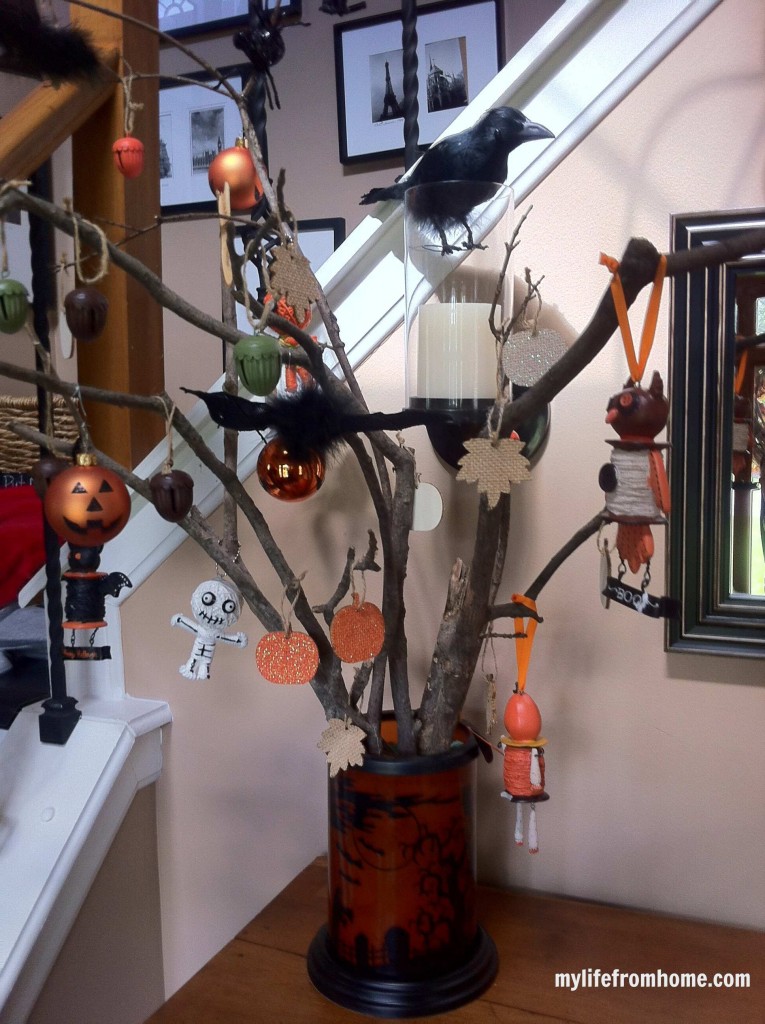
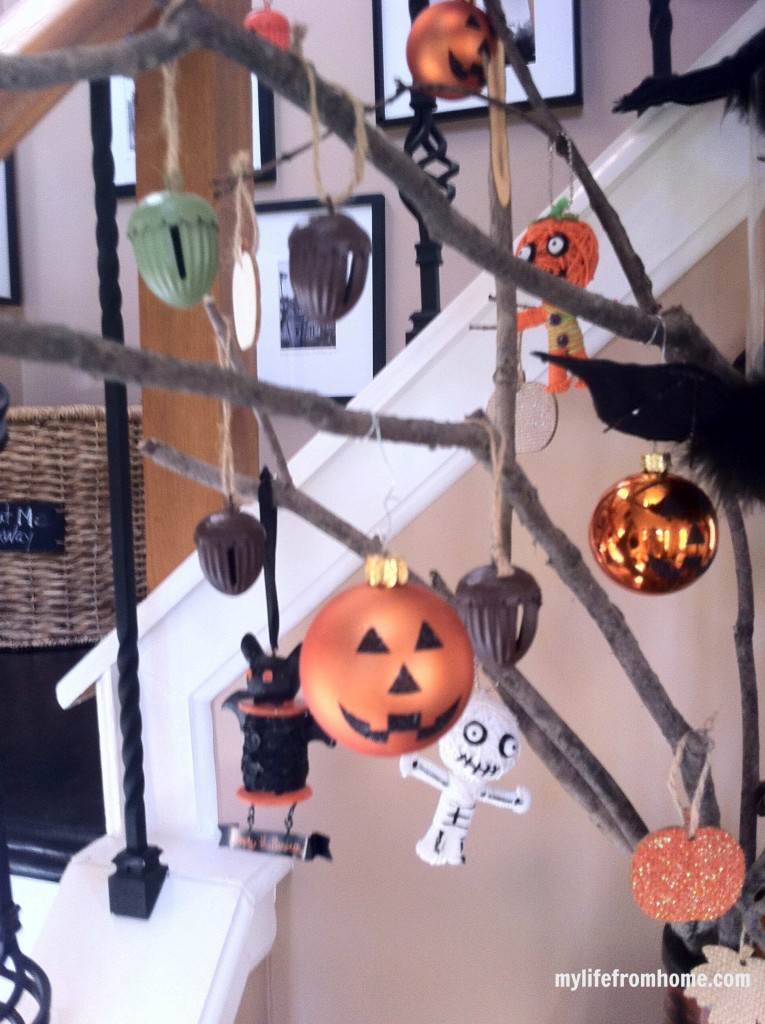
Here are some of the ornaments I used:
- Pumpkin Ornaments: These cute little pumpkins added just the right amount of Halloween flair. Their warm orange tones popped against the natural wood of the branches, creating a classic Halloween look that wasn’t too over-the-top.
- Cat Ornament: This one was a must-have for me! The black cat ornament had just the right mix of spooky and cute, perfect for Halloween. Plus, it’s a fun nod to all those classic Halloween black cats.
- Acorn Ornaments: To add some rustic charm, I included a few acorn ornaments. They brought in a bit of that cozy, fall feeling, making the tree feel seasonal without being overly Halloween-centric.
- Pumpkin Spool Ornament: This was a unique find! It’s a little spool wrapped in orange thread, topped with a tiny pumpkin. It added a touch of craftiness to the tree, which I absolutely loved.
- Owl Ornament: The owl ornament was another great addition. Owls are such a perfect Halloween symbol, and this one had a rustic feel that matched the branches perfectly.
- Bat Ornament: And of course, no Halloween tree would be complete without a bat! This bat ornament was a fun and slightly spooky addition that tied the whole theme together.
The Finished Look: A Rustic Halloween Statement Piece
Once all the ornaments were in place, I stood back and admired my creation. The branches gave the tree a natural, rustic look, and the ornaments added the perfect touch of Halloween spirit. It was exactly what I had envisioned—a Halloween decoration that was unique, charming, and a little bit rustic.
The best part? This project was incredibly budget-friendly. Most of the materials were things I already had on hand, and the few items I purchased were all reasonably priced. Plus, because I used natural elements like the branches, I was able to bring a bit of the outdoors inside, adding to the overall cozy, autumnal vibe of my home.
Tips for Creating Your Own Rustic Halloween Tree
If you’re feeling inspired to create your own rustic Halloween tree, here are a few tips to help you get started:
- Choose Your Branches Wisely: When selecting branches, look for ones with interesting shapes and textures. Mix and match different sizes to create a more dynamic look. And don’t worry if they’re not perfect—imperfections add to the rustic charm!
- Use a Sturdy Base: Make sure your vase or container is heavy enough to support the weight of the branches. You don’t want your tree toppling over once you start adding ornaments!
- Secure the Branches: Use craft foam or another type of filler to hold the branches in place. Take your time arranging them to ensure the tree is balanced and stable.
- Mix and Match Ornaments: Have fun with your ornaments! Mix different styles, colors, and sizes to create a tree that’s uniquely yours. Don’t be afraid to incorporate non-Halloween items like acorns or leaves to add a bit of rustic charm.
- Embrace Imperfection: Remember, the goal is to create a tree that feels natural and a little bit rough around the edges. Don’t worry about making it look too “perfect”—the beauty of this project is in its imperfections.
How Are You Using Halloween Ornaments This Year?
Creating this rustic Halloween tree was such a fun and rewarding project. It allowed me to get creative, use materials I already had, and add a unique touch to my Halloween decor. Plus, it’s a great way to showcase some of those cute Halloween ornaments that are just too good to pass up!
So, what do you think? Are you inspired to create your own Halloween tree? How are you incorporating Halloween ornaments into your seasonal decor this year? I’d love to hear your ideas and see your creations!

[…] 1. Halloween DIY Tree […]
[…] I loved the look of our Halloween Tree that I recently put together for our foyer console, you may remember seeing it here. […]