How to Make Pinecone Fire Starters: A Simple, Beautiful DIY for Cosy Nights In


There is something undeniably romantic about a real fire. The crackle of the wood, the warmth that wraps around you like a blanket, the way the whole room seems to slow down the moment the flames catch. Living in Scotland, where the evenings draw in early and the weather has a mind of its own, our wood-burning fireplace gets a proper workout from autumn right through to spring.
The one thing that always slightly ruins the magic? Trying to actually get the fire going. Damp kindling, stubborn logs, and that vaguely desperate ten minutes of coaxing flame from newspaper while the room stays resolutely cold. That is exactly why pinecone fire starters became a permanent fixture in our home.
These wax-dipped pinecone fire starters are one of the easiest and most satisfying DIY projects you can do. They look gorgeous stacked in a basket beside the hearth, they smell incredible if you add a few drops of essential oil, and they genuinely work. One pinecone tucked under your kindling and you will have a roaring fire in minutes with no fuss at all. They also happen to make the most thoughtful handmade gift, whether it is Christmas, a housewarming, or just a “thinking of you” gesture for someone who deserves something a bit more personal than a shop-bought candle.
Why Pinecone Fire Starters Are Worth Making
Before diving into the method, it is worth saying why these are such a brilliant little project, especially if you have never tried making your own fire starters before.
First, they actually work. The combination of natural pine resin and wax creates a slow, steady flame that catches kindling far more reliably than scrunched-up newspaper ever will. If you have ever struggled with damp wood (and if you store yours outside, you almost certainly have), a single wax-dipped pinecone solves the problem entirely.
Second, they cost next to nothing. If you can forage your own pinecones, the only real expense is the wax, and a bag of soy wax flakes goes a remarkably long way. Even if you buy everything new, a batch of twenty or so fire starters will cost you less than a pack of commercial fire lighters from the supermarket.
Third, and this is the part that really won me over, they are genuinely beautiful. A basket of wax-dipped pinecones sitting on the hearth looks like something out of a interiors magazine. Add a ribbon and a handwritten tag and they become the kind of gift that people actually keep on display rather than shoving straight in a drawer.
What You Will Need
The supplies for this project are simple, and most of them are things you may already have around the house. Here is the full list.
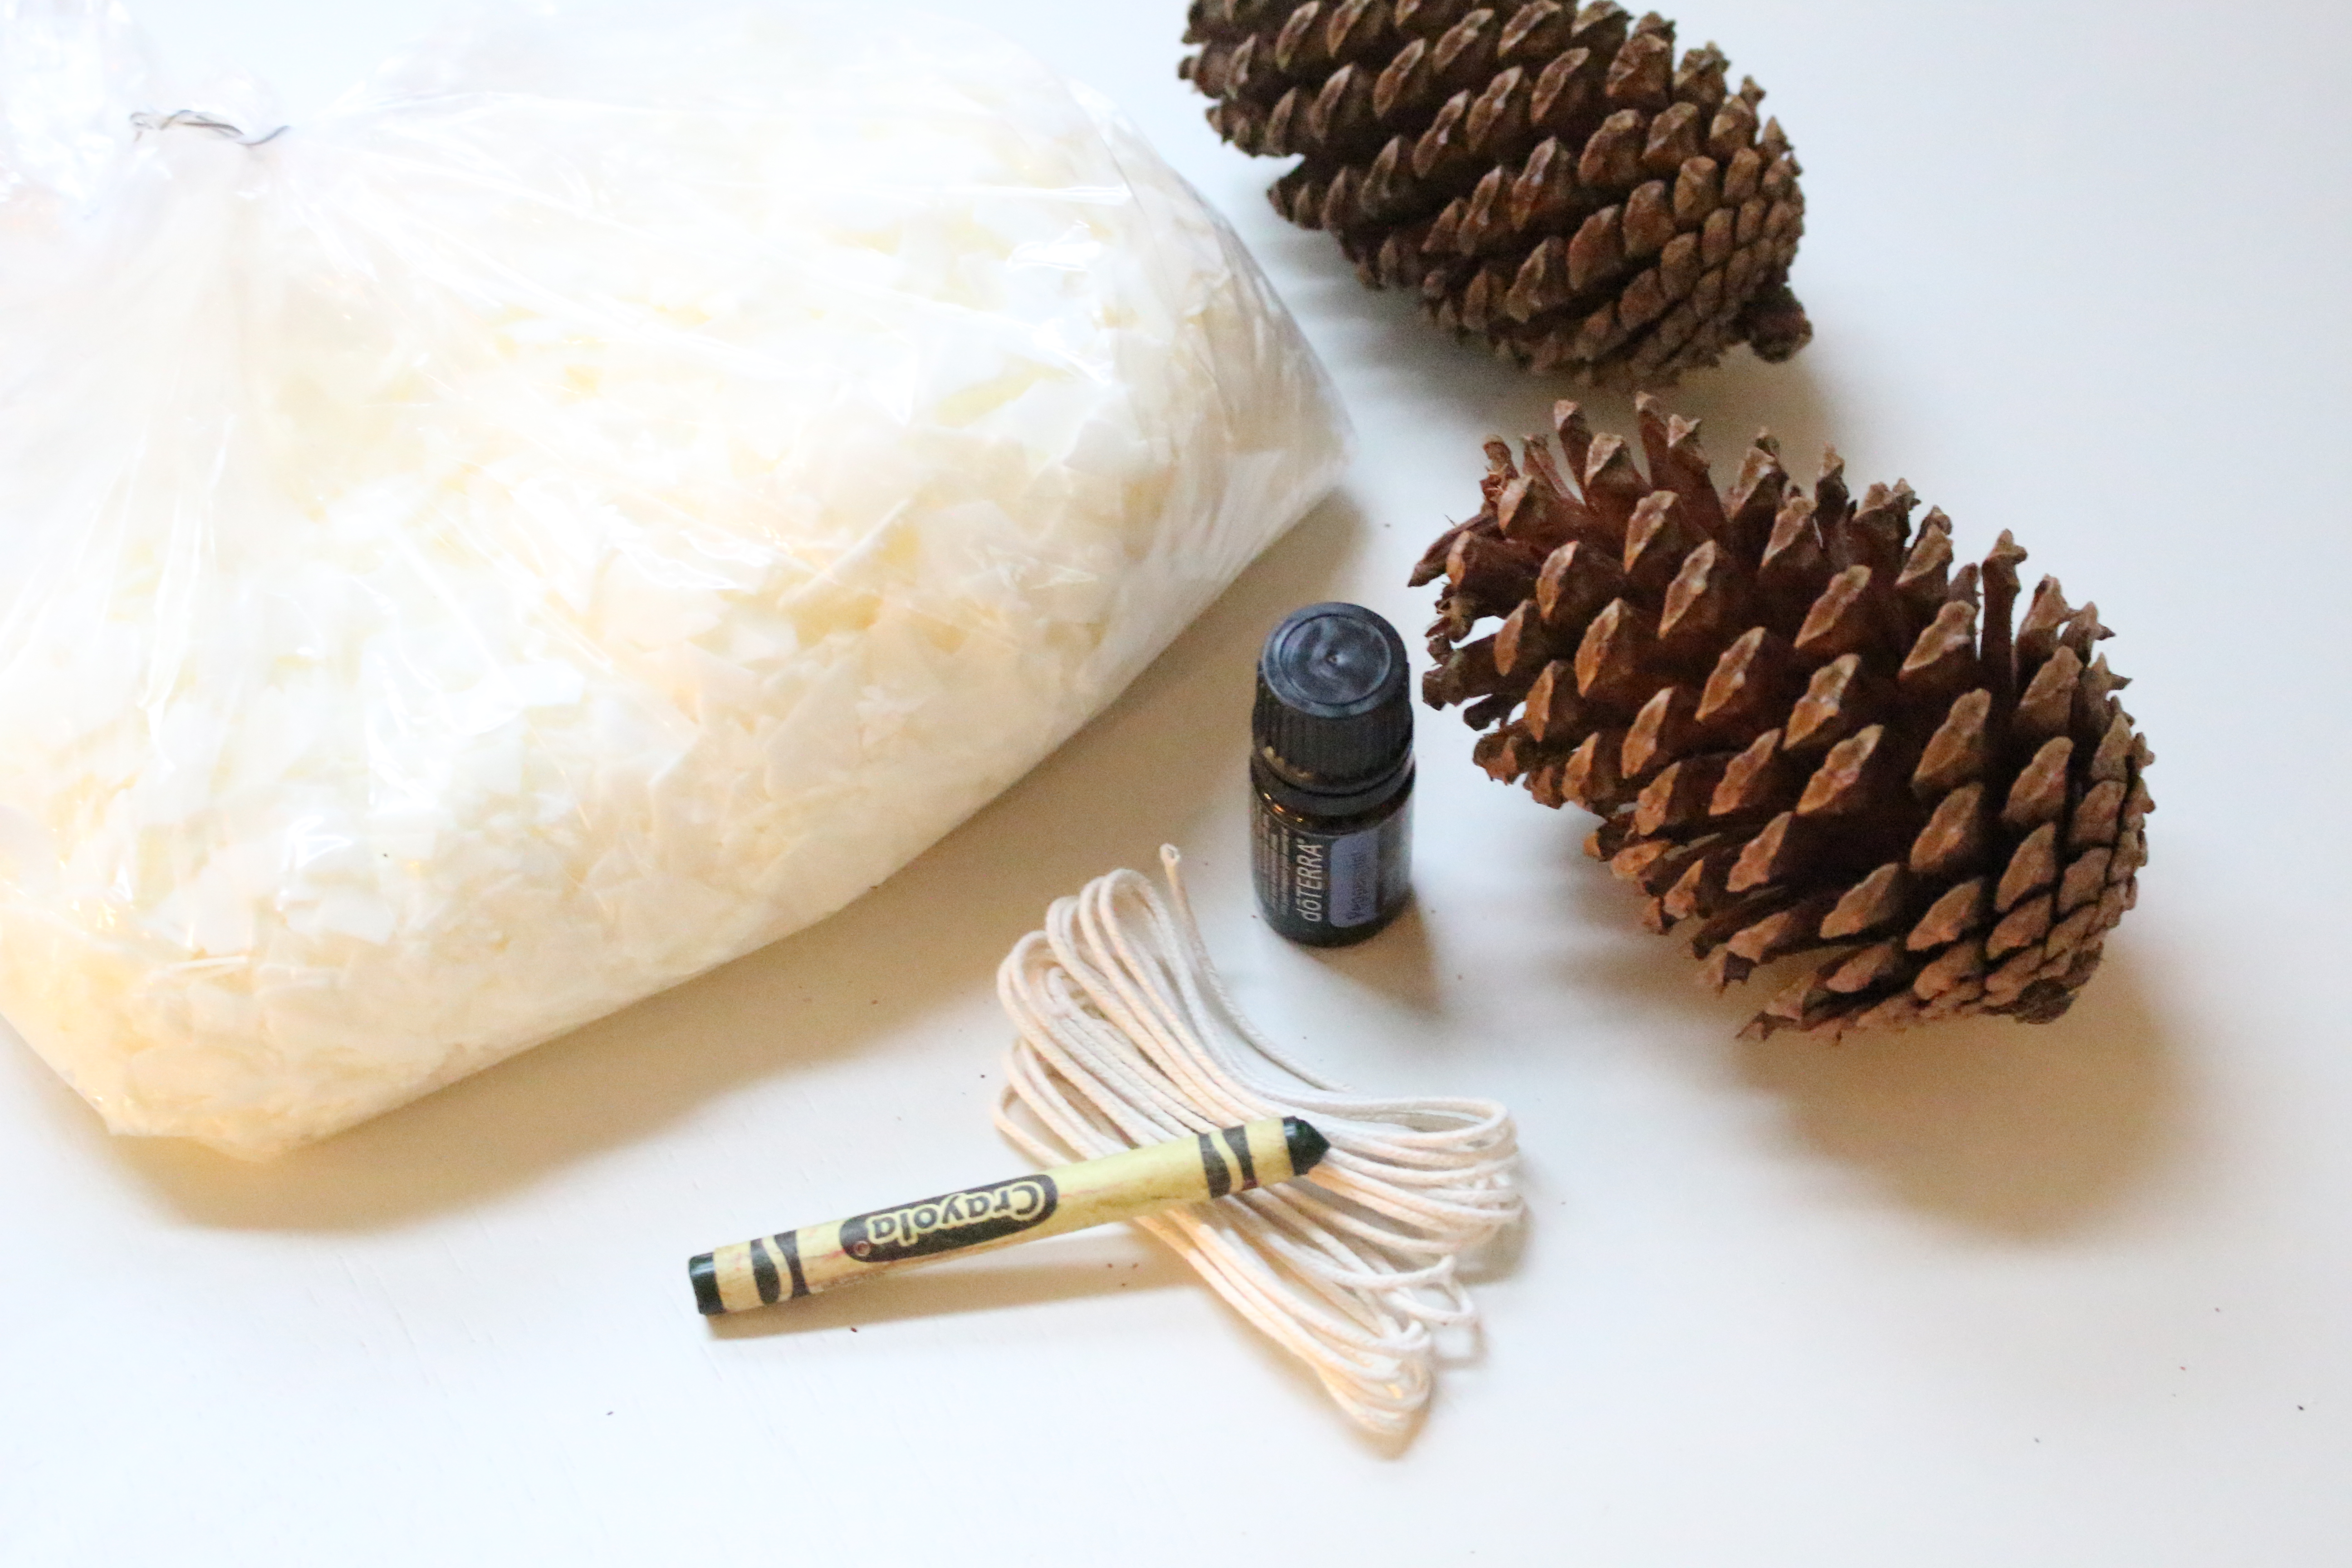
Pinecones – foraged or bought, any size works though medium to large pinecones hold the wax best and burn longest. If you are foraging, make sure they are fully dry and open before you start. Closed pinecones mean moisture is still trapped inside, which you do not want.
Soy wax flakes – soy is a lovely choice because it is natural, burns cleanly, and melts at a low temperature which makes the whole process safer and easier. You can also use beeswax for a beautiful honey scent, or even melt down old candle stubs if you have a collection building up. About 500g of wax flakes will coat roughly 10 to 15 pinecones depending on size.
Candle wicking – cotton wicking is what you need. You will cut a length for each pinecone and tuck it into the scales to act as a wick when you light the fire starter.
Wax colour blocks or crayons – entirely optional, but if you want your pinecones in a particular colour, a small piece of crayon stirred into the melted wax works perfectly. Deep reds and forest greens look especially lovely at Christmas.
Essential oils – also optional, but highly recommended. Cinnamon, cedarwood, or pine essential oils all smell wonderful and add a gorgeous scent as the fire starter burns. Around 10 to 20 drops per batch is plenty.
A double boiler setup – you do not need an actual double boiler. A heatproof glass bowl or jug set inside a saucepan of simmering water works perfectly.
Baking parchment – for lining your tray while the dipped pinecones dry.
How to Make Pinecone Fire Starters: Step by Step
This project is genuinely straightforward and takes about an hour from start to finish, most of which is dipping and drying time. Here is how to do it.
Step 1: Prepare Your Pinecones
Start with clean, fully dry pinecones. If yours are freshly foraged, give them a quick check for any little residents and let them dry out completely. If they are still slightly closed, pop them on a baking tray in the oven at around 100°C (210°F) for about 30 minutes. This opens them up, drives out any remaining moisture, and also takes care of any tiny creatures that might have hitched a ride.
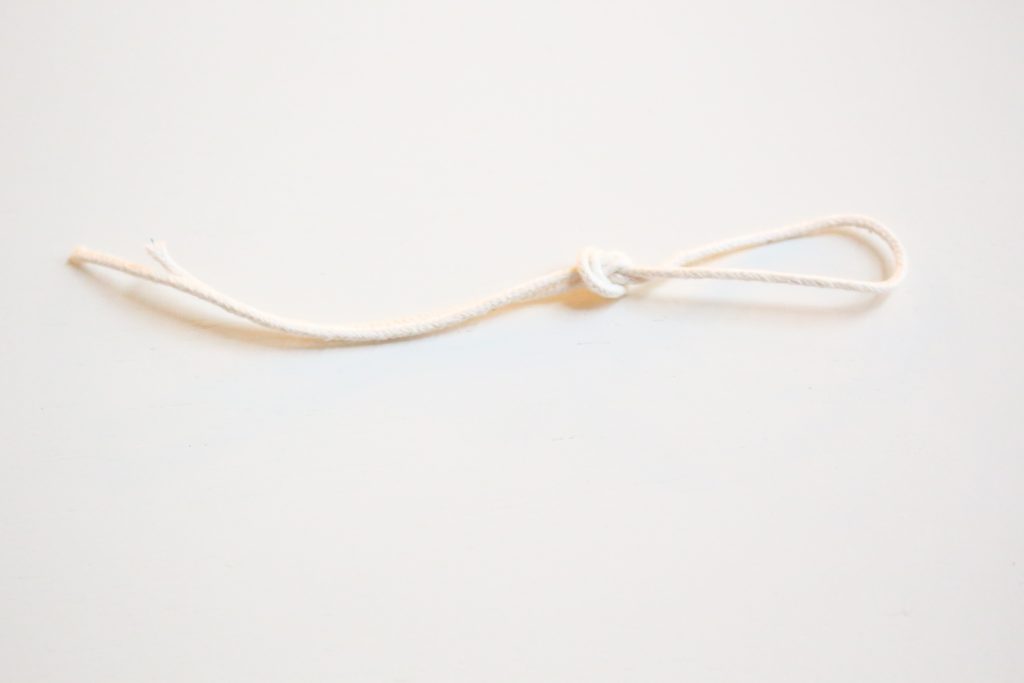
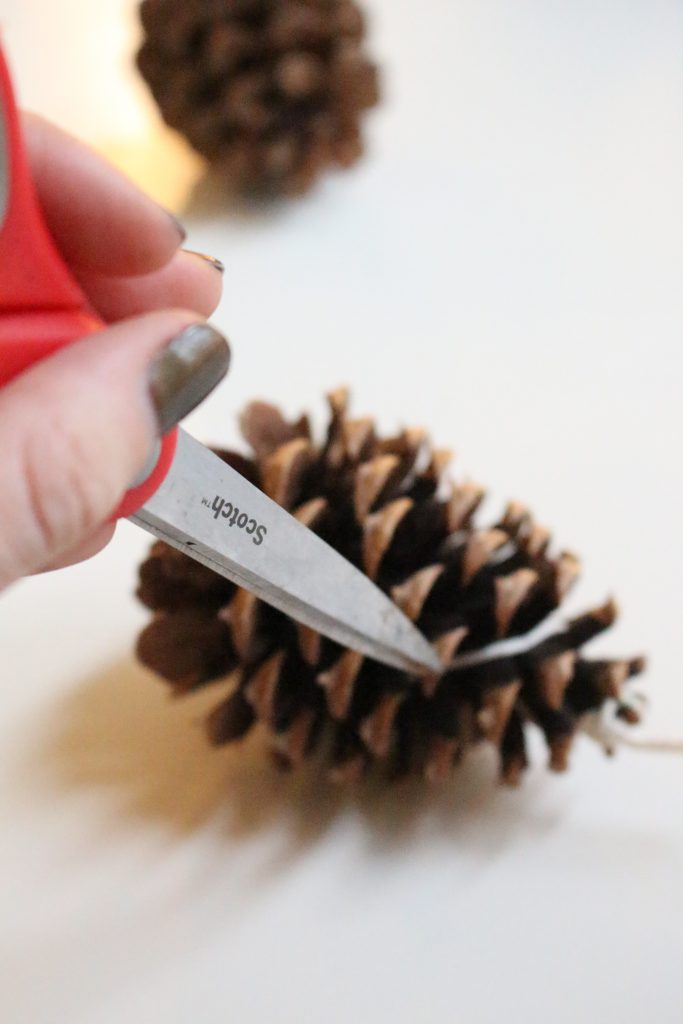
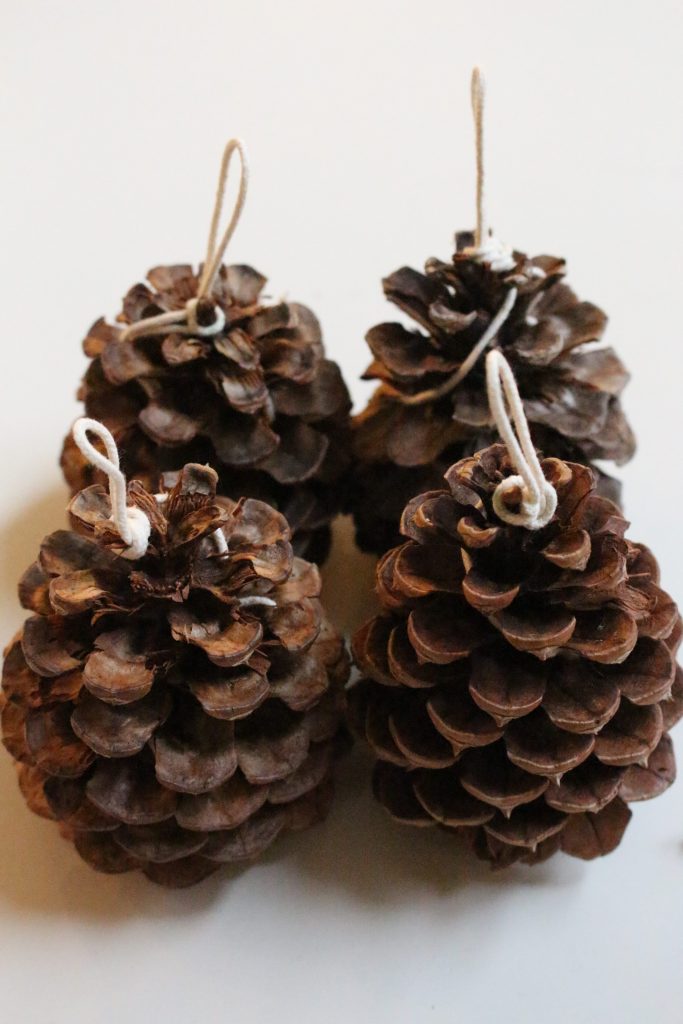
Step 2: Attach the Wicking
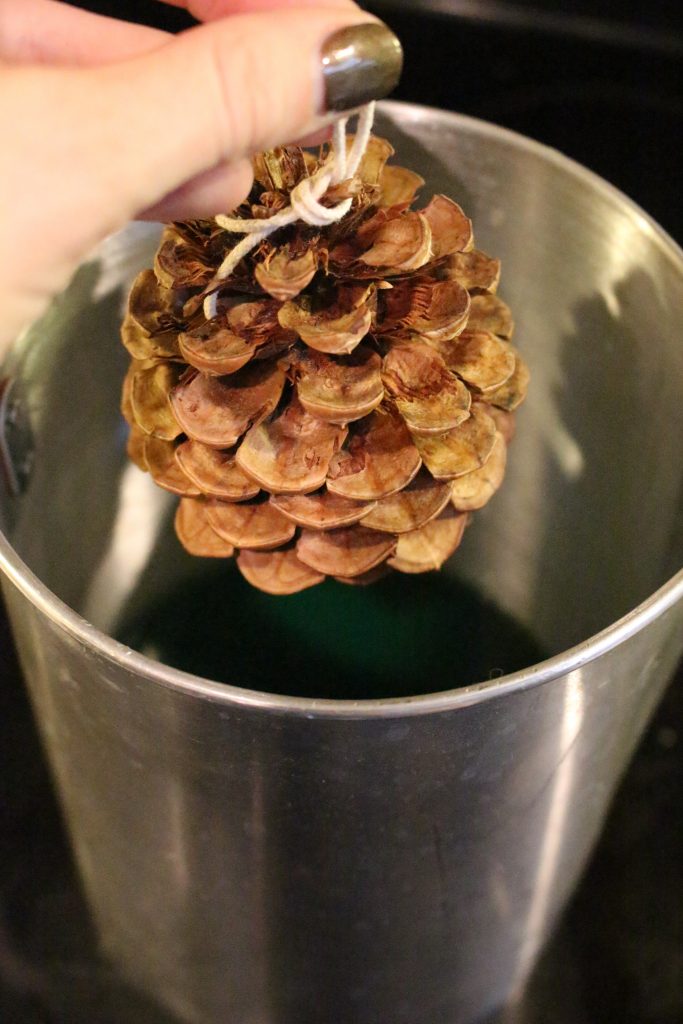
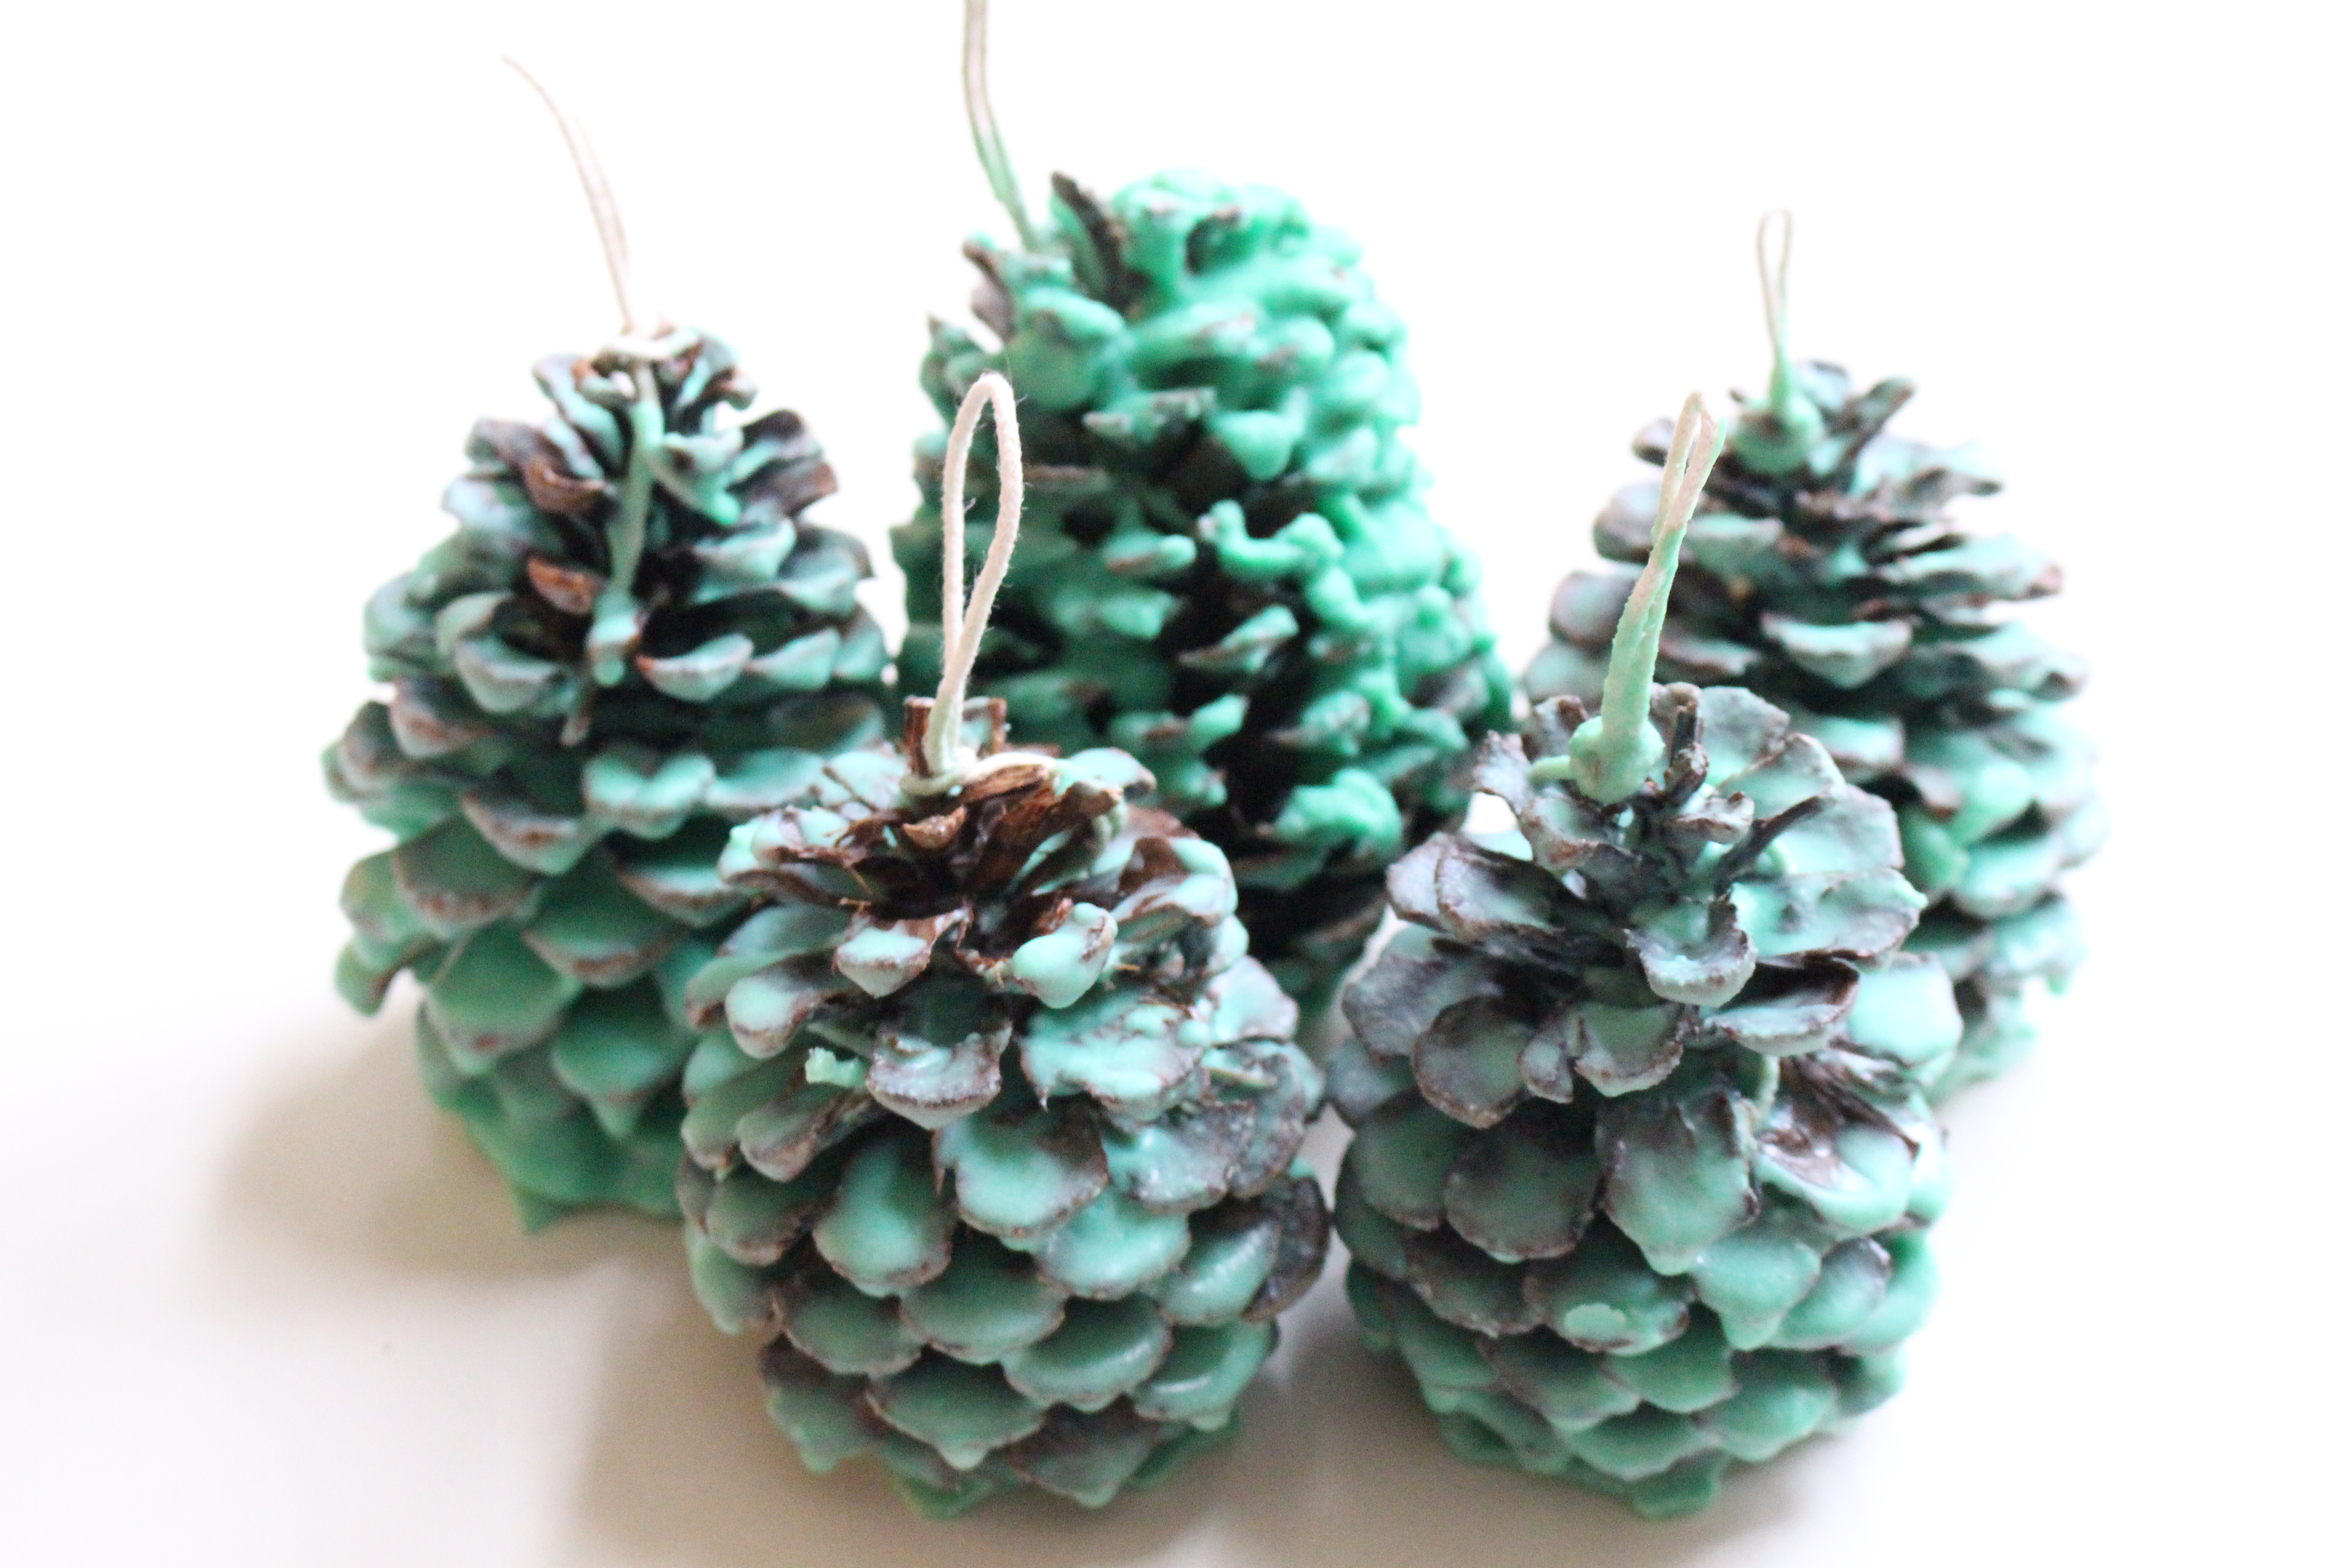
Cut a length of cotton wicking for each pinecone, roughly 15 to 20 centimetres. Create a small loop at one end and tuck it securely into the top scales of the pinecone, threading the wick down between the layers. You want it snug enough that it stays in place when you dip. A pair of scissors or tweezers can help push the ends in. Leave a tail of a few centimetres poking out at the top so you have something to hold onto during dipping and something to light later.

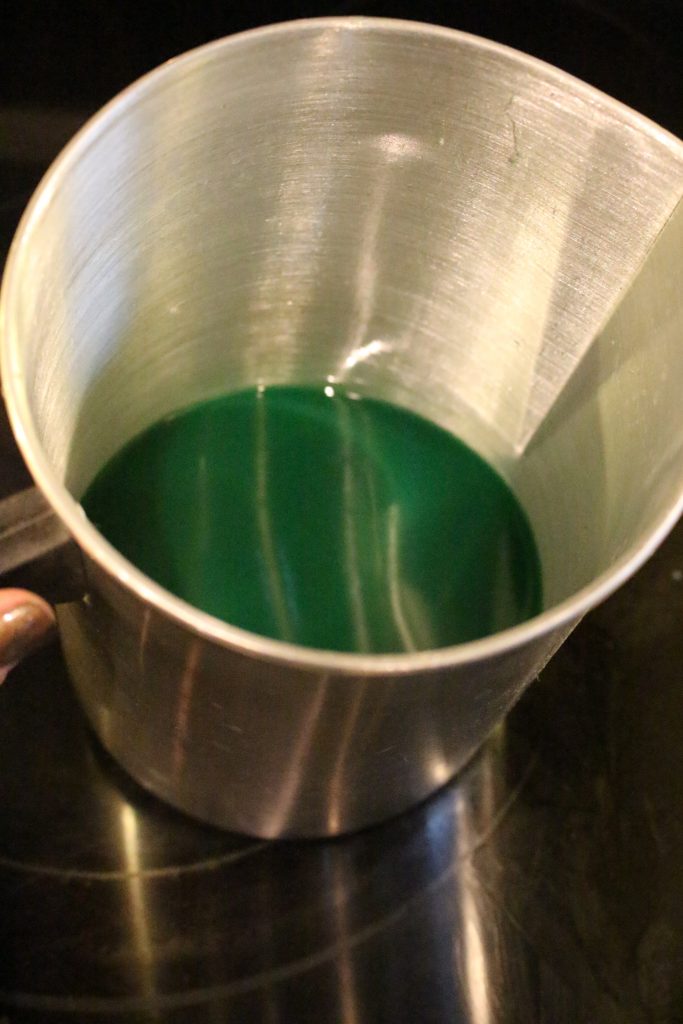
Step 3: Melt Your Wax
Set up your double boiler by placing a heatproof bowl inside a saucepan of gently simmering water. Add your wax flakes to the bowl and let them melt slowly. Keep the heat low; there is no rush here and overheating wax is both wasteful and potentially dangerous. If you are adding colour, stir in a small piece of crayon once the wax is fully melted. Add your essential oil drops at this stage too, stirring gently to combine.
Step 4: Dip the Pinecones
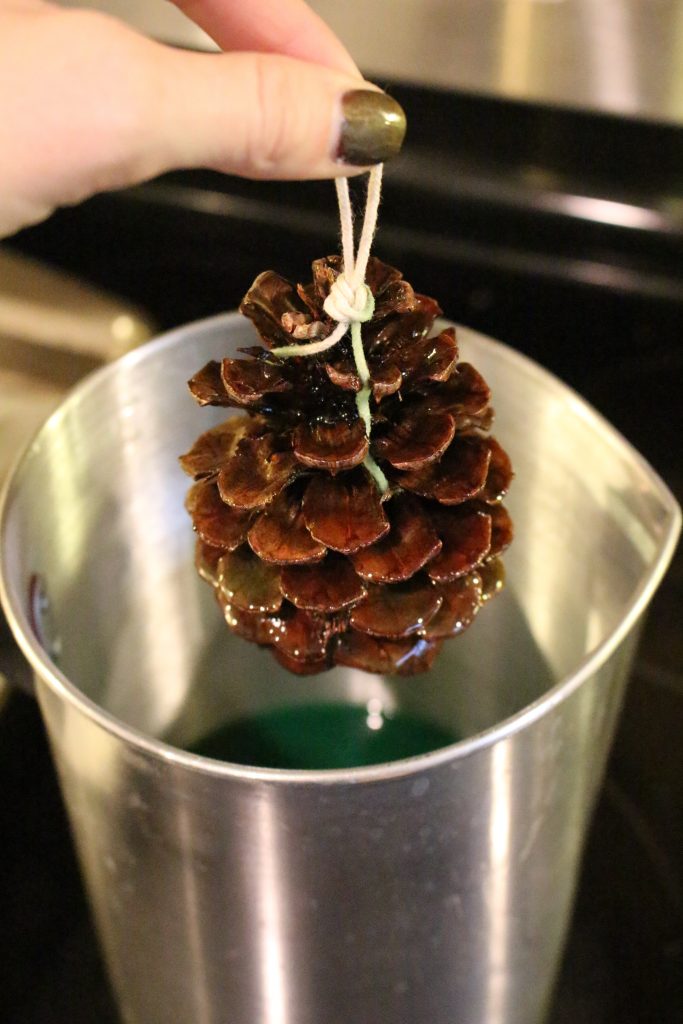
Holding each pinecone by its wick, dip it into the melted wax, turning it to make sure every side gets a good coating. Let the excess drip off for a few seconds before placing it on your parchment-lined tray. The first coat will look quite thin and that is perfectly normal.
Step 5: Build Up the Layers
Let each pinecone dry for about 15 minutes, then dip again. Three to four coats gives you a lovely thick wax layer that will burn slowly and reliably. Between coats, the wax in your bowl may start to set around the edges; just keep it over the simmering water and stir gently to keep it liquid.
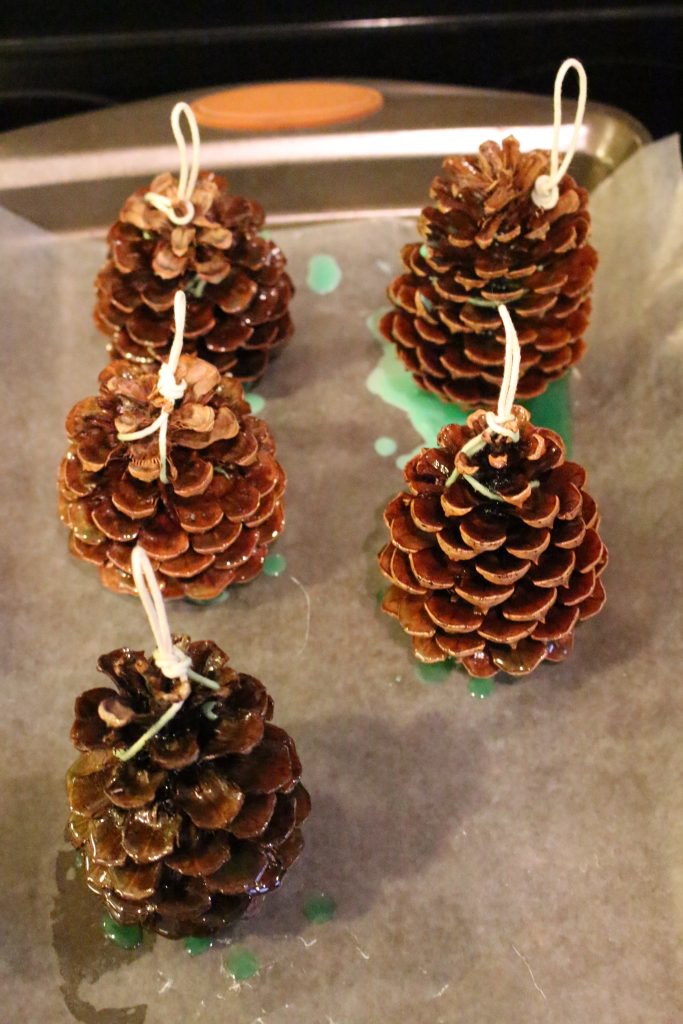
Step 6: Let Them Set Completely
Once you are happy with the wax coverage, leave your pinecones on the parchment to cool and set completely. This takes about an hour at room temperature. Resist the temptation to move them too soon or the wax can crack.
Tips for the Best Results
Choose open pinecones. Tightly closed pinecones do not hold wax well and will not burn as effectively. If yours are closed, the oven trick at a low temperature opens them right up.
Freeze before dipping. If you have freezer space, popping your pinecones in for an hour before you start means the cold surface grabs the wax more efficiently. You get a thicker coat with fewer dips, which saves both time and wax.
Do not overheat the wax. Keep it at a gentle melt. If the wax is too hot it runs straight off the pinecone and you will need far more coats. Slightly cooler wax clings better and builds up a lovely thick layer.
Use old candle stubs. This is such a satisfying way to use up those candle ends that are too low to burn but feel wasteful to throw away. Collect them in a bag throughout the year and melt them down for this project. Free wax and less waste.
Add salt for coloured flames. A light sprinkle of Epsom salt or table salt on the wet wax before it sets can produce subtle colour effects in the flame. It is a small touch, but it adds a genuinely magical quality to the fire.
Store them properly. Keep finished fire starters in a cool, dry spot out of direct sunlight. A lidded basket or box works perfectly. They will keep for months without any issue at all.
Beautiful Ways to Use and Gift Pinecone Fire Starters
One of the things that makes this project so appealing is how versatile the finished fire starters are.
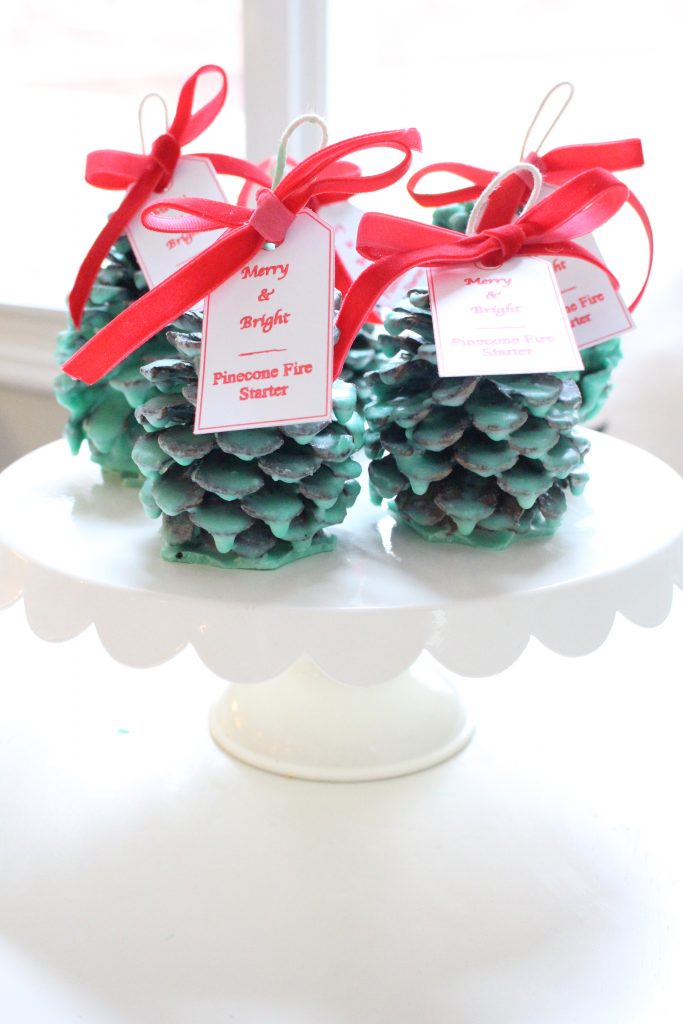
At home, stack them in a beautiful basket or vintage bowl beside your fireplace. They look stunning alongside a few sprigs of dried eucalyptus or a bundle of cinnamon sticks, and having them within arm's reach makes lighting a fire feel effortless rather than like a chore.
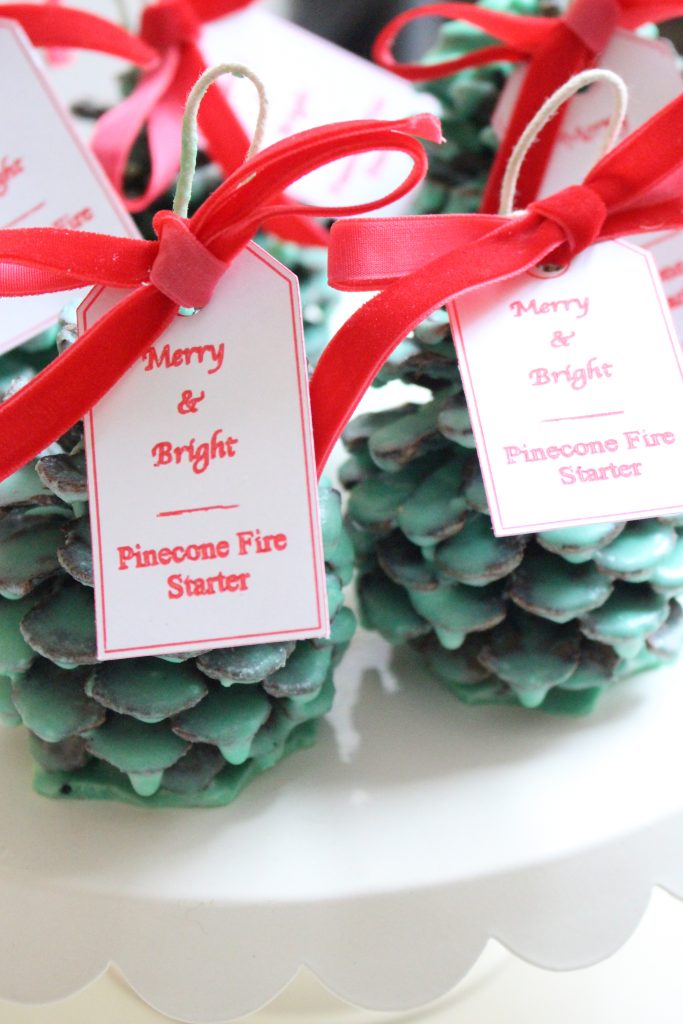
As gifts, they are genuinely special. Tie a simple ribbon around three or four pinecones, add a handwritten tag, and you have a thoughtful, handmade present that costs very little but feels incredibly considered. They work beautifully as Christmas gifts, housewarming presents, or even as part of a cosy night in hamper with hot chocolate, marshmallows, and a good pair of socks.
For a dinner party, place one at each setting as a favour. It is an unexpected, charming touch that guests will genuinely appreciate, especially if you have scented them with something warm like cinnamon or clove.
If you are making a large batch, consider pairing a set of fire starters with a box of long matches or a pretty lighter as a complete gift set. It is the kind of present that people would never think to buy for themselves but absolutely love receiving.
Frequently Asked Questions
They really do. The natural resin in pinecones is already flammable, and coating them in wax gives you a slow, sustained flame that catches kindling efficiently. One pinecone tucked under your logs with some kindling on top will have a fire going within a few minutes.
Soy wax is a great all-round choice because it is natural, melts at a low temperature, and burns cleanly. Beeswax is another excellent option with a lovely natural honey scent, though it is more expensive. You can also use paraffin wax or melt down old candle stubs for a cost-free alternative.
Very little. The wax burns off as part of the fire-starting process, so there is no significant residue. You will find far less mess than you would from commercial fire lighter blocks, which can leave a waxy or chemical residue behind.
Absolutely. They work just as well outdoors in a fire pit as they do in an indoor fireplace or wood-burning stove. The scented versions are particularly lovely outside on a summer evening.
A well-coated pinecone will typically burn for 10 to 15 minutes, which is more than enough time to get your kindling and logs catching. Larger pinecones with more wax coats will burn longer.
They are as safe as any fire-starting method, provided you use them as intended. Never leave a lit fire unattended, keep them stored away from heat sources, and always use them in a proper fireplace, wood-burning stove, or fire pit. They are not candles and should not be burned on their own outside of a fire setting.
The foraging and wicking steps are perfect for little hands. The wax-dipping stage needs adult supervision because of the hot wax, but older children can manage the dipping with a bit of guidance. It makes a lovely family craft project, especially in the lead-up to Christmas.
How to Store Pinecone Fire Starters
Finished fire starters keep beautifully for months. Store them in a cool, dry place away from direct sunlight or any heat sources. A lidded box, a basket with a cloth over the top, or even a paper bag works well. Avoid stacking them too tightly or the wax surfaces may stick together; a layer of parchment between rows prevents this.
If you are making them as gifts in advance, they will keep perfectly well for several months, so you can batch-make them in autumn and have them ready for Christmas giving without any last-minute rush.
You can see another DIY wax fire starter I made in the YouTube video below
If you enjoyed this project, you will find plenty more craft and DIY ideas in the DIY section here on My Life From Home.


Do wax-based fire starters leave any mess in the bottom of a fireplace? I was wondering about the melted wax. Thanks!
[…] years ago, I made these adorable Merry & Bright Pinecone Fire Starters (LINK). Today, we are making them again with a slight variation. Instead of pinecones, I have […]
[…] Pinecone Fire Starter DIY – My Life From Home […]
These are adorable. I would totally make these for someone sometime. Perfect for those with fireplaces or firepits.
Thanks for sharing at Bloggers Spotlight!
Lovely DIY! I miss my real fireplace. I have a real hearth but, electric log 🙁 lol Thanks for sharing at the Inspiration Spotlight party. Pinned & Shared. Happy Holidays!
Thank you, Theresa! It was a really fun DIY.
Hi Amy! These are super cute 🙂 I would love to make some of these for my parents since they have a wood burning fireplace. I adore homemade gifts! Thank you so much for sharing with us at Dishing It & Digging It.
I used one last week and they really do work and with the peppermint essential oil added, they smell amazing!
These look great and I appreciated your detailed instructions as I’m not really a DIY person. Thanks for sharing with us at Over the Moon link up.
Your welcome. Thank you for hosting.
These are so pretty. I have allergies, so a wood burning fireplace is not in the picture for me. Mine is electric. Great gift idea though.
There is definitely a convenience to electric that you cannot overlook! We are wanting to put an electric one in our bedroom!
This is such a cool idea and they turned out so cute! Awesome gift idea!
Thank you, Samantha! They were fun to make!
I’ve always wanted to try these & they make such a great gift! Love them!
They are so fun and turned out cute! You will need to try them, Michelle!
So cute! I wish we had a wood-burning fireplace! I almost would feel bad using them in a fire 🙂
I know! I’m struggling with that also!
I’m so jealous that you have a wood burning fireplace! The previous owners of our home had ours converted to gas but we talk all the time about converting it back. These are so, so adorable and would be great for outdoor firepit lovers as well!
Thank you, Kim! I love it, but the convenience of a gas is enticing.
These are so cool, Amy! I wish we had a wood-burning fireplace; ours is gas, but I grew up with a wood-burning one and loved helping my dad make fires. I was always given the task of crumpling up sheets of newspaper to use as starter 🙂
It’s the best! A little messy, but so worth it!