DIY Etched Glassware: The Thoughtful Homemade Gift That Looks Like It Cost a Fortune

There's something so satisfying about giving a gift that you've actually made yourself, especially when it looks far more expensive than it was. These DIY etched glasses are exactly that kind of gift. They look like something you'd spot in the Pottery Barn catalogue (or the John Lewis gifting section), but the whole project costs a fraction of the price and takes less than an hour from start to finish.
Glass etching sounds technical, and honestly, when I first came across it, I assumed it was one of those crafts that required specialist equipment, a steady hand, and a serious amount of patience. It's none of those things. If you can peel a sticker and spread cream cheese on a cracker, you can etch a glass. I mean that.
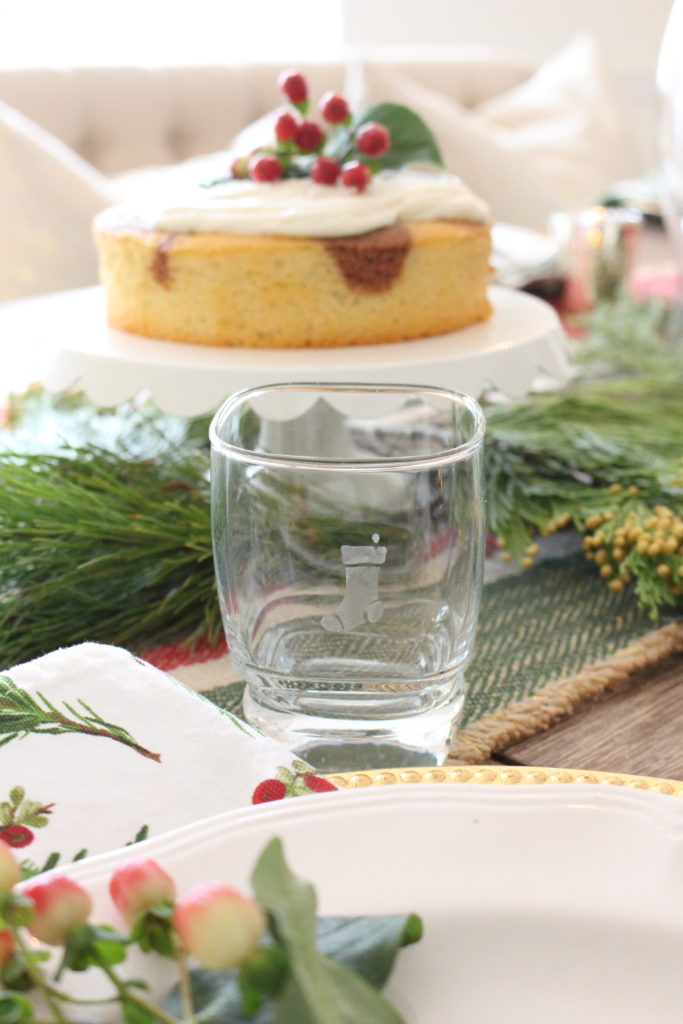
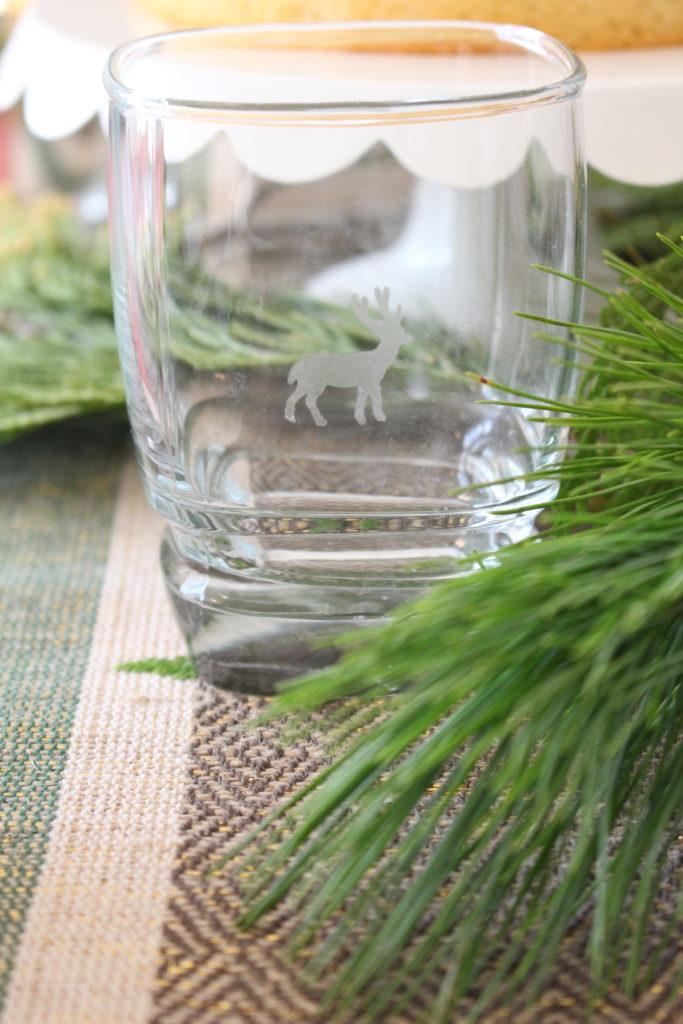
The results are genuinely beautiful: a soft, frosted design permanently etched into the glass. Whether you're making them as Christmas gifts, a housewarming present, or just because you want a set of gorgeous personalised glasses in your own home, this is a project worth trying. I picked up the glassware from a local charity shop for next to nothing and used a set of self-adhesive stencils from Amazon, and the finished result looked like something worth gifting in a ribbon-wrapped box.
Let me walk you through exactly how to do it.

Why You'll Love This DIY Etched Glassware Project
- It's genuinely beginner-friendly. No special skills, no specialist equipment. If you can follow a simple set of steps, you'll get gorgeous results.
- The cost per gift is remarkably low. Sourcing glassware from charity shops or Poundland keeps costs minimal, while the etching cream and stencils are reusable across multiple projects.
- The results look high-end. Etched glassware has that timeless, artisan quality that's always well-received as a gift. It looks considered and personal, not DIY-budget.
- You can fully personalise it. Once you've got your etching cream and a few stencils, the design possibilities are endless: seasonal motifs, monograms, botanical patterns, whatever suits your recipient.
- It's a brilliant way to breathe life into charity shop finds. There's something wonderfully satisfying about transforming a 50p glass into something genuinely gift-worthy.
- It makes a thoughtful set gift. A set of four matching etched glasses, wrapped in tissue in a gift box, is the kind of present people actually remember.
What You'll Need — Materials
Here's everything you need to get started. The etching cream is the only specialist item; everything else is easy to source.
For the glasses:
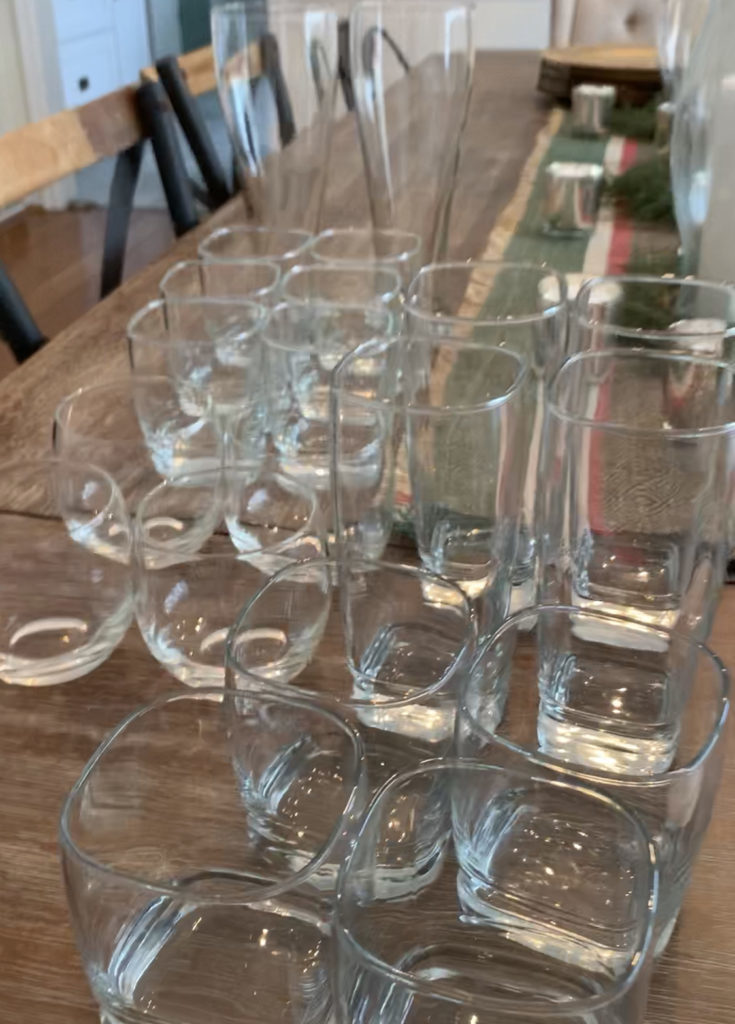
- 4–6 plain glasses (charity shop, Poundland, or B&M are ideal; look for sets with simple, smooth surfaces)
For the etching:
- Glass Etching Cream
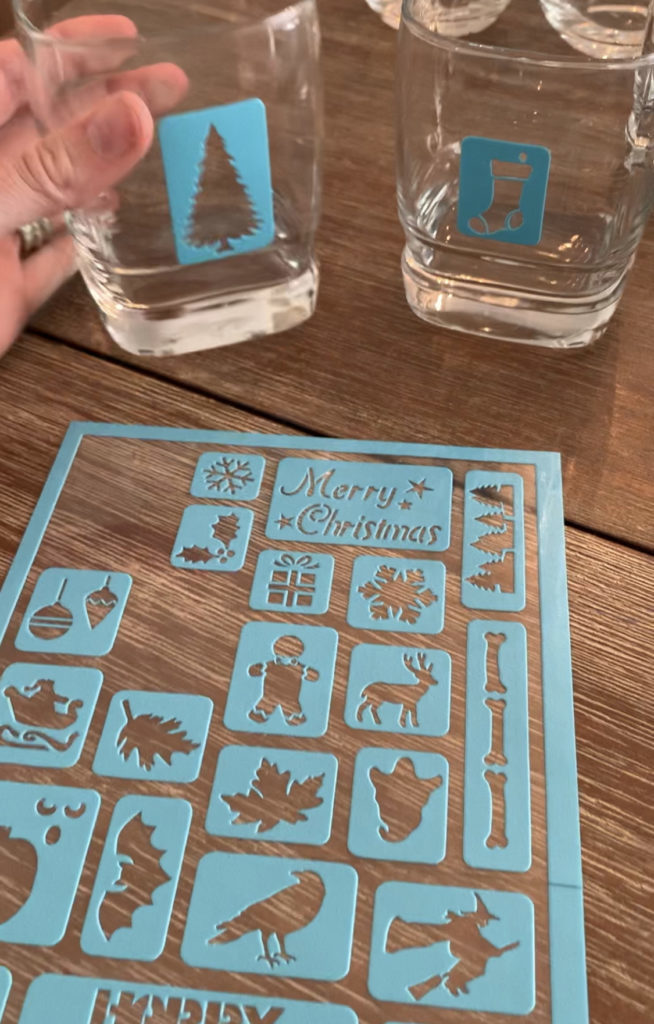
- Self-adhesive stencils of your choice
- Rubber gloves (essential; the etching cream contains an acid)
- Old paintbrush or foam brush
- Paper towels
- Access to a sink
A note on stencils for UK readers: Martha Stewart stencils (referenced in American tutorials) aren't always easy to find in the UK. I'd recommend searching Amazon UK for self-adhesive stencil sheets. There are brilliant seasonal and botanical options available, and they can be reused multiple times. Hobbycraft also occasionally stocks adhesive stencils in their craft supplies section.
Equipment You'll Need
Nothing fancy here, just a few basics:
- Rubber or latex gloves (non-negotiable; wear these throughout)
- Foam brush or cheap paintbrush (dedicated to this project; don't use it for anything else afterwards)
- Kitchen roll / paper towels
- Small bowl or container (for rinsing)
- Lint-free cloth for final polish
How to Make DIY Etched Glasses — Step by Step
Step 1: Prepare Your Glasses
Start with clean, dry glasses. Any grease or residue will prevent the stencil from adhering properly, so give them a good wash and dry thoroughly before you begin. This step makes a real difference to how cleanly the stencil sits, so don't skip it.
Step 2: Apply Your Stencils
Choose your stencil designs and peel the backing off each one. Press them firmly onto the glass, smoothing out any air bubbles with your fingertip or a clean credit card. The sticker needs to be completely sealed to the glass surface; any lifted edges will allow the etching cream to bleed underneath and blur your design. Take your time here. The neater your stencil application, the crisper your finished result.
Step 3: Put Your Gloves On
Before you open the etching cream, gloves on. Glass etching cream contains hydrofluoric acid. It's safe to use at home when handled correctly, but you do not want it on your skin. Keep it away from children and pets, and make sure you're working in a well-ventilated area.
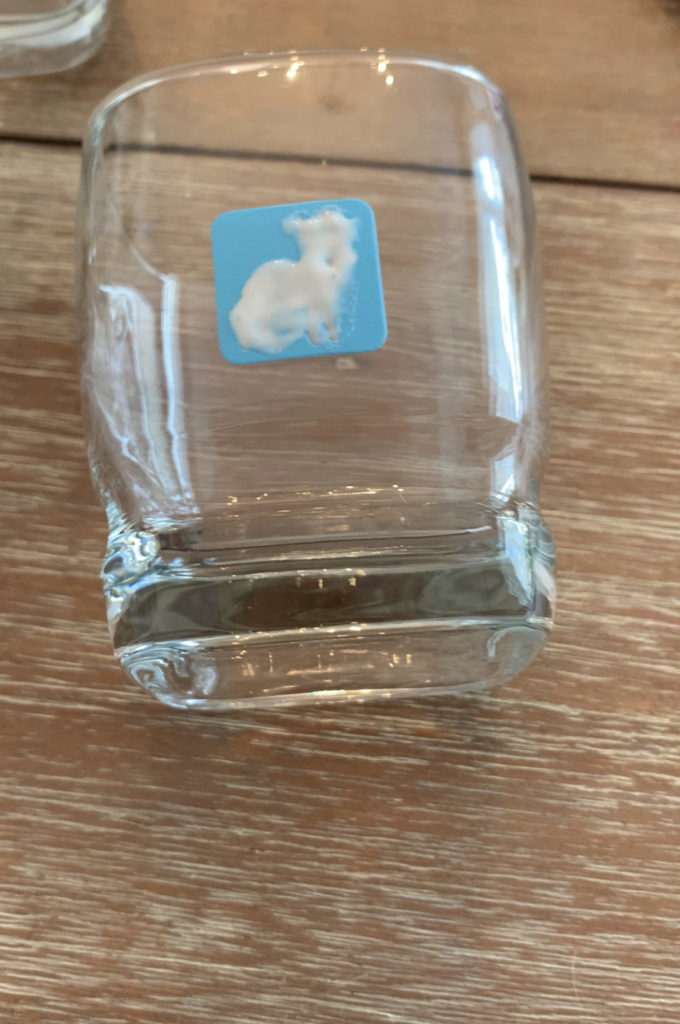
Step 4: Apply the Etching Cream
Using your foam brush, apply the etching cream generously over the stencil. You want a thick, even layer; don't be stingy with it. Make sure you're covering the entire stencil design with no gaps. Set a timer as soon as the cream is on, because timing is everything with this step.
Step 5: Wait Five Minutes (and Swirl Halfway Through)
Leave the cream to work for exactly five minutes. At the halfway point, so around two and a half minutes in, give the cream a gentle swirl with your brush. This helps release any air bubbles and ensures an even etch across the whole design. Resist the temptation to leave it longer. More time doesn't mean a deeper etch; it just risks uneven results.
Step 6: Rinse and Reveal
Take your glass to the sink and rinse off the cream thoroughly under running water, still wearing your gloves. Once it's fully rinsed, pat dry with paper towels and carefully peel away the stencil. Your etched design will be revealed underneath: that soft, frosted finish against the clear glass is so satisfying to see for the first time.
Step 7: Final Polish and Admire
Give the glass a final wipe with a lint-free cloth. The design is now permanently etched; it won't wash off, won't fade, and is completely dishwasher safe. Repeat with your remaining glasses and stencil designs.
Tips for the Best DIY Etched Glassware Results
Source glassware with smooth, flat surfaces. Textured or highly curved glasses make it harder for stencils to sit flush. Straight-sided tumblers or stemless wine glasses tend to give the cleanest results.
Press those stencil edges down firmly. The most common beginner mistake is a stencil that isn't properly sealed. Run your fingernail around every edge before you apply the cream.
Go generous with the etching cream. A thin application gives patchy results. Apply it thickly and evenly; you can always rinse it off and reuse what remains in the jar.
Keep your stencils for next time. Self-adhesive stencils can be reused several times if you peel them carefully and store them flat. It makes the per-project cost even lower.
Elevate the gifting presentation. A set of four etched glasses wrapped in tissue paper inside a plain gift box, tied with ribbon, looks genuinely considered. The packaging makes as much of an impression as the glasses themselves.
Try a monogram for a personal touch. Letter stencils are widely available and make the most thoughtful personalised gift. A set of monogrammed champagne flutes for a newly engaged couple, for example, is the kind of gift that gets kept forever.
Make It Your Own
Once you've got the hang of the basic technique, the variations are really where this project gets exciting.
Seasonal sets work beautifully as Christmas gifts. Snowflakes, stars, holly motifs etched onto a set of six tumblers feel special in a way that a shop-bought set doesn't. Make a batch and give them as host gifts throughout the season.
Botanical designs such as eucalyptus, ferns, and florals give etched glassware a more everyday luxury feel. These aren't just for gifting; they look gorgeous in your own home, especially on a bar cart or open shelving.
Monogrammed wine glasses are one of the most thoughtful wedding or engagement gifts you can make. A set of two, presented beautifully, costs a fraction of a personalised gift from a boutique.
Etched carafes and vases work just as well as glasses. The technique is identical, and a beautiful etched carafe on a dinner table looks like something from a boutique homewares shop.
Mix and match stencils within a set. Rather than using the same design on all six glasses, try a different but coordinating stencil on each one. The effect is eclectic and charming, and it makes each glass feel individual.
Frequently Asked Questions
Yes, when handled correctly it's safe for home use. Always wear gloves, work in a ventilated space, and keep it out of reach of children. Follow the product instructions carefully and rinse thoroughly.
It's available on Amazon UK; just search “glass etching cream.” It's not widely stocked in high street craft shops in the UK, so ordering online is your easiest option.
Most plain glass works well, including tumblers, wine glasses, gin glasses, and champagne flutes. Avoid anything labelled “crystal” as the composition can react differently, and avoid heavily textured glass as stencils won't adhere cleanly.
Yes. Once etched, the design is permanently frosted into the glass. It won't wash off, fade with dishwasher use, or rub away over time. That's what makes it such a great gift; it genuinely lasts.
Absolutely. If you have a Cricut or Silhouette cutting machine, you can cut your own adhesive vinyl stencils in any design you like. This opens up an enormous range of personalisation options: names, dates, custom illustrations.
A standard jar will cover a lot of projects. Depending on stencil size, you can typically etch 50–100+ designs from one jar. It's excellent value when you factor that in.
Yes. The same technique works on mirrors, glass picture frames, glass ornaments, and glass candle holders. The effect on mirrors is particularly beautiful.
Gifting and Care Guide
These glasses are genuinely dishwasher safe. The etching won't fade or wash off, so they're as practical as they are beautiful.
For gifting, a set of four wrapped in white tissue paper inside a plain kraft gift box with a ribbon looks really lovely. You can pick up plain gift boxes cheaply from Amazon, Wilko, or The Works. If you're giving monogrammed glasses, a handwritten tag explaining they were made specifically for the recipient always adds a personal touch.
Store any unused etching cream in its original jar with the lid tightly closed, out of direct sunlight.
DIY Etched Glassware
Equipment
- Rubber or latex gloves non-negotiable; wear these throughout
- Foam brush or cheap paintbrush dedicated to this project; don't use it for anything else afterwards
- Kitchen roll / paper towels
- Small bowl or container
- Lint-free cloth for final polish
Ingredients
- 4 plain glasses
- Glass etching cream
- Self-adhesive stencils
- Rubber gloves
- Foam brush
- Paper towels
Instructions
- Clean and dry glasses thoroughly
- Apply stencils firmly, smoothing all edges
- Put on gloves
- Apply etching cream thickly over stencil
- Wait 5 minutes, swirling gently at 2.5 minutes
- Rinse under running water, peel stencil, dry
- Polish and repeat for remaining glasses
Notes
If you make these, I'd love to see them, share a photo over on Instagram @gillianfromhome or drop a comment below. They make such a gorgeous gift, and once you've done your first glass you'll want to etch everything in sight.
Looking for more handmade gift ideas? Check out our crafts.

[…] made the DIY Etched Holiday Glasses (LINK) this year which made a cute addition to the […]