How to Make an Inspiration Board (And Why Every Home Needs One)

If you've ever had a blank wall staring back at you and felt completely stuck about what to do with it, this post is for you. There's something about an empty space in your home that can feel like both an opportunity and a mild source of low-level anxiety, especially when you can't quite figure out what belongs there.

The answer, more often than not, is something personal. Something that actually means something to you. And that's exactly where an inspiration board comes in.
I'd been hearing about inspiration boards for a while before I actually made one, and once I did, I couldn't believe I'd waited so long. It's one of those genuinely satisfying DIY projects that costs very little, takes an afternoon, and ends up becoming one of your favourite things in your home. So let's get into it.
What Is an Inspiration Board?
You might also hear them called mood boards, vision boards, or idea boards. They're all variations on the same concept: a curated collage of images, words, textures, and objects that represent what inspires you, what you're working towards, or simply what makes you happy when you look at it.
For interior designers and creatives, mood boards are a professional tool used to map out a visual direction before a project begins. But you absolutely don't need to be a designer to benefit from one. An inspiration board in your home is a daily visual anchor. It can reflect your values, your goals, your aesthetic, a project you're working on, a season you're moving into, or simply a collection of things that make you feel good.
There are no rules. That's genuinely the best part.
Why Make a Physical Inspiration Board?
In an age where we all have digital Pinterest boards and saved Instagram posts, you might wonder why you'd bother making something physical. The answer is simple: there's something completely different about a tangible, physical thing on your wall that you actually see every day, rather than a folder of images on your phone that you open once in a blue moon.
A physical inspiration board is always there. It catches your eye when you sit down to work, when you walk past it, when you're having a slow morning with a coffee. It becomes part of your environment in a way that a digital board simply can't replicate.
It's also a lovely piece of decor in its own right. Done well, an inspiration board adds texture, colour, and personality to a wall in a way that feels completely unique to you. No two will ever look the same, because no two people are inspired by exactly the same things.
What to Put on Your Inspiration Board
This is the most personal part of the whole project, and it's worth taking a bit of time to think about before you start gathering materials. The things you put on your board will shape how it looks and what it means to you, so be intentional rather than just grabbing the first things that come to hand.
Here are some ideas to get you thinking:
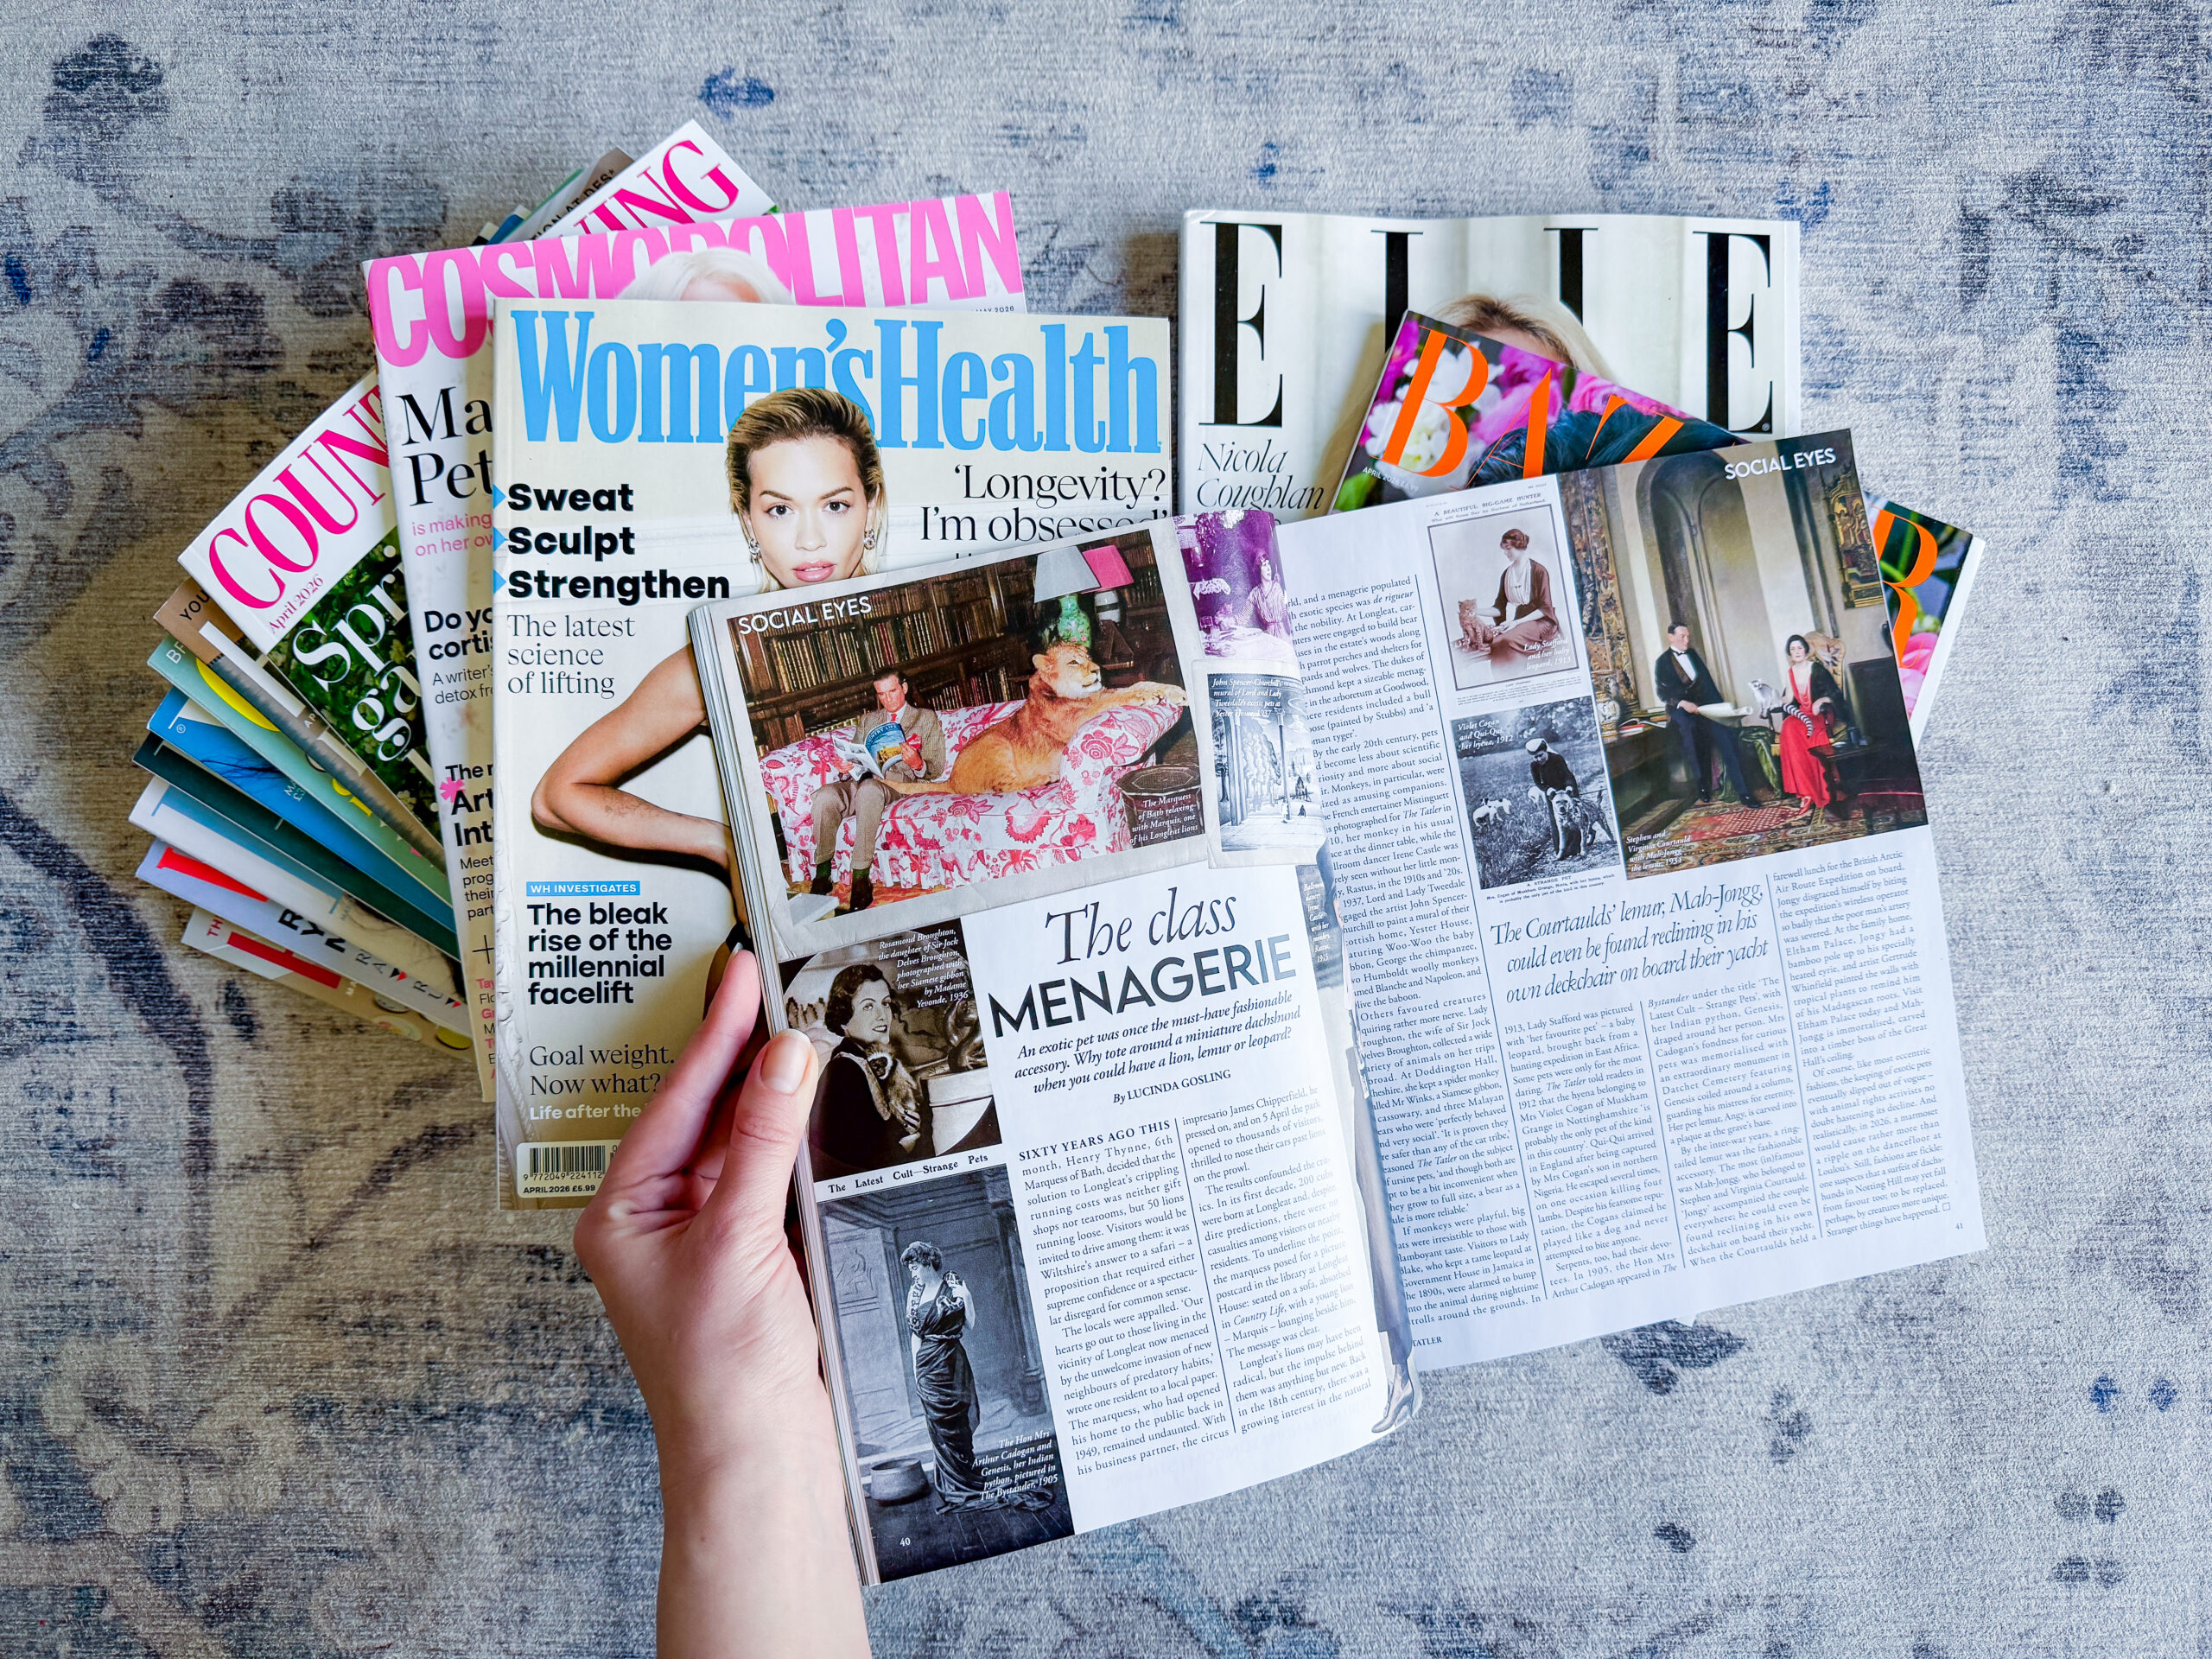
Images. Magazine clippings are brilliant for this. Tear out anything that catches your eye without overthinking it, whether it's a beautiful interior, a fashion editorial, a landscape, or a close-up of something that appeals to you visually. Printed photographs work beautifully too, especially if you want family or travel memories woven in.
Quotes and words. A line of text that resonates with you can be incredibly powerful when you see it every day. Whether it's a motivational quote, a poem you love, a phrase from a book that stuck with you, or even just a single word that feels meaningful right now.
Colour swatches. If you're using your board to plan a creative or interiors project, fabric swatches, paint chip samples, and torn pieces of paper in your chosen palette can all go on. This turns it into something genuinely useful as well as beautiful.
Textures and materials. A small piece of fabric you love, a pressed flower, a ribbon in a colour that makes you happy. Physical elements like these add depth and tactility to the board that flat images can't match.
Personal touches. A small photo of someone you love. A ticket stub from somewhere that mattered. A handwritten note. These are the things that make the board feel truly yours rather than a generic Pinterest aesthetic.
The best inspiration boards have a mix of aspirational and personal. They feel like a window into who you are and what you're moving towards.
How to Make an Inspiration Board: Step by Step
This is genuinely one of the most accessible DIY projects going. You don't need special skills, and the materials are inexpensive and easy to find.
What You'll Need
- A pinboard, corkboard, or foam board (fabric-covered looks beautiful and feels more elevated than bare cork)
- Fabric of your choice, if you're covering the board
- Spray fabric adhesive
- A staple gun
- Pins or small clips for attaching your items
- Scissors
- Your chosen images, quotes, swatches, and personal items
Choosing Your Board
The size of your board will depend on the wall space you're working with. Measure the space first and think about whether you want the board to be a statement piece or something more subtle. A larger board has more impact visually and gives you more room to add and change things over time.
Foam boards and corkboards are widely available at craft stores and come in all sorts of sizes. If you want something sturdier, a wooden pinboard is a great investment and will last for years.

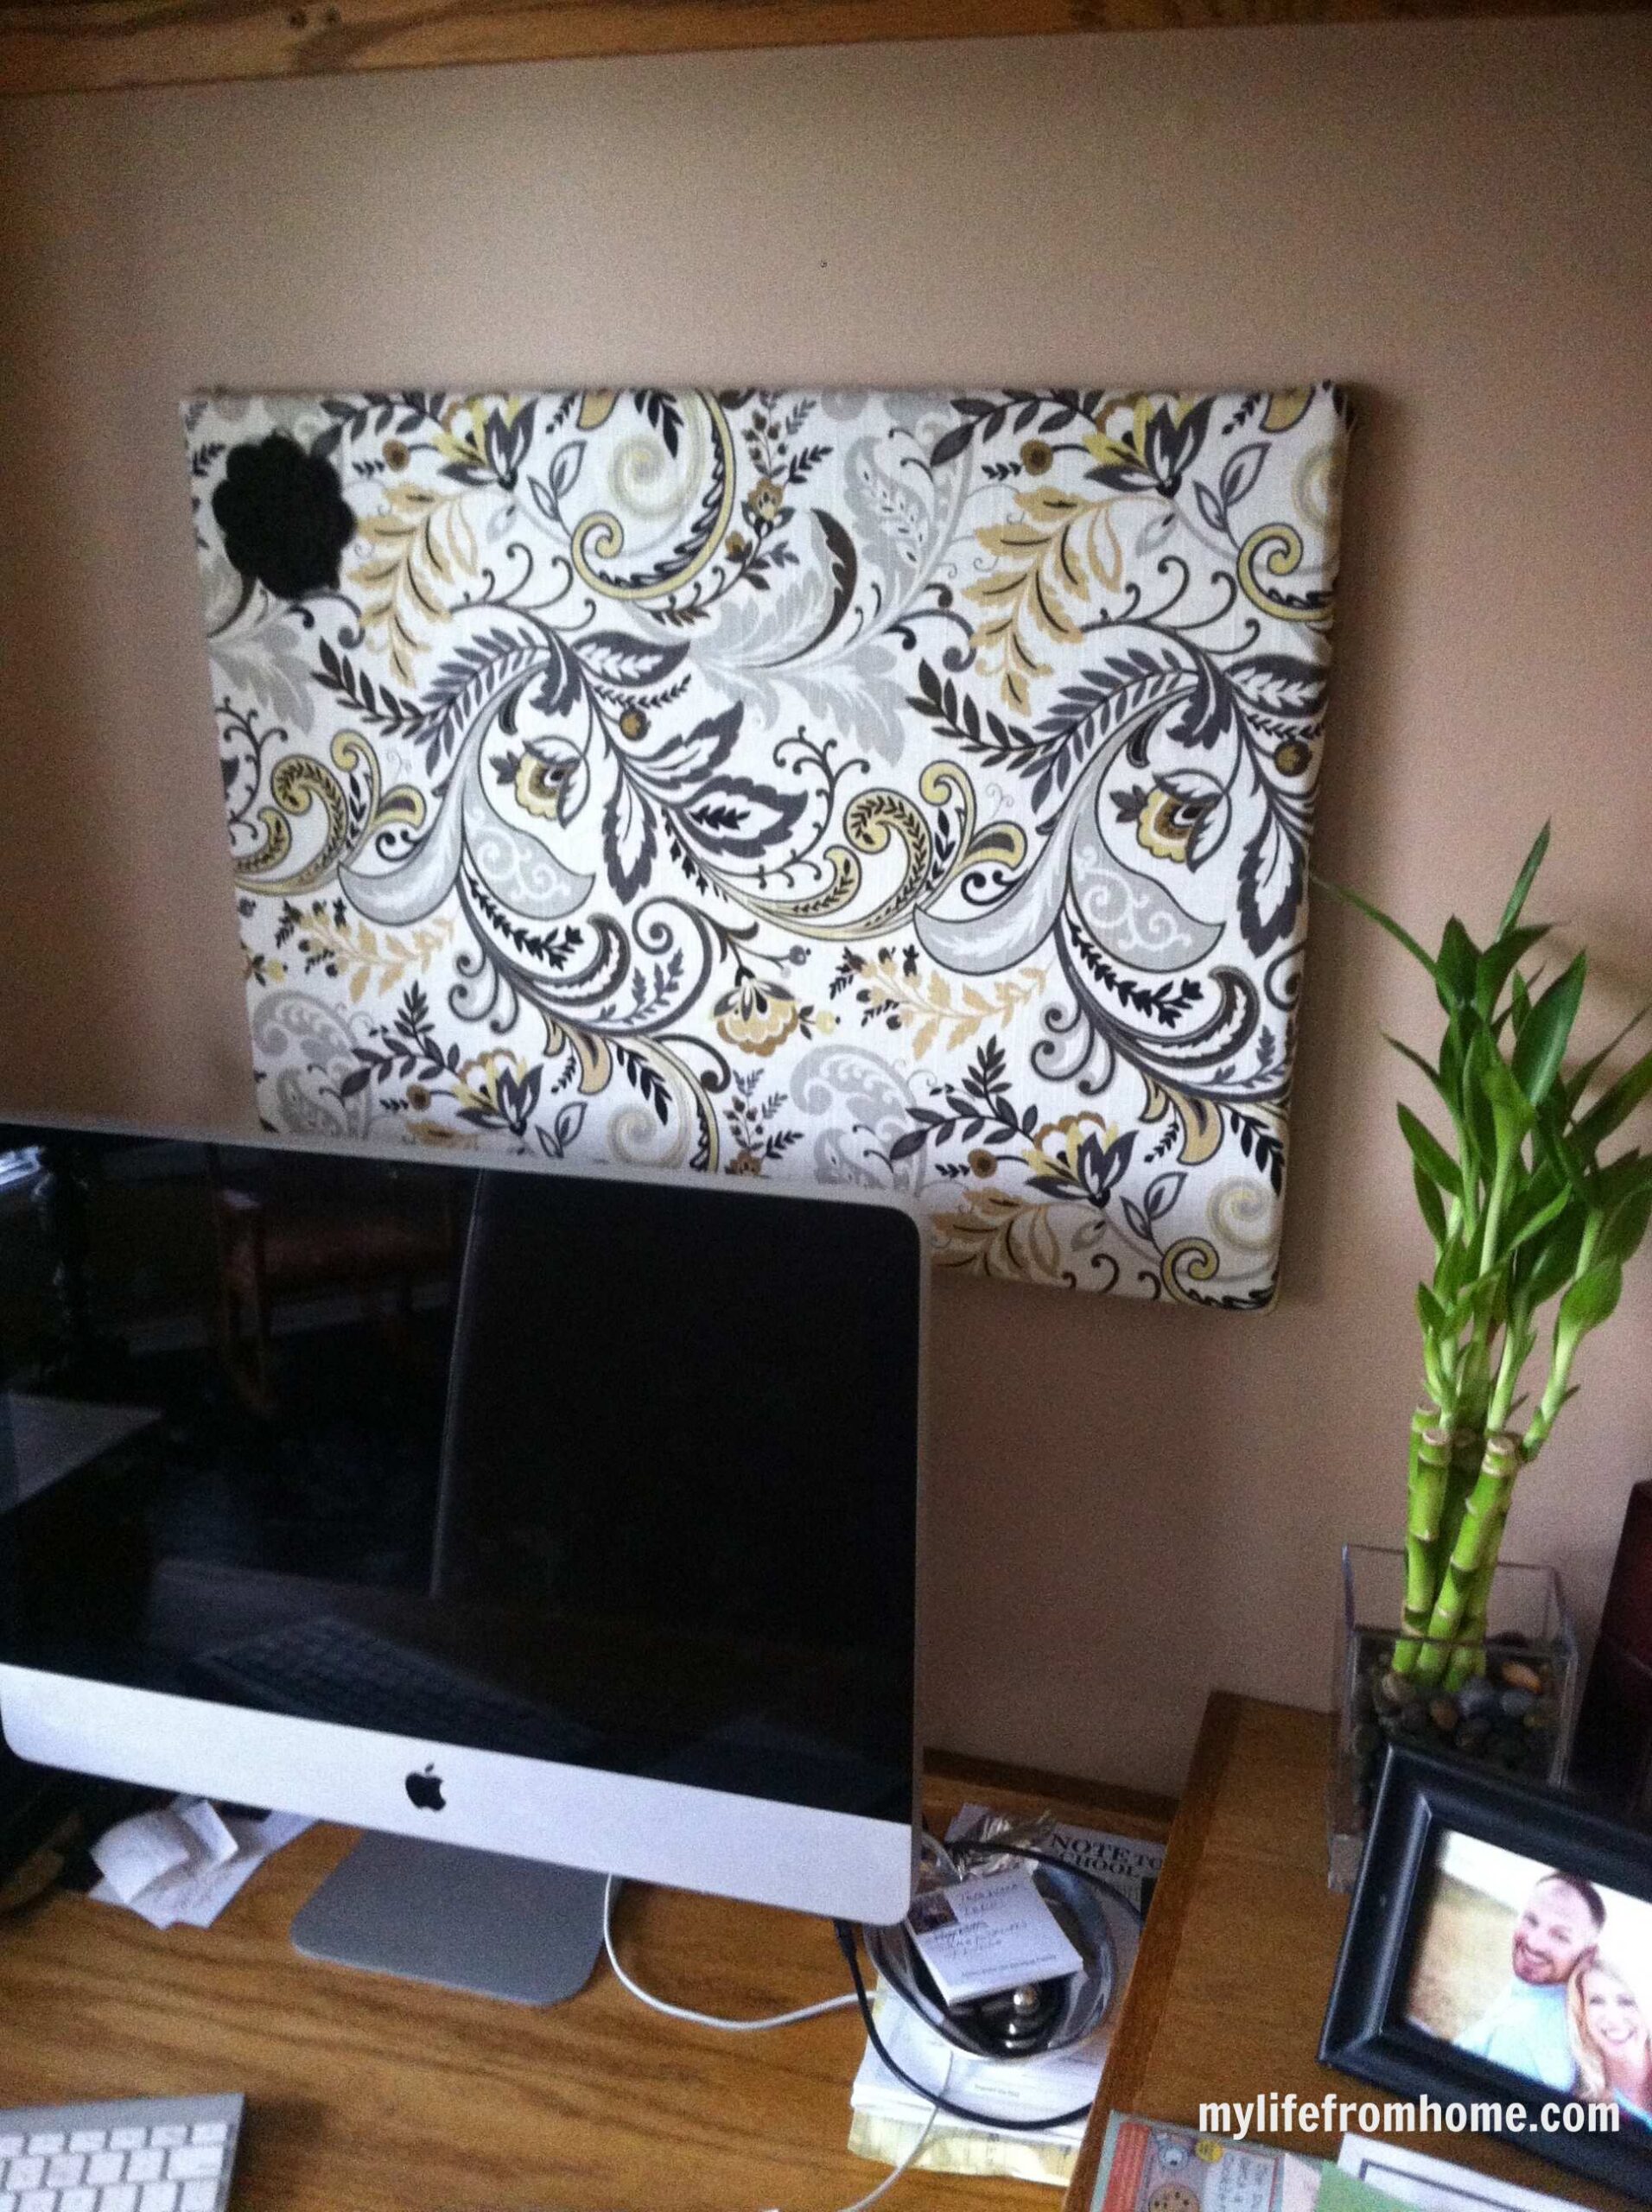
Covering the Board with Fabric
If you're using a plain corkboard, covering it with fabric instantly elevates it from a functional office item to something that feels considered and beautiful. This step takes about 20 minutes and makes a significant difference to the finished result.
Choose a fabric that complements your room. Linen, cotton, and boucle all look gorgeous. Avoid anything too thick or stiff as it won't wrap smoothly around the edges.

Lay your fabric face-down on a flat surface and place your board face-down on top of it, leaving a few inches of fabric on all sides. Spray the back of the board with fabric adhesive and smooth the fabric into place, working out any bubbles as you go. Then fold the edges over to the back of the board, pulling the fabric taut as you go, and staple firmly in place. Start with the corners, pulling diagonally to get a neat finish, then work along each side. Trim any excess fabric once it's all secured.

The result should be a perfectly smooth, fabric-covered board with no bubbles or creases. If you want to add a decorative touch, a small fabric flower, a velvet ribbon trim, or a few decorative pins along the border all add a lovely finishing detail.

Arranging and Attaching Your Items
This is the fun part. Lay everything out on a flat surface first before you commit to pinning anything. Play with the arrangement until it feels balanced and cohesive. Think about mixing sizes, orientations, and types of content so it doesn't feel too uniform.
As a general rule, larger images look best positioned towards the centre or anchoring a corner, with smaller pieces and text elements filling the gaps. Don't be afraid of white space (or in this case, fabric space). A board that's too crammed loses its impact.
Once you're happy with the arrangement, pin everything in place. Use small gold or brass pins if you can find them as they add a lovely detail. Small bulldog clips or washi tape can also work well for a different look.
Hanging Your Board
A fabric-covered board has a bit of weight to it, so make sure you're hanging it properly. A picture hook rated for the weight is the safest option. If you're hanging on plasterboard, use a proper wall anchor rather than relying on a standard nail.

Refreshing Your Board Over Time
One of the best things about an inspiration board is that it's never finished. You can add to it, swap things out, and refresh it as your life and interests evolve. Seasonally refreshing your board is a lovely ritual, and it keeps the wall from feeling static or stale.
Remove anything that no longer resonates. Add images that reflect where you are now, what you're excited about, what you're working towards. Think of it as a living, breathing reflection of you rather than a fixed installation.
Some people like to completely refresh their boards twice a year in line with the seasons. Others add and remove things on a more ad hoc basis as things come and go. There's no right approach. The only rule is that everything on the board should earn its place by meaning something to you.
The Everyday Luxury of a Meaningful Wall
There's something genuinely lovely about walking into a room and seeing a wall that reflects you. Not a generic print from a high street homeware shop, but something you made, curated, and filled with meaning. That's the everyday luxury of an inspiration board. It costs very little to create but adds something money can't easily buy: a space that feels personal and intentional.
It's also a reminder, every single day, of what matters to you. Your goals, your aesthetic, the people and places you love. In a world that moves very fast, having something that anchors you and makes you pause for a second is worth more than it might seem.
So if you've got a blank wall, a sad nail, or simply a corner of your home that's been bothering you for a while, this might be exactly the project it's been waiting for.
Do you have an inspiration board at home? I'd love to know what you put on yours and what keeps you inspired every day.

[…] Adding a new fabric covered cork board and a file wall holder completed the transformation. You can read how I made the cork board for my home office, here. […]