I'm Gillian, a Scotland based home & lifestyle blogger. Follow along as I navigate this new journey sharing my life from home.


Post updated:
I’m not really a Valentine’s Day decorator. Every February I look at the shelves of red and pink everything and quietly walk past, because it just isn’t my style and it doesn’t suit the calm, neutral feel I’ve built in my home.
But this year I wanted a tiny touch of something for the mantel. Just enough to say “yes, it’s February, and yes, there’s love in this house” without turning the living room into a card shop.
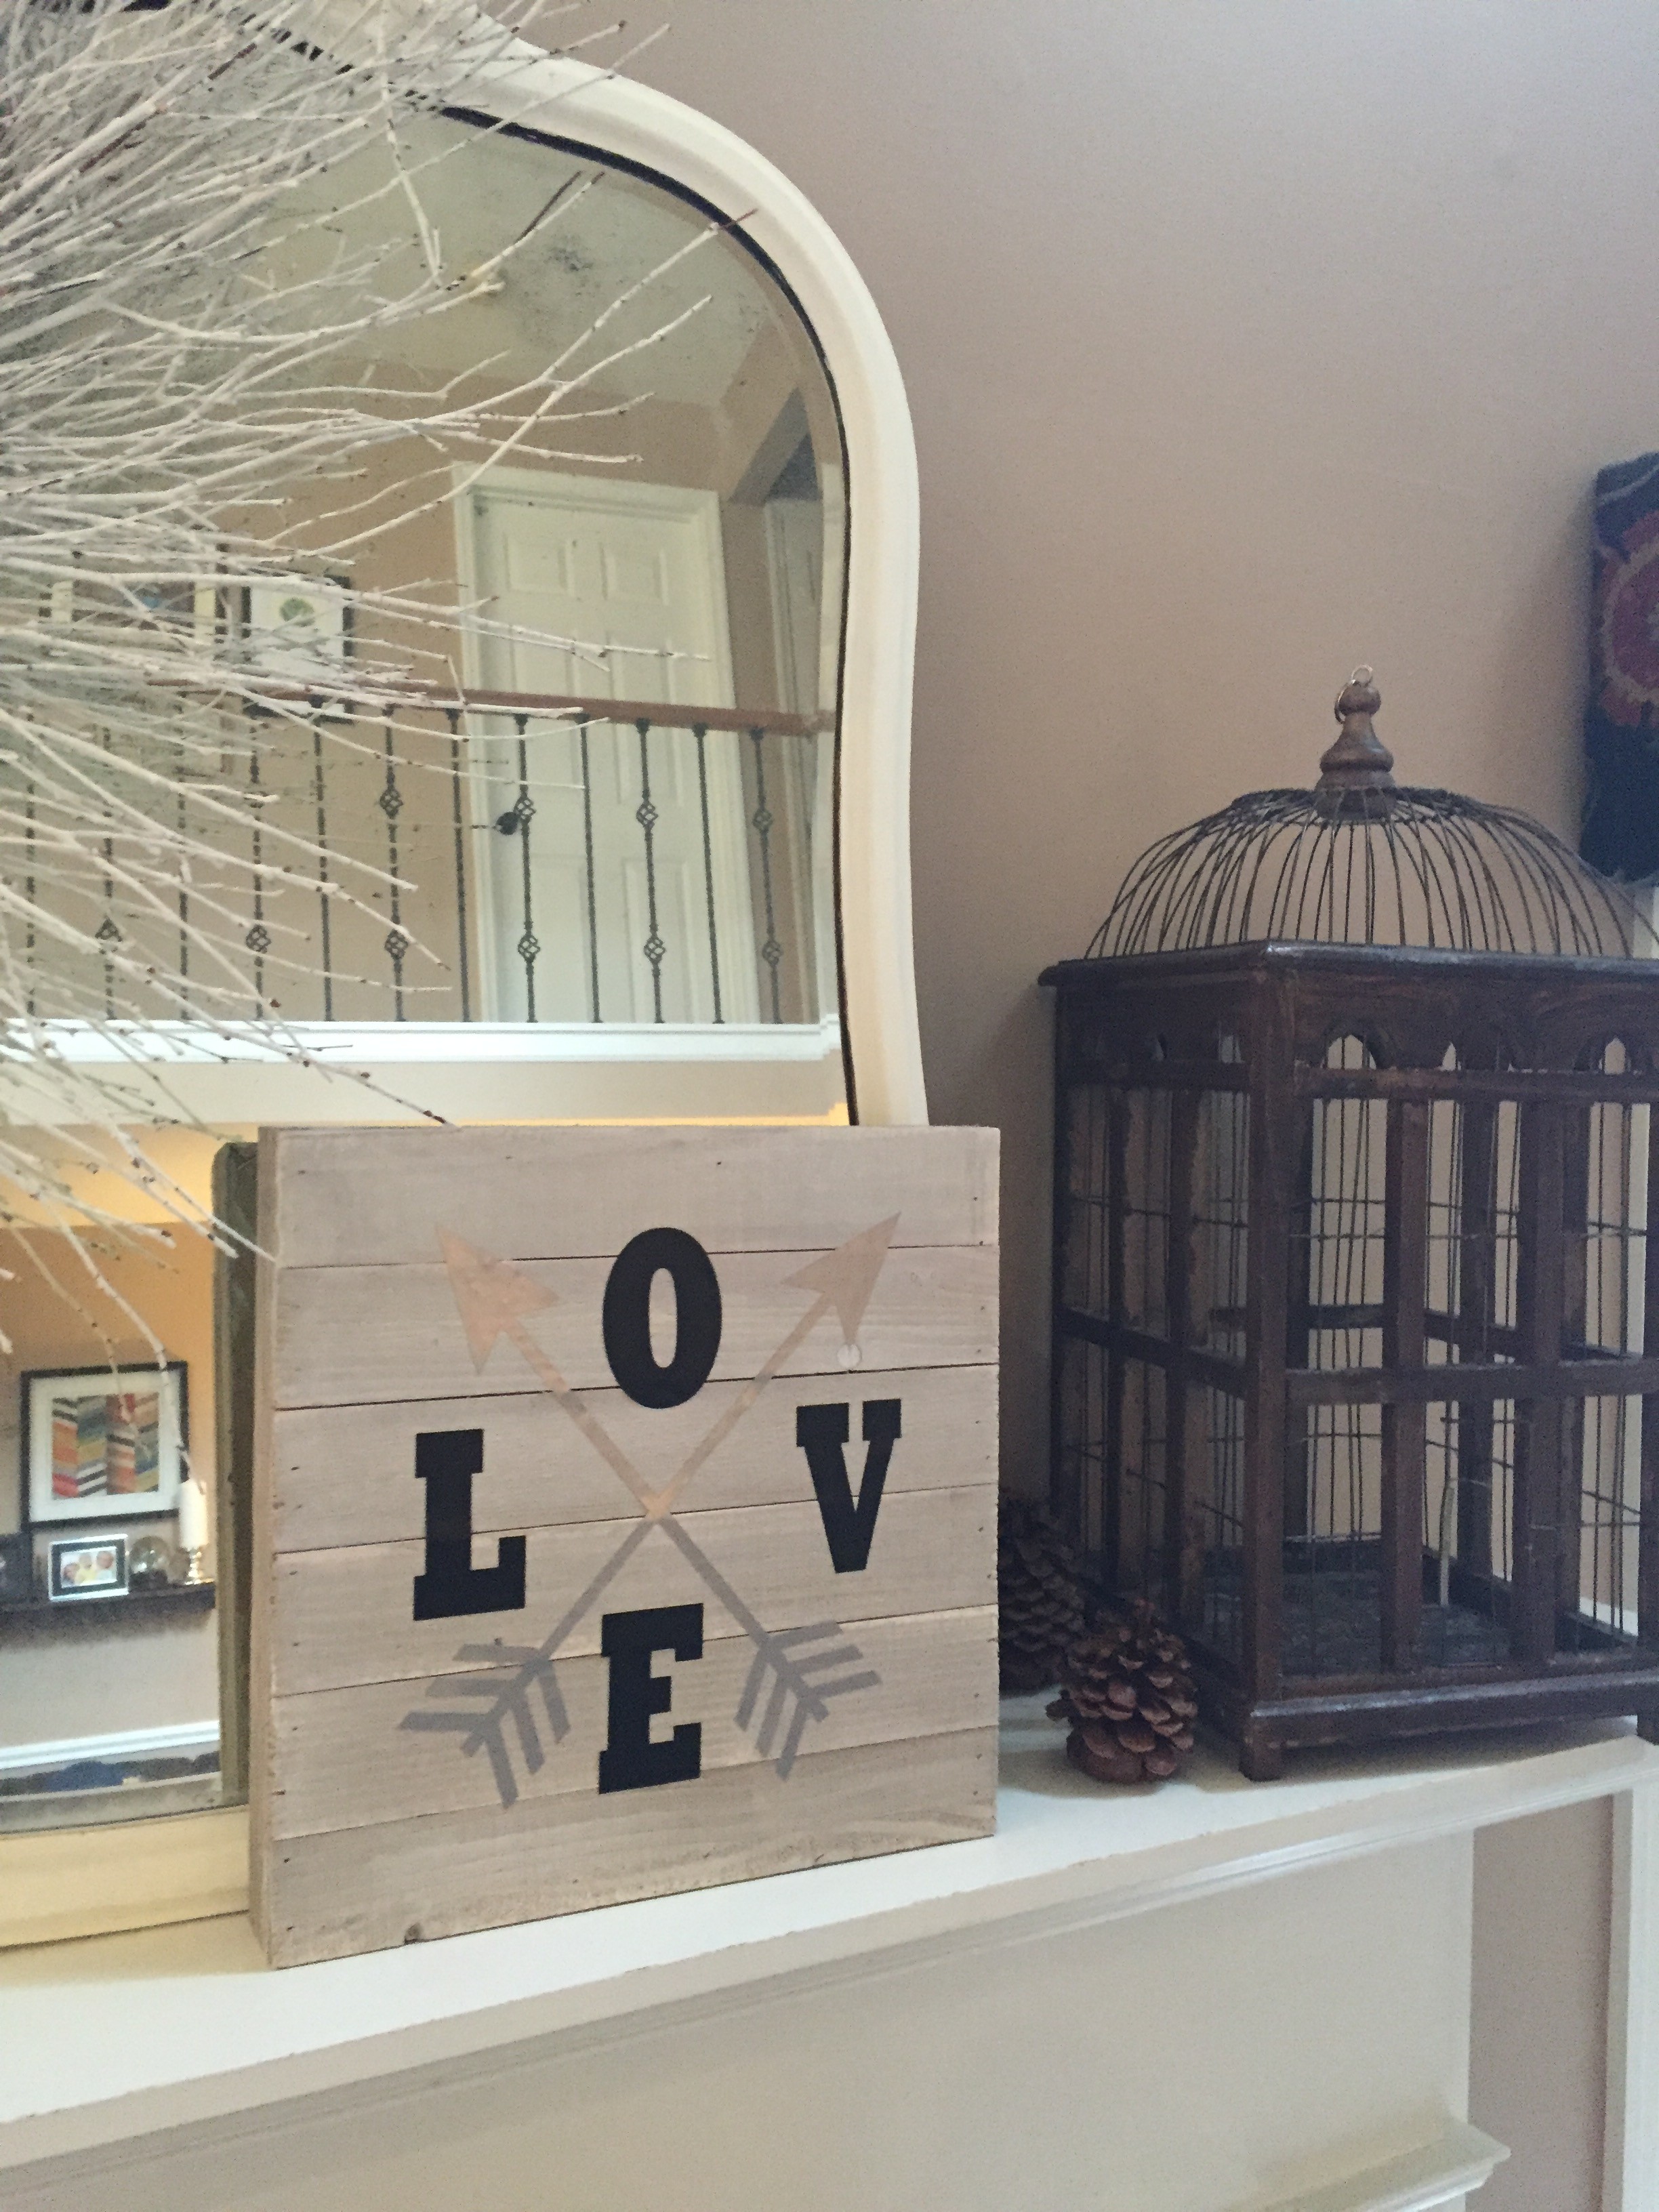
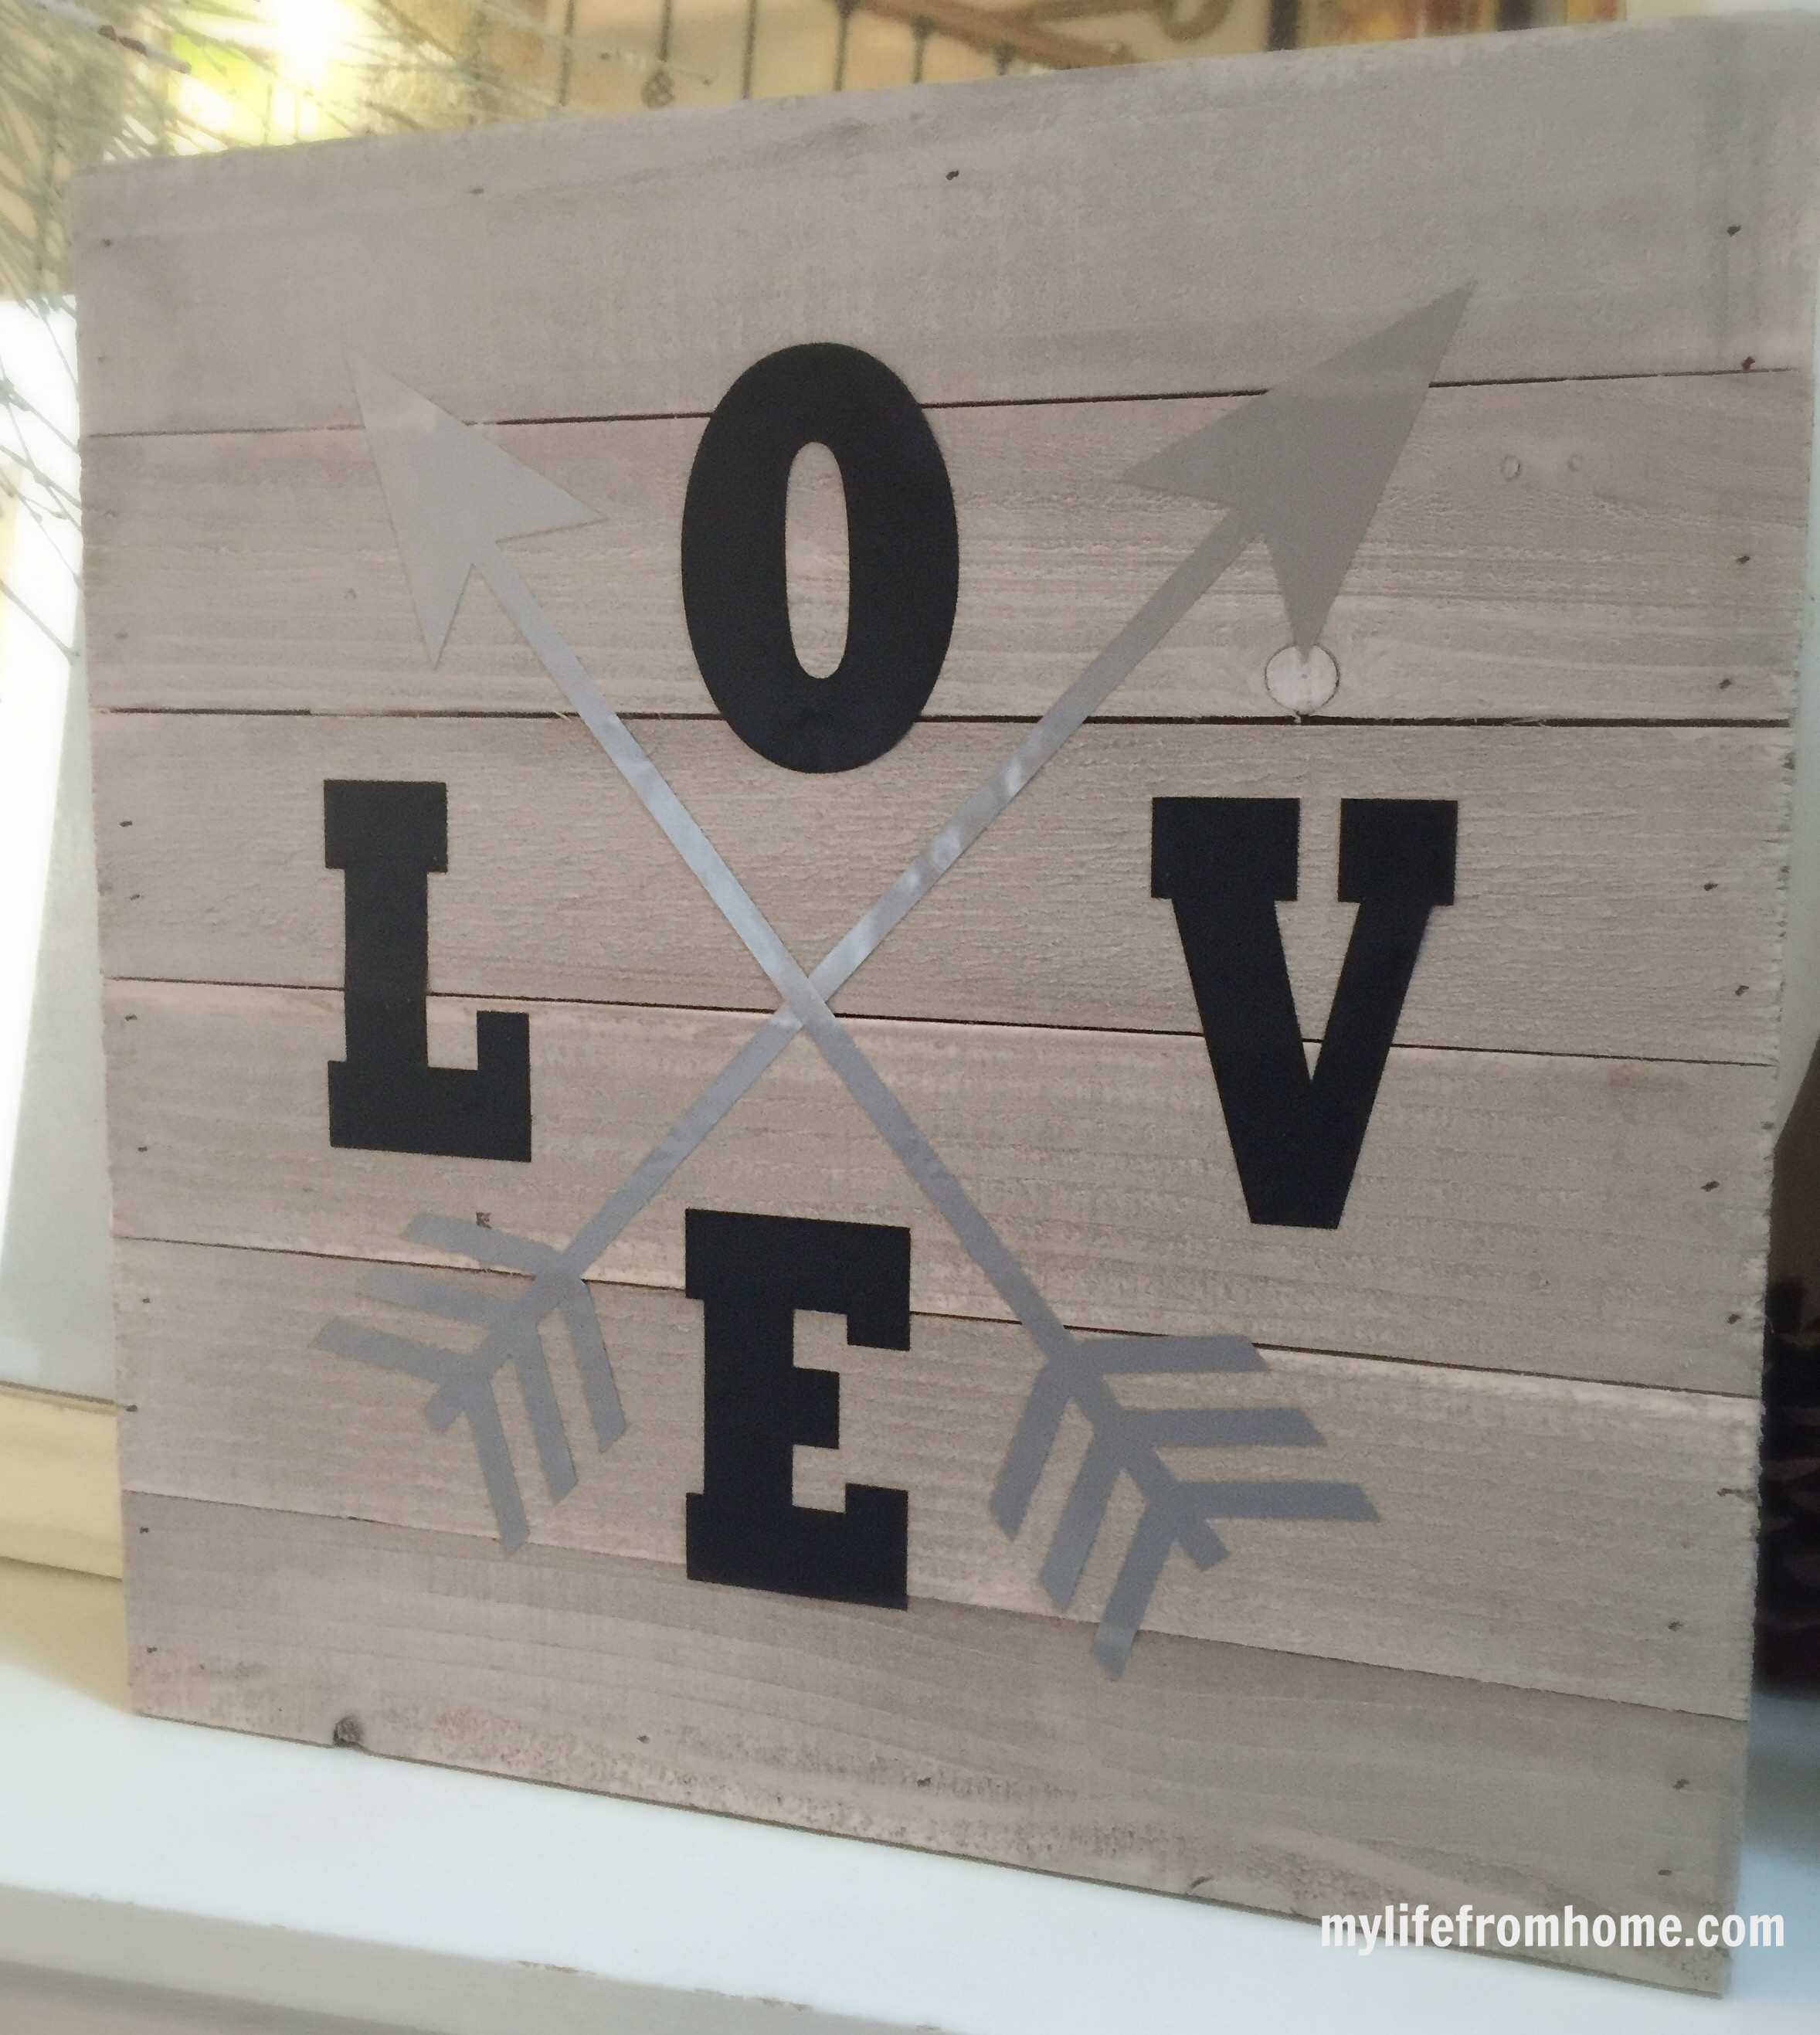
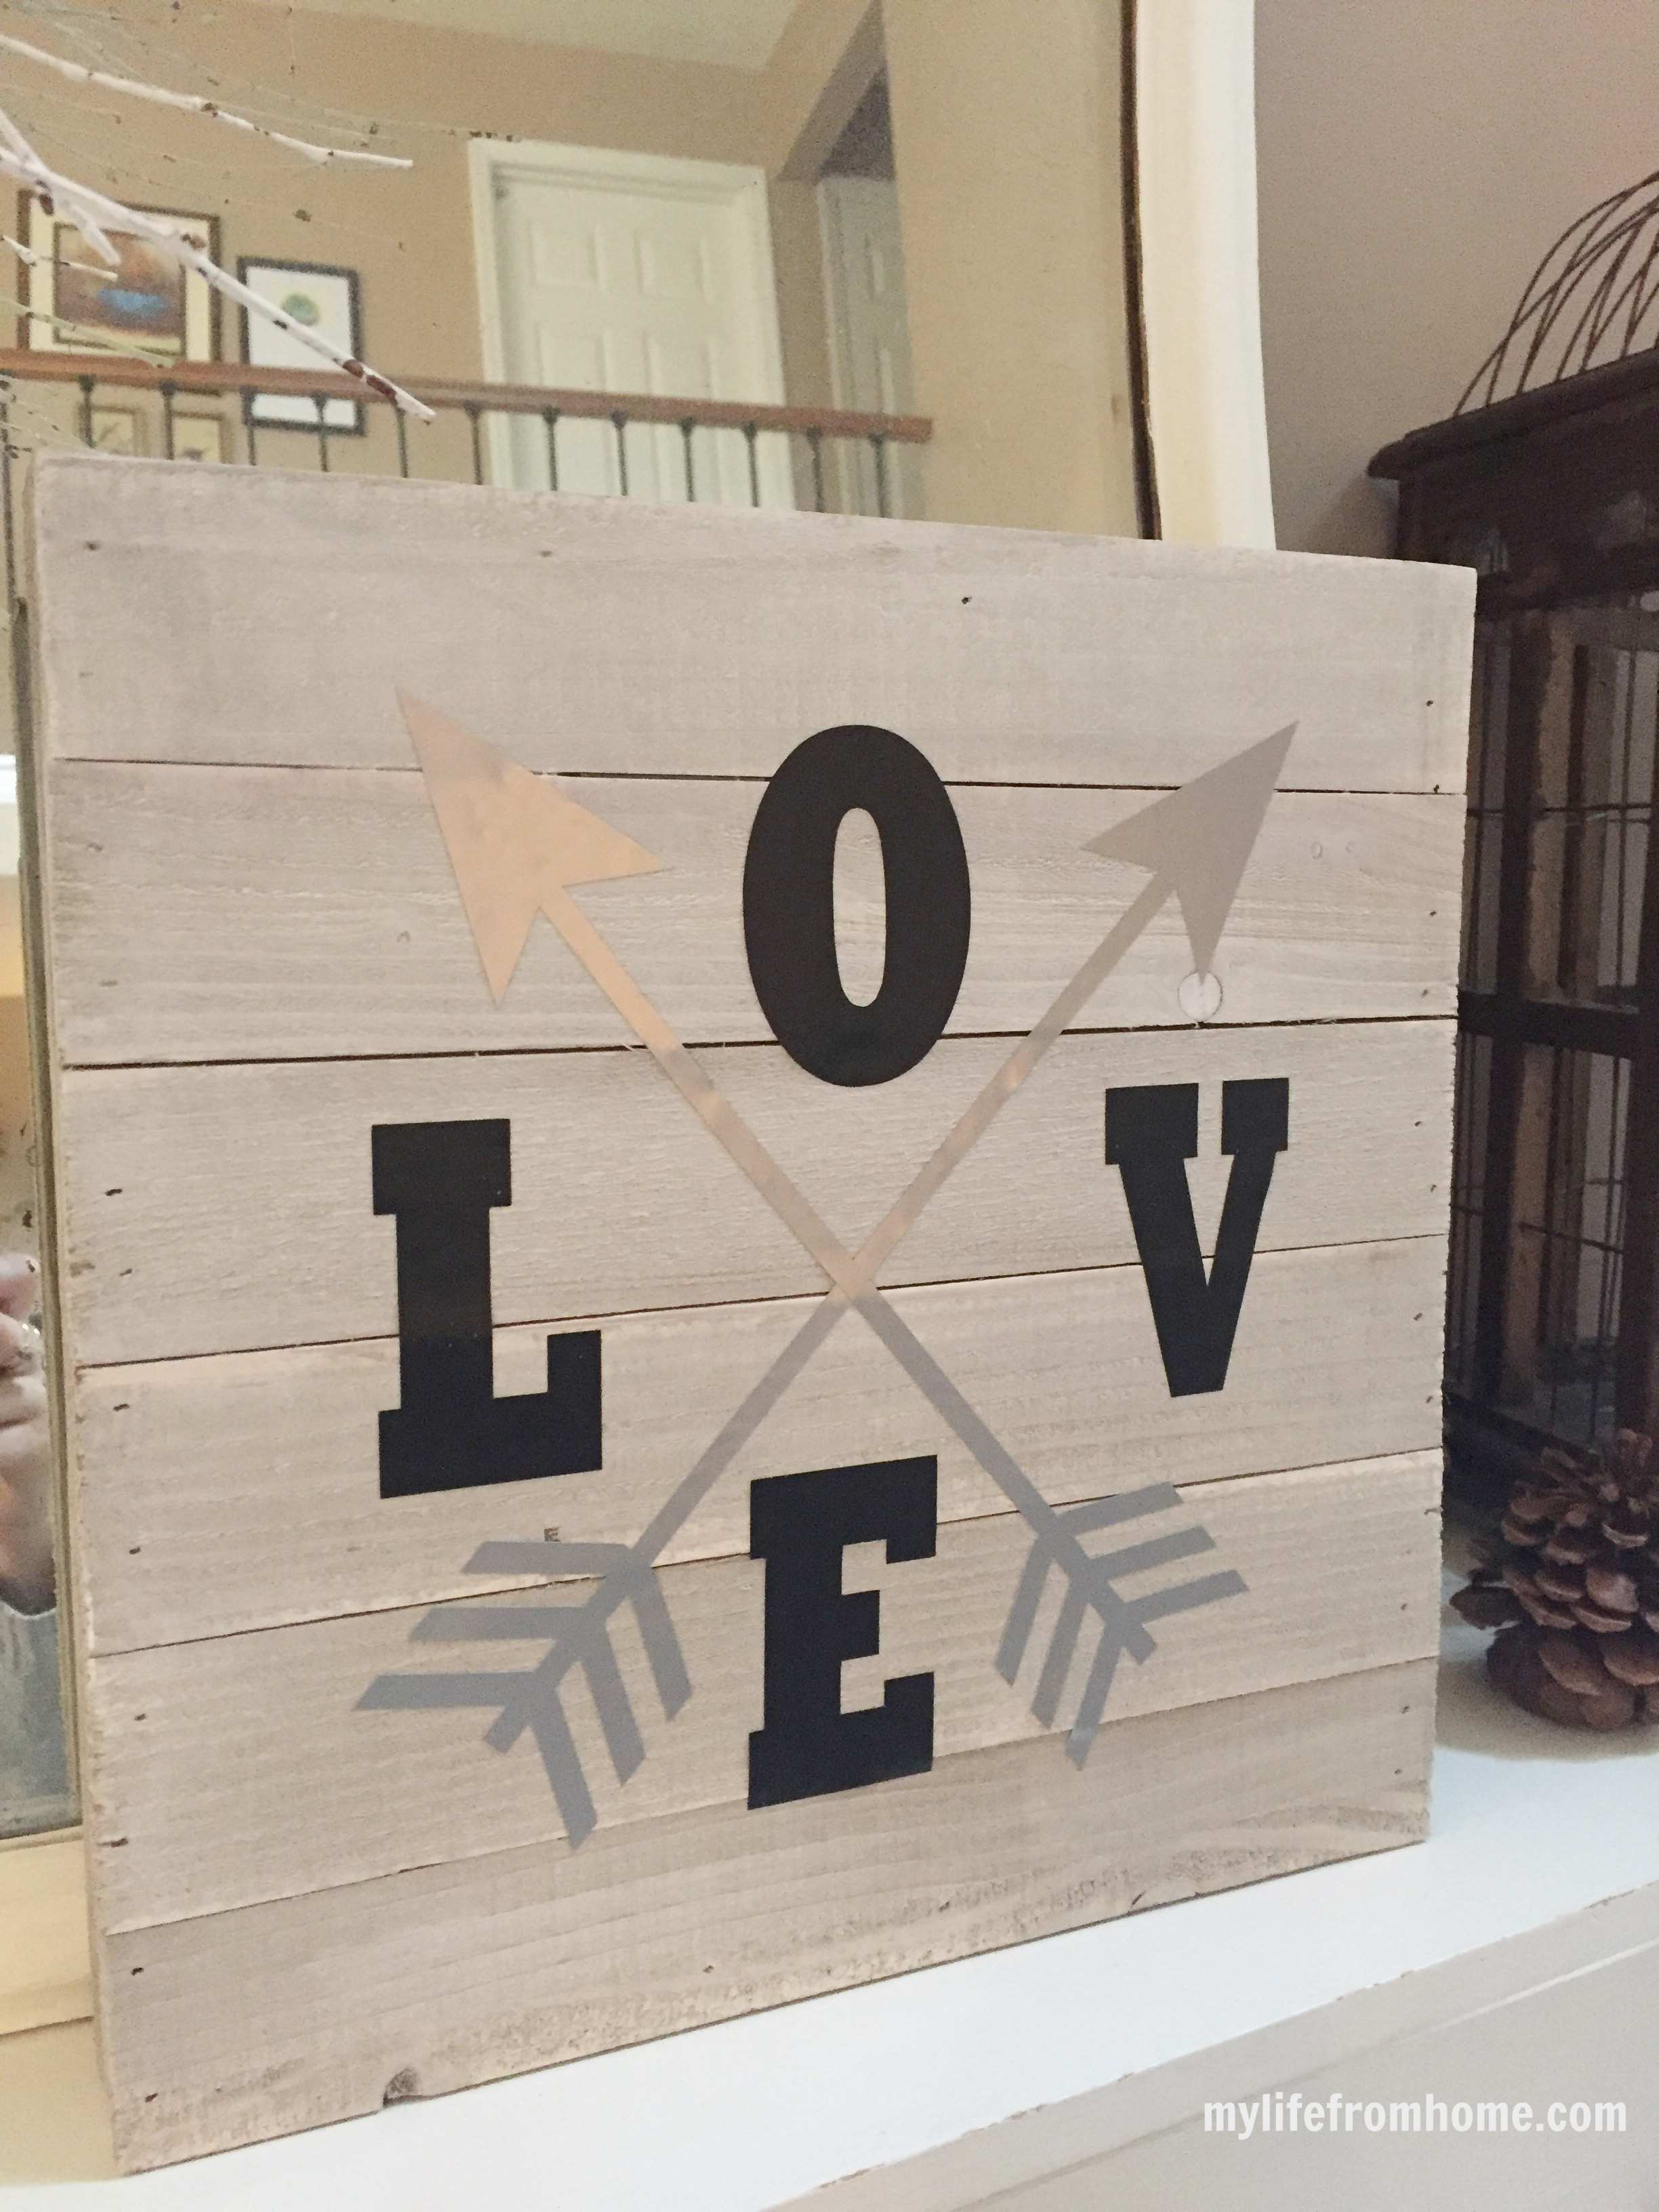
So I made a little whitewashed pallet sign. It’s soft, it’s rustic, it’s finished in white, black and silver, and it took me one relaxed afternoon. It’s the easiest DIY Valentine’s Day pallet sign I can think of, and the best part is that it doesn’t scream “holiday decor”, which means I can leave it up all winter.
If you love a home that feels pulled together and a bit luxurious, but you also like making things yourself and keeping the budget sensible, this one’s for you.
Why I went neutral for Valentine’s Day
Red and pink are lovely, but they’re loud. My mantel is already styled for winter in creams, whites, soft greys and a bit of metal, and I didn’t want one bright red object pulling the whole look apart.
Sticking to white, black and silver does something nice. It keeps the sign feeling grown up. The whitewashed wood gives it that soft, lived-in texture, the black lettering gives it contrast, and the silver arrows catch the light just enough to feel a little special.
It’s the same idea I use all over my home: simple materials, handled thoughtfully, so that everyday things feel a bit more luxurious. You don’t need to spend a fortune for that effect. You need a good colour palette and a bit of patience.
What you’ll need
This is a short list, which is half the appeal.
- A small wooden pallet sign. I used a Walnut Hollow Rustic Pallet, 11 by 11 inch from Amazon. It’s a nice size for a mantel or shelf, and the wood already has lovely character.
- White craft paint. I had some left over from another project, so I didn’t need to buy any. Any basic white acrylic will do.
- Water and a soft cloth. For the whitewash effect.
- Fine sandpaper. Just for a quick smooth over.
- Vinyl in your chosen colours. I used black for the word and silver for the arrows.
- A cutting machine. I used my Silhouette to cut the lettering, but you don’t strictly need one (more on that below).
- A credit card or similar straight edge. For smoothing the vinyl down.
That’s genuinely it. Even if you buy everything from scratch, it’s an inexpensive project, and the pallet itself is the only thing that really needs buying.
How to make your DIY Valentine’s Day pallet sign
Step 1: Give the pallet a light sand
Pallet wood is gorgeous but it can be rough, and you’ll want a surface that feels nice to touch and gives you a smoother base for the vinyl later.
I did a quick, minor sanding over the front and edges. You’re not trying to strip anything back, just knock off the splintery bits and soften the surface. A few minutes is plenty. Wipe away the dust afterwards so it doesn’t get trapped under the paint.
Step 2: Water down your white paint
This is the step that makes it look like a whitewash rather than a painted board.
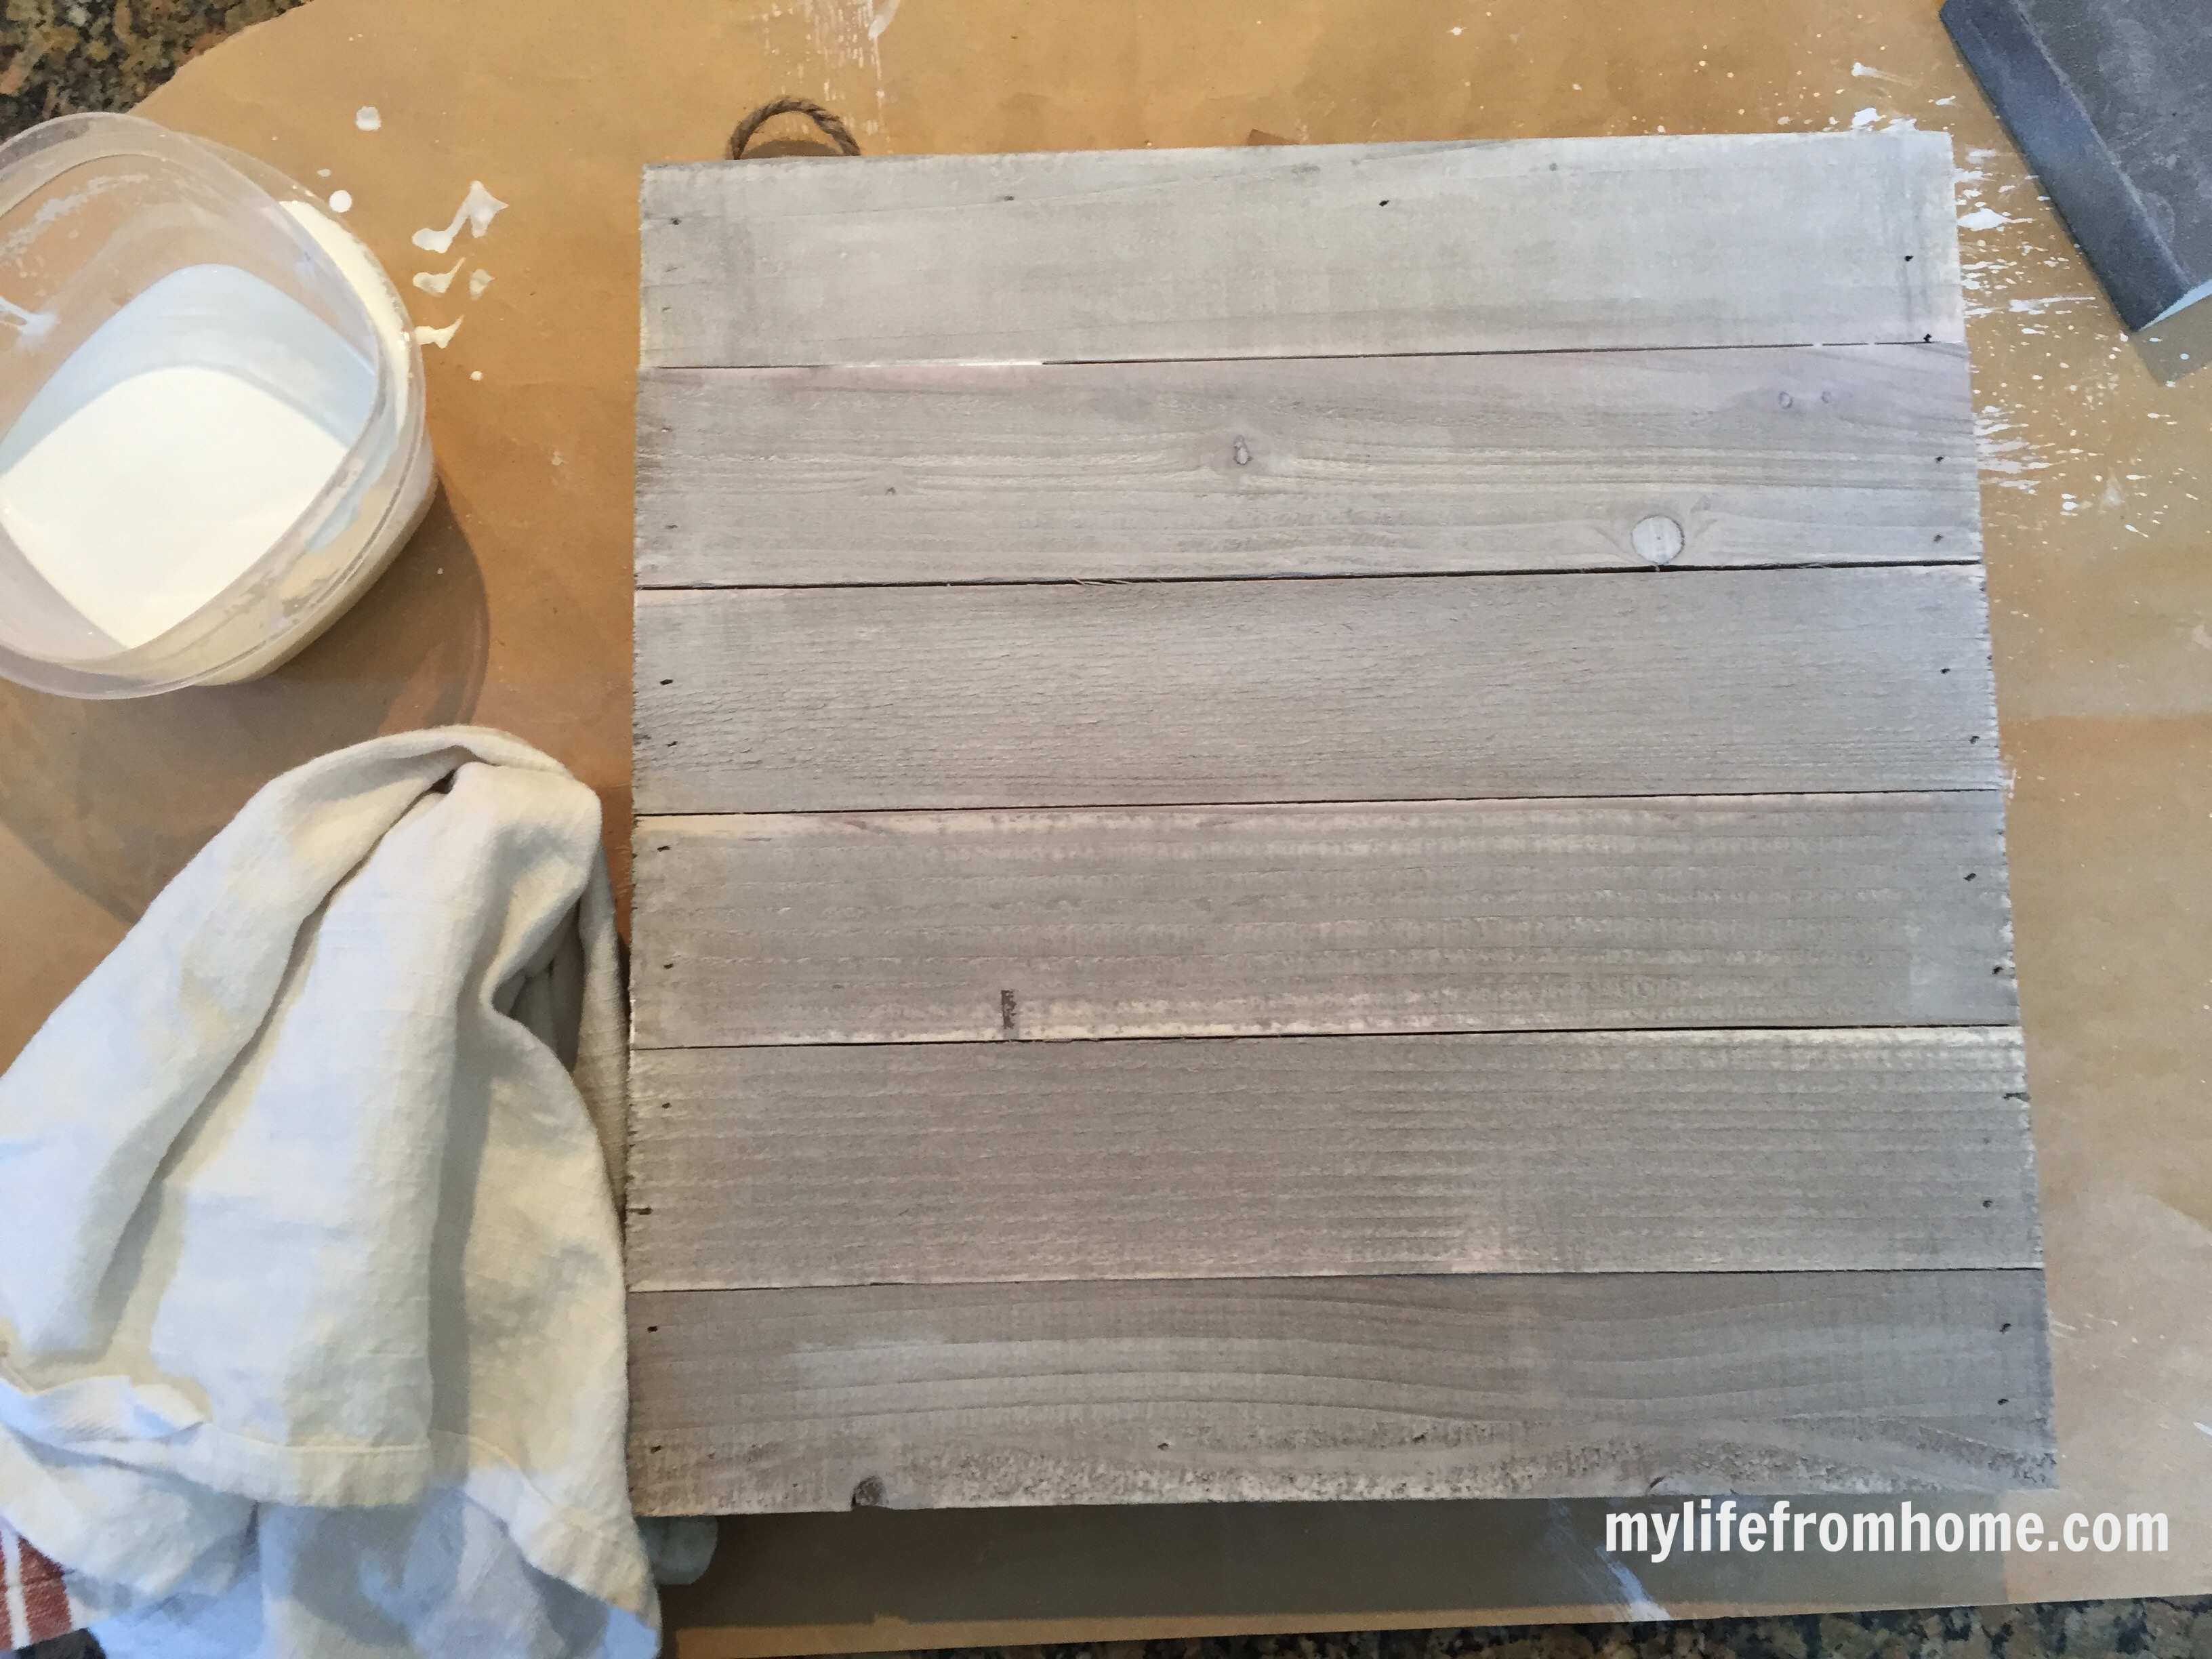
I mixed some white craft paint with water until it was thin and milky. I wanted the rustic grain of the wood to show right through, with just a soft veil of colour over the top. If you use the paint straight from the pot, you’ll lose all that lovely texture, so don’t be shy with the water.
If you’re not sure, test it on the back of the sign first. You can always add more paint to make it stronger or more water to make it softer.
Step 3: Rub it on with a cloth
I started off with a paintbrush, but because the mixture was so runny, it kept dripping and spraying everywhere. Not ideal on a kitchen table.
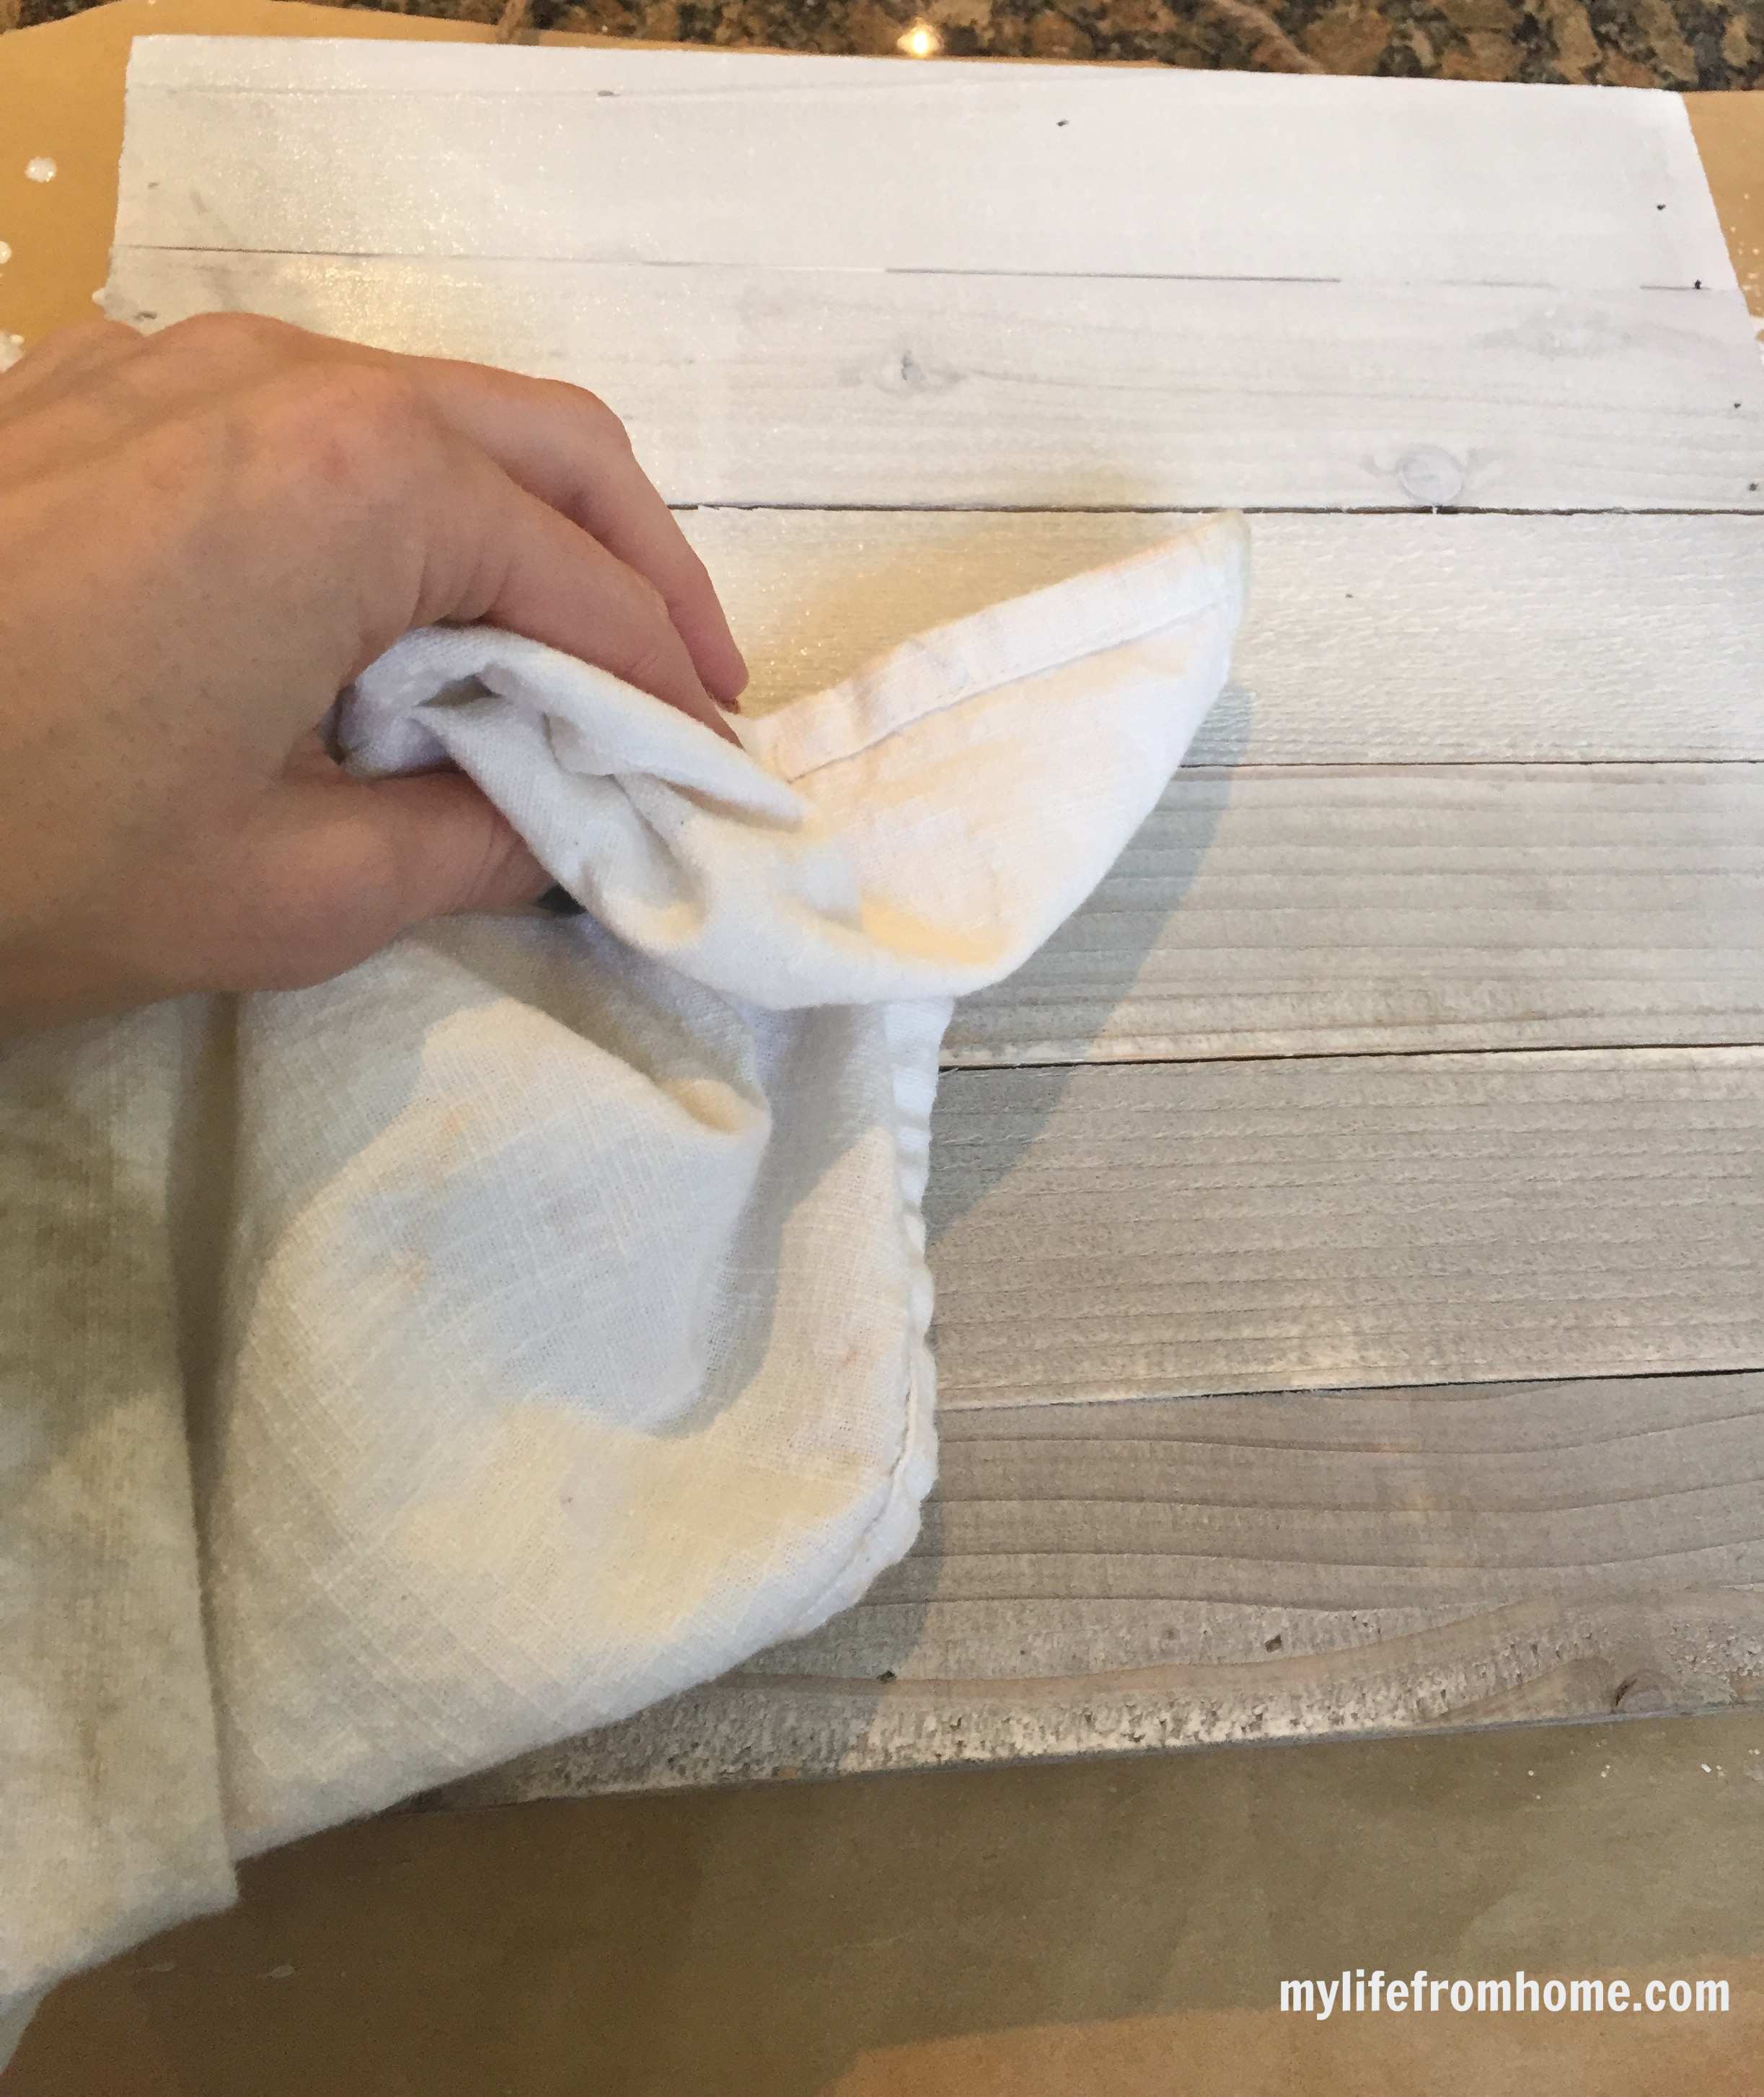
So I switched to a cloth and simply rubbed the paint onto the wood. It was easier, tidier, and honestly gave a better result. The cloth pushes the whitewash into the grain and leaves a soft, even finish with no brush marks.
Work in the direction of the grain, and wipe back any patches that look too heavy. Then leave it to dry completely before you move on. Rushing this part is the one thing that will cause you trouble later.
Step 4: Cut your vinyl
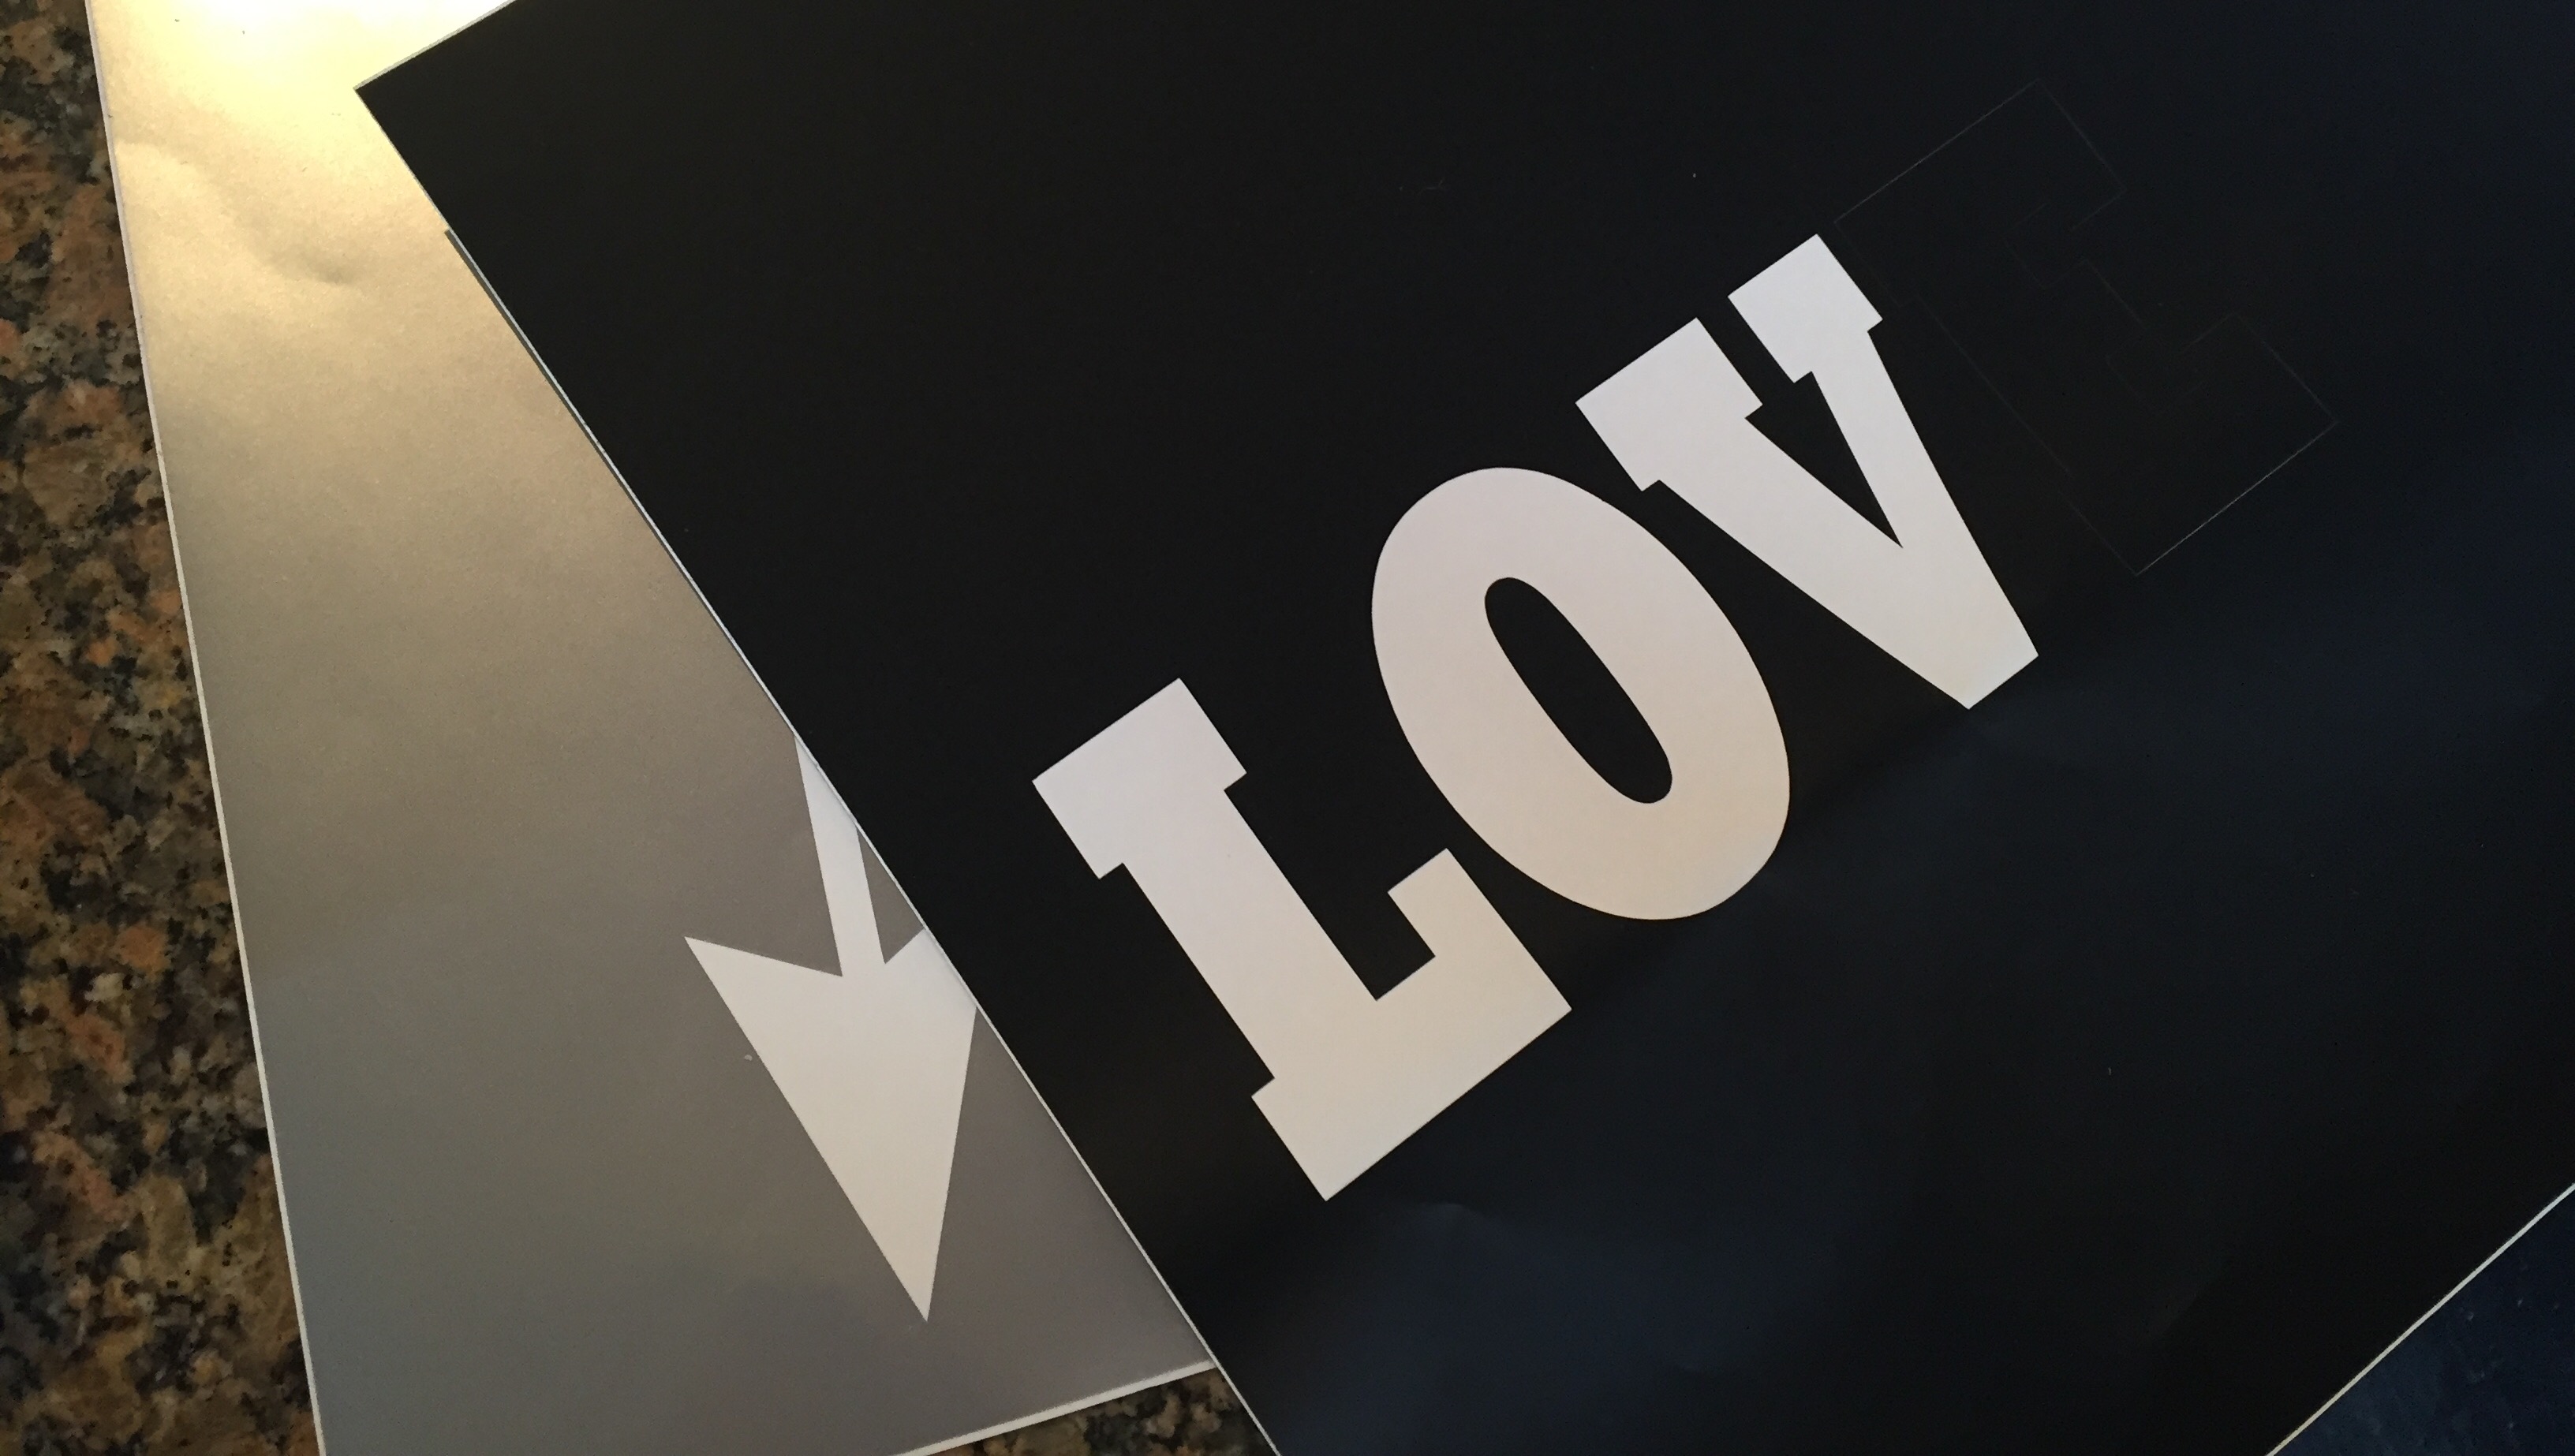
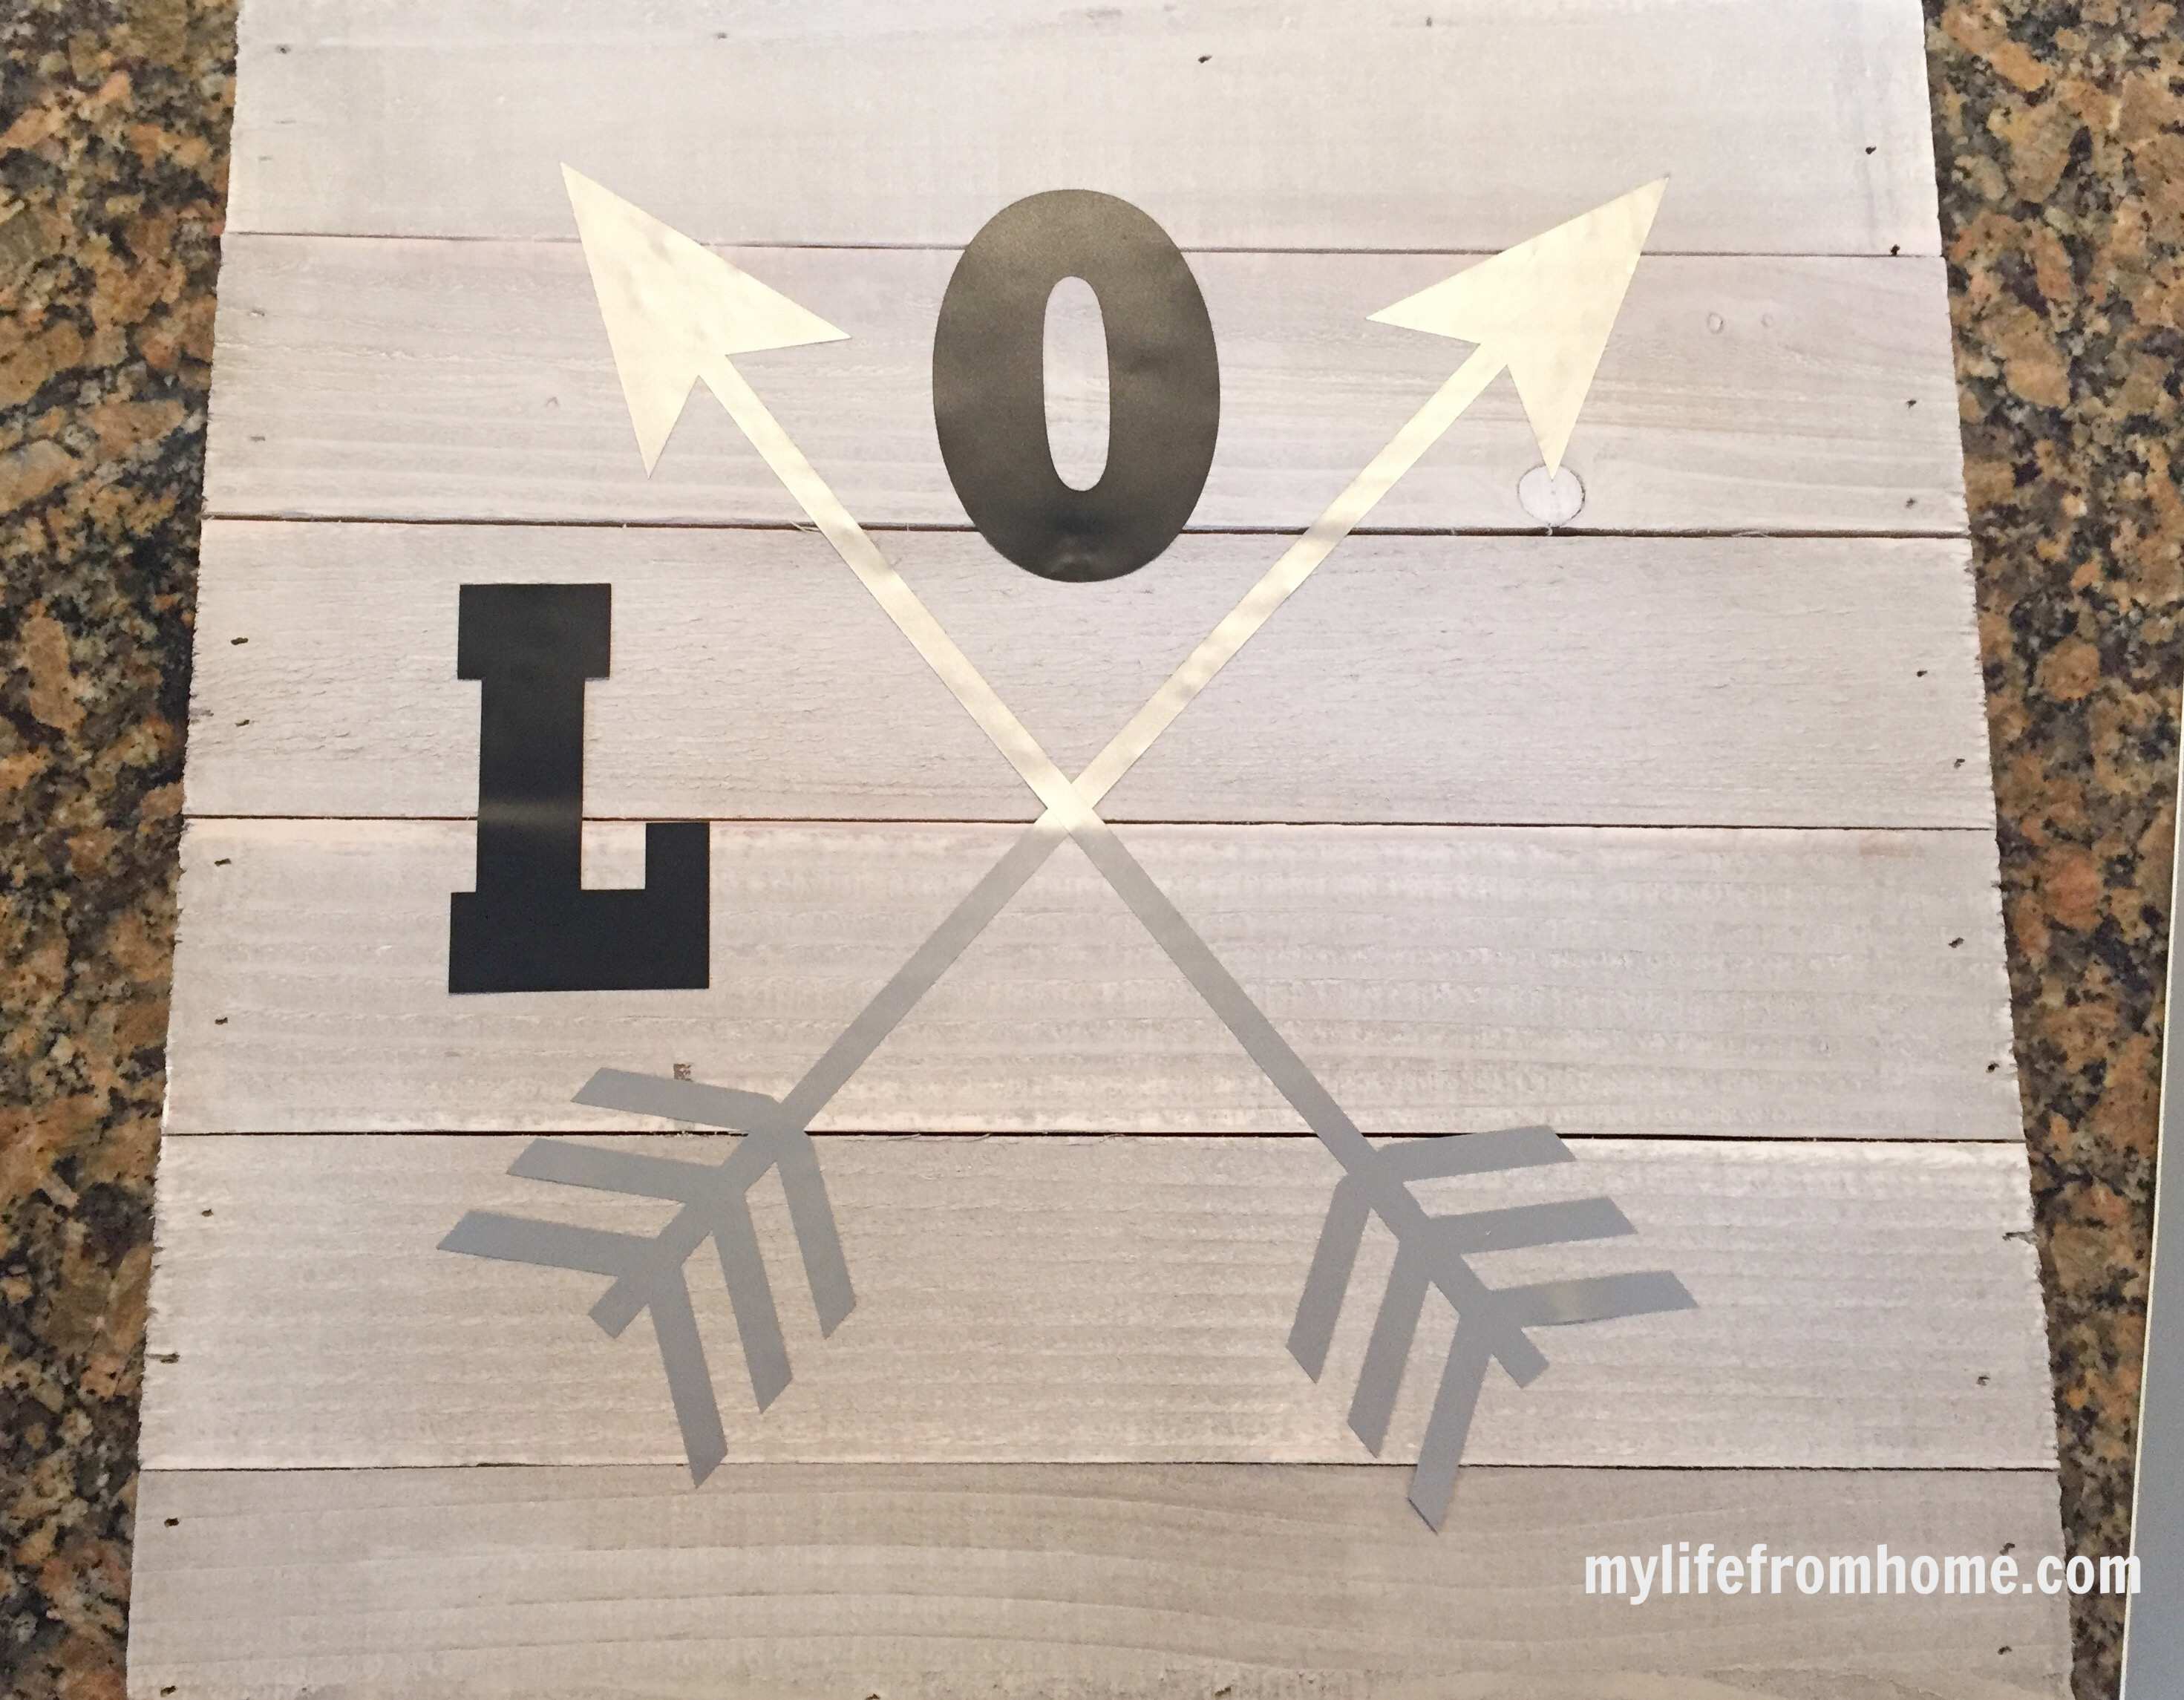
Once the sign was dry, I used my Silhouette machine to cut the word LOVE and two arrows out of vinyl. Black for the word, silver for the arrows.
I like arrows because they add a little movement and a nod to Cupid without being cheesy. One on each side of the word gives it a balanced, finished look.
Step 5: Stick it down and smooth it out
Peel away the excess vinyl, apply transfer tape, and position your lettering on the sign. Take your time here, and step back to check it looks straight before you press down.
Once it’s in place, go over it with a credit card or any other straight edge to smooth out bumps and bubbles. Press firmly, especially around the edges of the letters, so the vinyl sticks properly to the textured wood.
Peel back the transfer tape slowly, and you’re done.
No cutting machine? No problem
I know not everyone owns a Silhouette or a Cricut, and I don’t want that to put you off. There are plenty of other ways to get the same look:
- Stencils. Buy a letter stencil set and dab on black paint with a sponge brush.
- Letter stickers. Chunky craft shop stickers work surprisingly well on a whitewashed background.
- Hand lettering. If you’ve got a steady hand and a fine paint pen, write it freehand for a more personal touch.
- Wooden letters. Glue on small wooden letters painted black for a raised, three dimensional finish.
Whichever method you choose, keep it simple. A single word in a strong colour against pale wood is what makes this sign feel so polished.
Styling your pallet sign
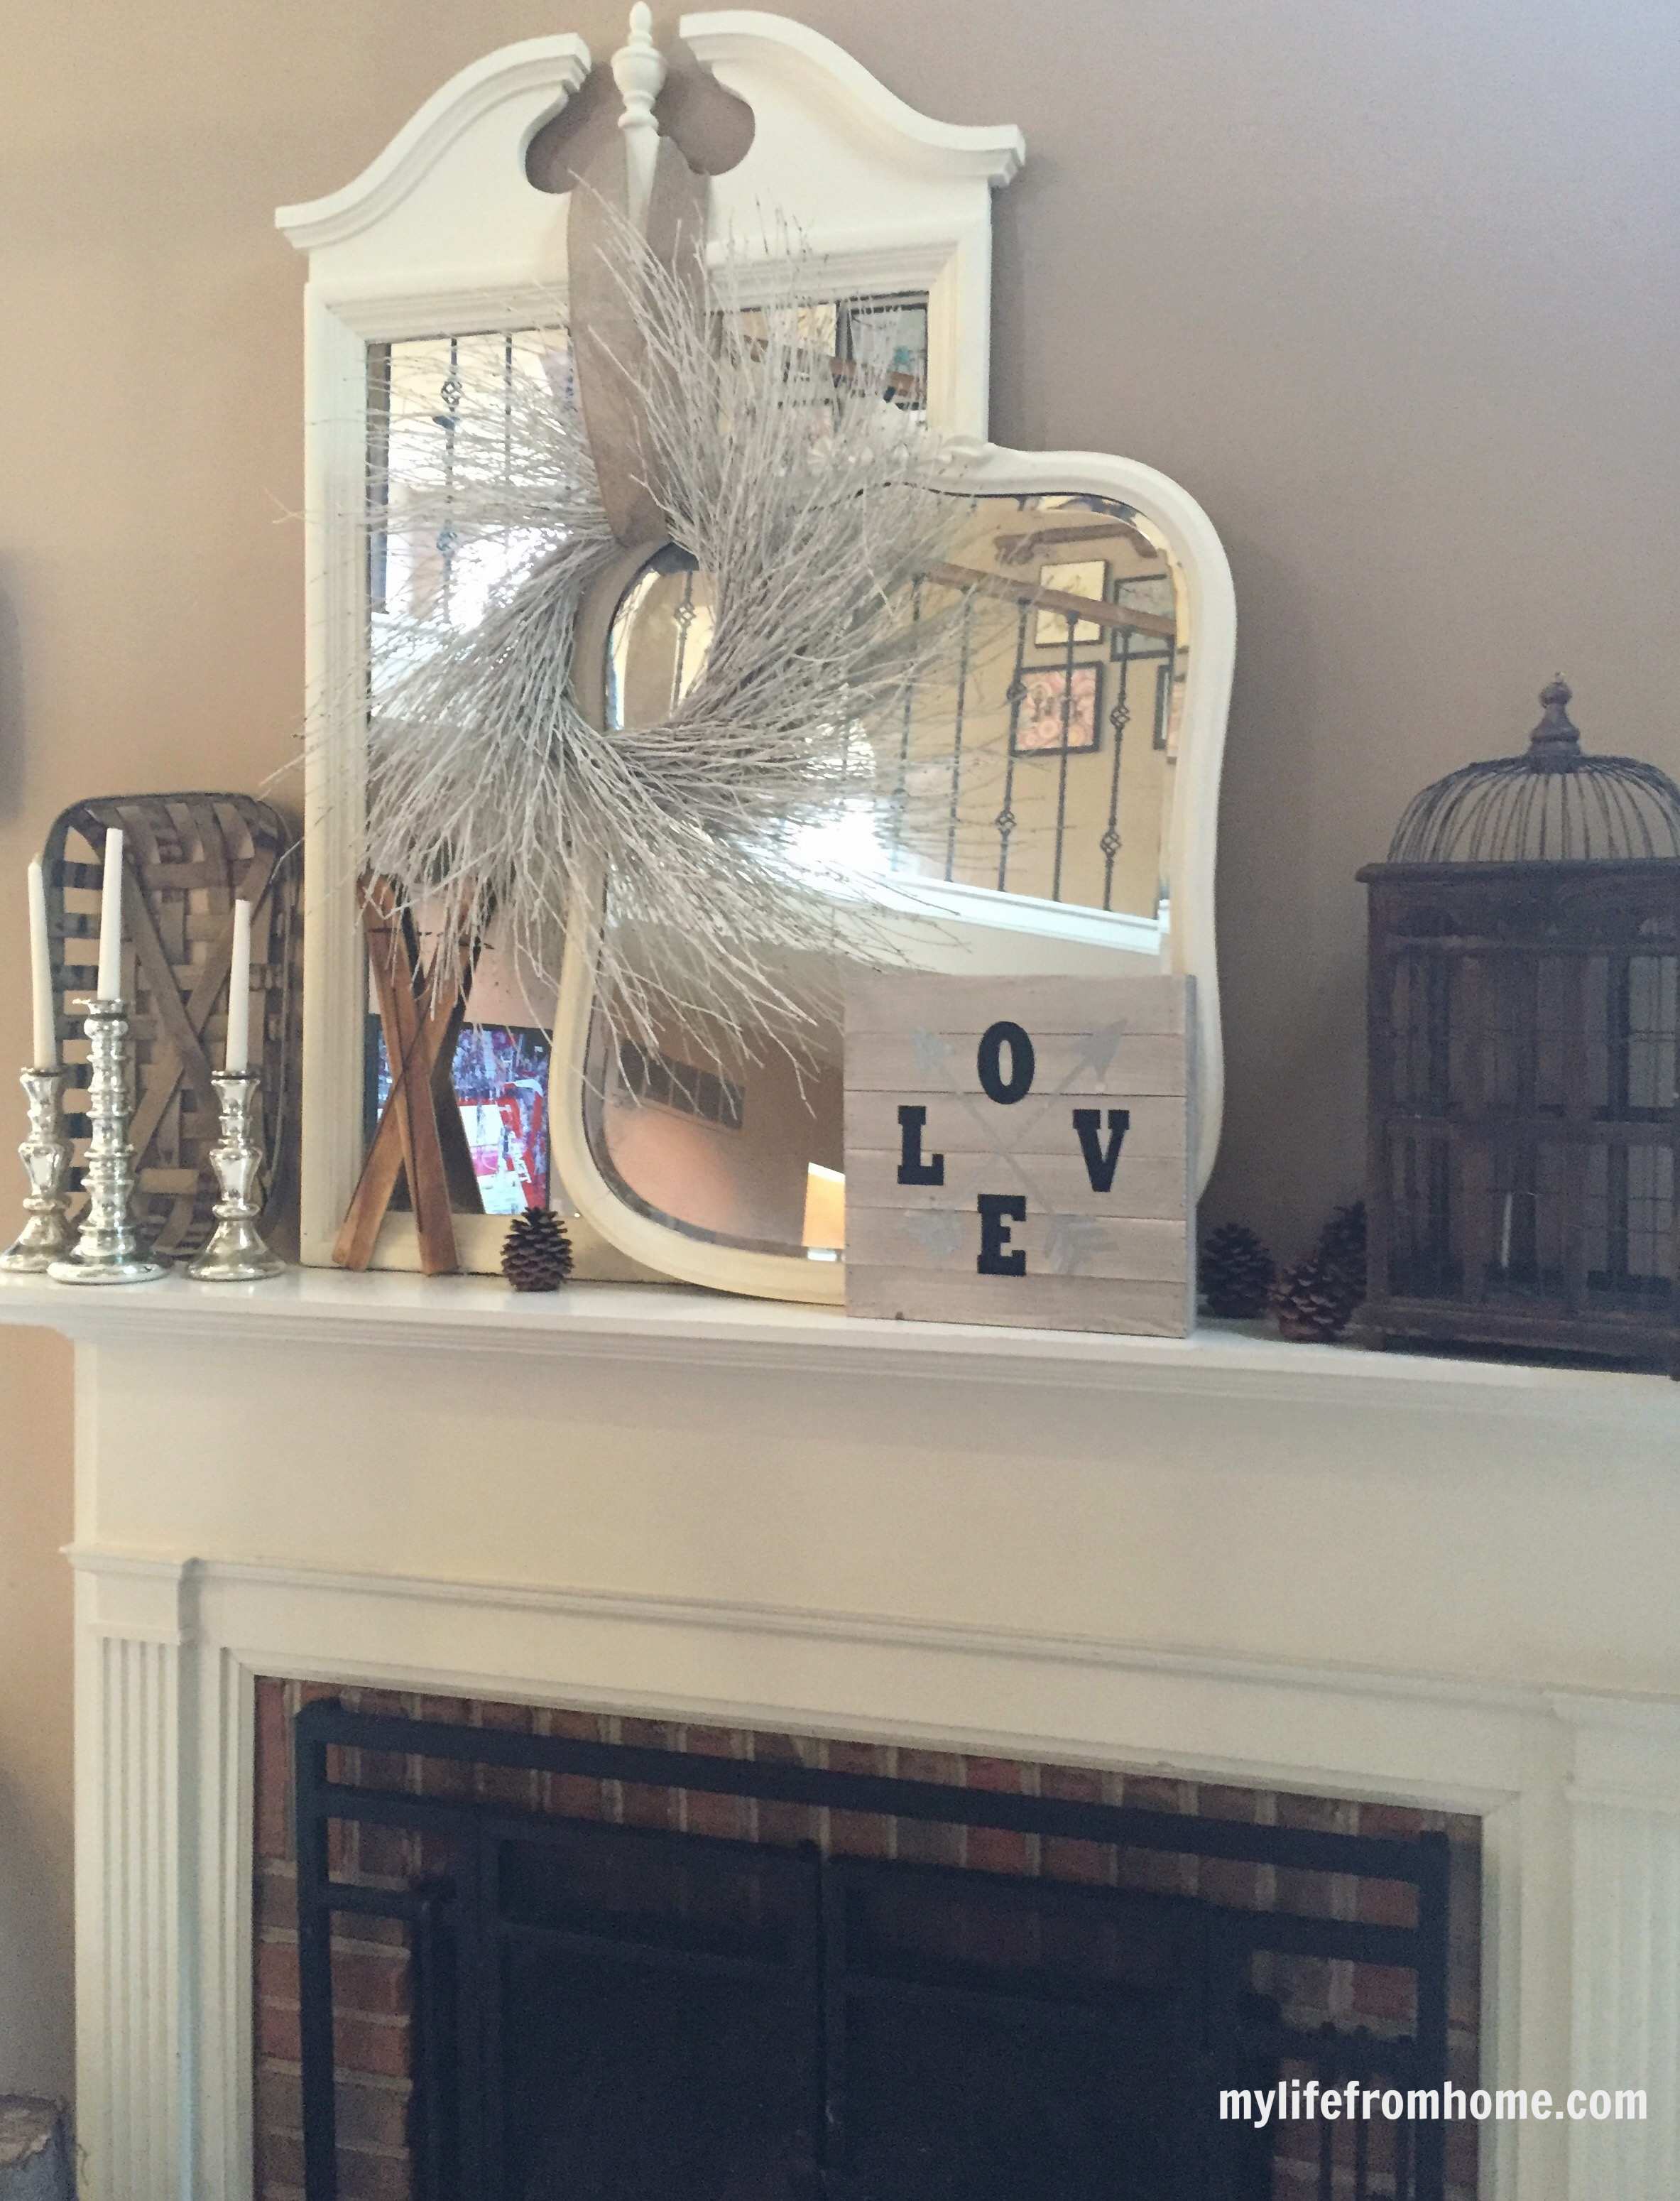
I’ve got mine on the mantel with the rest of my winter decor, and it works because it blends in rather than competing. Here are a few ways to style yours:
- Lean it against the wall on a mantel or shelf, with a few candles and some greenery nearby.
- Pair it with metallics. Silver or brushed gold frames and candle holders pick up the arrows nicely.
- Layer textures. A chunky knit throw, a linen cushion or a little ceramic dish all add warmth.
- Keep the rest calm. One statement piece is enough. Let the sign be the star and keep the surrounding styling quiet.
That’s the quiet luxury trick, really. One well chosen detail, surrounded by plenty of breathing space.
Easy ways to change it up
Because the project is so simple, it’s easy to make it your own:
- Swap LOVE for XOXO, HOME, or your family’s last name.
- Use gold or rose gold vinyl for the arrows if silver isn’t your thing.
- Go for a grey or soft taupe wash instead of white.
- Make a set of two or three smaller signs for a shelf or gallery wall.
- Add a loop of twine or ribbon so you can hang it on a door.
If you do want a pop of colour, a very soft blush pink wash would look gorgeous and still feel sophisticated.
Tips for the best finish
A few things I learned along the way:
- Thin your paint more than you think you need to. You can always build it up.
- Don’t oversaturate the wood. Too much water can cause the pallet to warp slightly, so wring out your cloth well.
- Let everything dry fully before applying vinyl, or it won’t stick properly.
- Burnish the vinyl firmly. The wood grain is bumpy, so you need good contact for clean edges.
- Seal it if you like. A light coat of clear matte sealer will protect it, though I left mine as it was and it’s holding up beautifully.
Frequently asked questions
You can, but I’d recommend at least a light sand. It makes the surface nicer to handle and helps the vinyl sit more evenly.
Any basic white acrylic craft paint is fine. Just thin it down with water until it’s more like milk than cream.
Yes, as long as the wood is dry and you smooth the vinyl down firmly. Pressing it into the grain with a credit card makes a big difference.
Most of the time is drying. The hands on work is only about half an hour, so it’s a lovely project for a quiet afternoon.
Absolutely. That’s exactly why I chose neutral colours. Mine is staying on the mantel all winter.
Final thoughts
This little sign has become one of my favourite things on the mantel. It cost very little, it took hardly any effort, and it adds just the right amount of love to the room without taking over.
That’s what I enjoy most about making things for the home. You don’t need a big budget or a huge amount of skill to create something that feels thoughtful and a bit luxurious. You just need a nice idea, a calm colour palette and a spare afternoon.
If you make your own DIY Valentine’s Day pallet sign, I’d love to hear how it turns out. Leave a comment below and tell me which colours you chose.
Leave a Reply
If you like the sort of recommendation that still holds up six months later, leave your email below and I'll write to you on Sunday.
Most Sundays, once the house has gone quiet and it's edging towards nine, a letter goes out. It's the one I'd write to a friend with good taste and not nearly enough time: one thing worth reading, one thing worth buying, and one thing to skip. No noise, no pressure to spend, just the considered version of what I've actually been using, loving, or quietly sending back.


January 25th, 2016 at 8:44 am
Amy – we love rustic inspired signs and yours is just wonderful! Arrows are a definite fave too! So happy to share the hop with you . Cheers to a wonderful week!
January 25th, 2016 at 6:47 pm
Thank you so much! Such a fun hop! 🙂
January 25th, 2016 at 8:57 am
I love this little piece! It is so great! Nice job!
January 25th, 2016 at 6:48 pm
Thank you Lindsay! Such a fun hop! 🙂
January 25th, 2016 at 3:38 pm
What a modern and cute idea! I may have to make my own this weekend. Thanks for sharing!
January 25th, 2016 at 6:48 pm
Thank you Heather! I loved being a part of this hop! Such great ideas. 🙂
January 25th, 2016 at 6:53 pm
This is so pretty! I’d leave it up all year long.
January 25th, 2016 at 7:03 pm
Thanks Amy! I think I am. It’s subtle enough and fits in with my current decor. I enjoyed sharing this hop with you! 🙂
January 25th, 2016 at 9:23 pm
Amy I am a sucker for signs and I love how yours turned out. Your mantle looks amazing and the signs works perfect for it. I enjoyed hopping with you!
January 25th, 2016 at 10:34 pm
Super cute! I like the colors you chose!!
January 26th, 2016 at 8:33 pm
I’ve been wanting to create a pallet sign for our mantel for months! And this is perfect for Valentine’s Day decor! Super cute ~ Pinning!
January 26th, 2016 at 9:44 pm
Thank you Ashley! It really was much easier than I expected! 🙂
January 27th, 2016 at 7:10 am
What a great sign. I love how you used the arrows and the letters. Sharing and pinning.
January 27th, 2016 at 7:20 am
Thank you Bonbon! 🙂
February 2nd, 2016 at 11:48 am
LOVE this, Amy! 😉
February 2nd, 2016 at 4:37 pm
Thank you Emily! 🙂
February 2nd, 2016 at 2:18 pm
I have to say, I “LOVE” it!!!
February 2nd, 2016 at 4:36 pm
Thank you Michelle! 🙂
February 3rd, 2016 at 12:09 am
This is such a cute little sign! I love anything that is palette related… but those arrows really take the cake! Super cute! Thanks for linking up with us at Welcome Home Wednesdays last week… we can’t wait to see you tomorrow morning!
February 3rd, 2016 at 8:34 am
Good Morning!! I wanted to let you know that your post has been selected as a Feature for the Welcome Home Wednesdays Link Party!! Stop by this morning to see your post linked up and don’t forget to grab your “Featured” button too!!
February 3rd, 2016 at 11:51 am
Yay!! Thanks so much Lisa. 🙂
February 5th, 2016 at 1:11 pm
[…] pick : Valentine’s Day Blog Hop: Love Palette Craft @My Life From Home (PIN […]
February 5th, 2016 at 2:01 pm
These signs never get old to me. I love that you used a silver for the arrows too. So sweetly rustic!
February 6th, 2016 at 7:31 pm
It looks great with the arrows. I just wish I had a silhouette machine, I see so many lovely craft projects done using them
April 30th, 2016 at 7:12 pm
[…] I recently whitewashed a rustic pallet sign, so I decided to use that same technique on the pot. If you missed the whitewashed pallet sign, you can catch up with that post, here. […]
November 14th, 2016 at 3:39 am
[…] pick : Valentine’s Day Blog Hop: Love Palette Craft @My Life From Home (PIN […]