If you're looking for an Easter project that's genuinely fun to make, looks absolutely beautiful, and doubles as a thoughtful handmade gift, this is it.
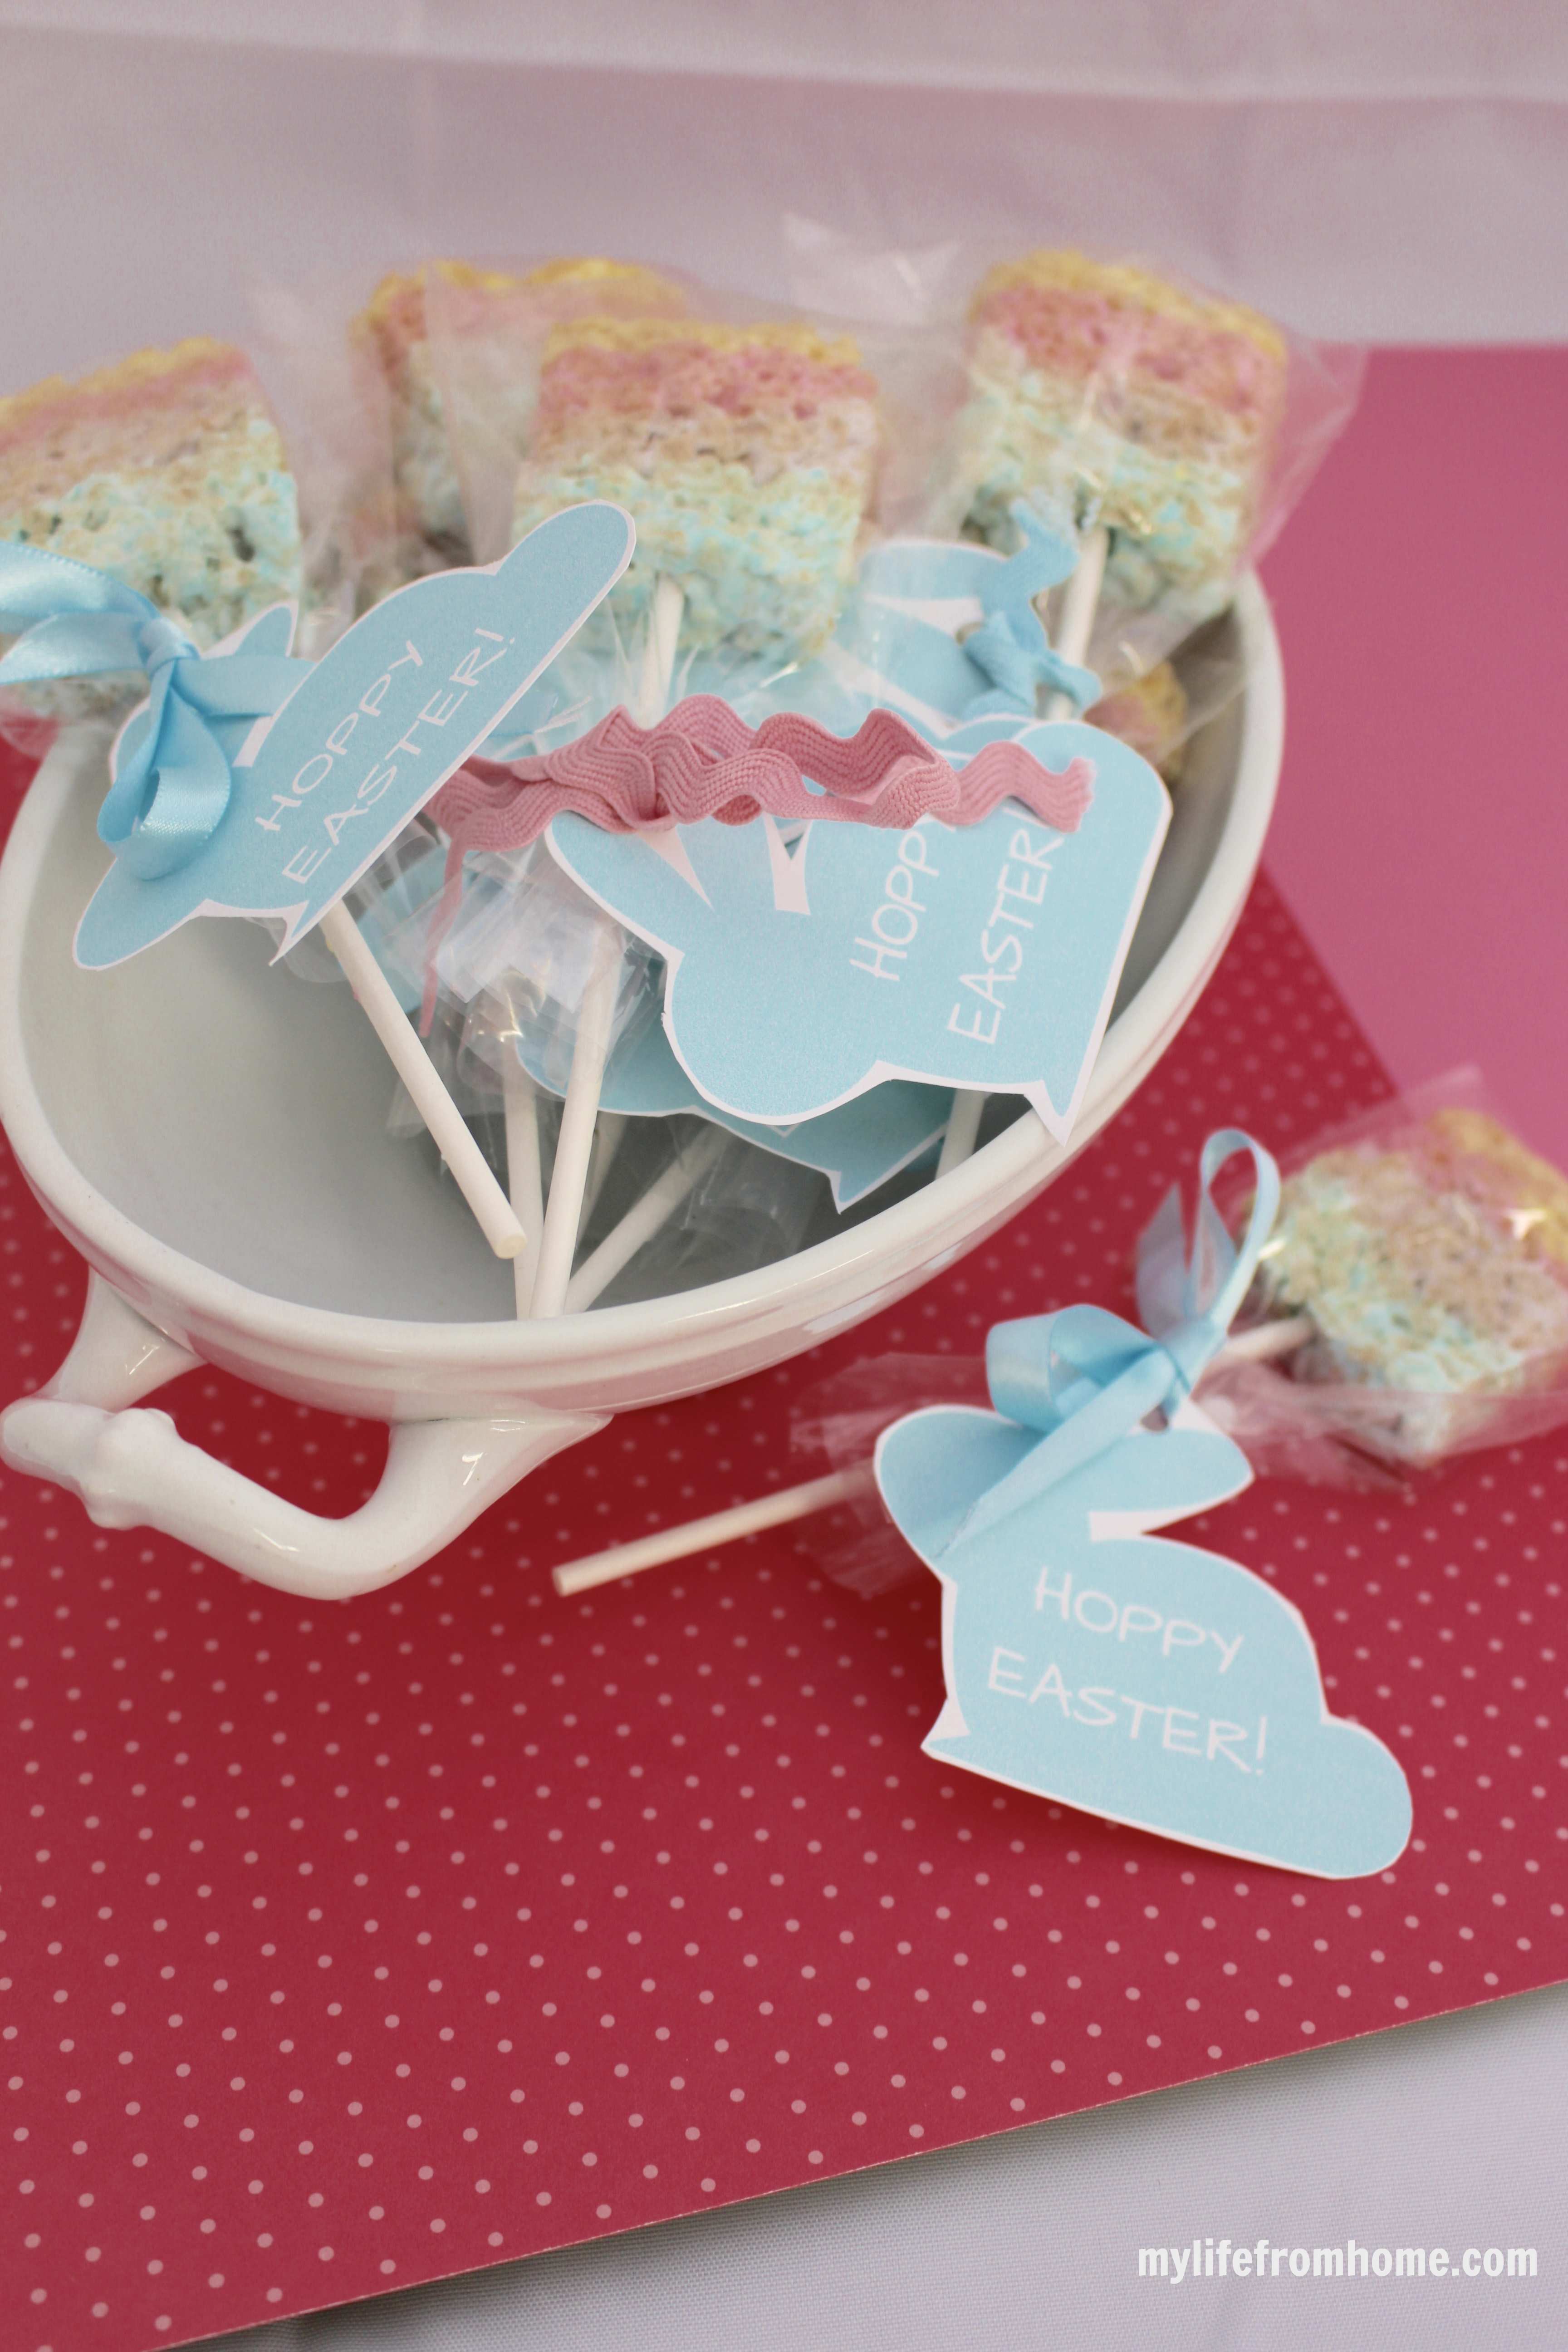
These Easter Peeps Popsicles are made from layered, coloured Rice Krispie treats using Peeps marshmallow chicks as the base. The result is a stack of pastel-coloured, striped squares on a stick that look like something from a boutique sweet shop, but cost next to nothing to make and take less than an hour from start to finish. They're the kind of thing that makes people stop and say you made these yourself? in the most gratifying way possible.
I'll be honest, I'm not a devoted Peeps fan on their own. But melted into a Rice Krispie treat? They're completely transformed. The marshmallow gets sticky and sweet, the colours stay vivid and gorgeous, and the finished popsicles are this wonderful combination of chewy and crisp that's far more enjoyable than eating a Peep straight from the box.
These make brilliant Easter gifts for teachers, neighbours, friends, or anyone you want to do something a little thoughtful for this spring. Package them in clear cellophane bags tied with ribbon and one of the free printable tags I've made for you below and they look genuinely professional. Honestly, they'd work beautifully on an Easter brunch table too, propped up in a glass or displayed on a board, they're almost too pretty to eat.
A quick note for UK readers: Peeps aren't stocked in most UK supermarkets, but they're readily available on Amazon UK, search for “Peeps marshmallow chicks” and you'll find them easily, usually in mixed colour packs. Order a week or so before you need them to be safe.
They look completely stunning. The layered pastel colours – pink, yellow, purple, blue – are genuinely beautiful and photograph like a dream. If you're making Easter content for social media, these are your shot.
They're deceptively simple to make. The method is essentially just melted marshmallow mixed with Rice Krispies, pressed into layers. If you've made Rice Krispie treats before, you can absolutely make these.
They make the most thoughtful Easter gift. Wrapped in a clear bag with a ribbon and a tag, these are a genuinely lovely alternative to a chocolate egg, particularly for teachers, neighbours, or friends who you want to give something personal and handmade.
The kids can absolutely help. Pressing the layers, choosing the colours, adding the sticks, children love every part of this process. It's a brilliant half-term activity that results in something actually useful.
They travel well. Unlike chocolate, these won't melt in a warm car or a coat pocket. They're sturdy, individually wrapped, and perfectly portable.
What You'll Need
Makes approximately 12 popsicles depending on how thickly you layer
4 x 12-packs of Peeps marshmallow chicks – one pack per colour (purple, yellow, pink, and blue are the classic Easter palette)
4 tablespoons butter – 1 tablespoon per colour
6 cups Rice Krispies cereal – 1½ cups per colour
Popsicle sticks or lolly sticks – available from craft shops, Amazon, or most supermarkets in the baking aisle
Clear cellophane treat bags and ribbon for gifting
Free printable gift tags – download below!
Equipment You'll Need
4 microwave-safe bowls – one for each colour
Muffin tin or square baking tin
Foil to line the tin
Wax paper or baking parchment
Sharp knife for slicing
Wooden spoon or spatula for mixing
Small scissors for trimming
How to Make Easter Peeps Popsicles
Step 1: Prep Your Tin
Line your muffin tin (or a square baking tin if you prefer uniform squares) with foil, pressing it neatly into the base and up the sides. This makes it much easier to remove the set treats cleanly without them sticking. Set aside.
Step 2: Melt Your First Colour
Place one pack of Peeps and 1 tablespoon of butter into a microwave-safe bowl. Microwave on high for 45 seconds, then remove and stir well. The Peeps should be mostly melted, if there are still lumps, return to the microwave in 15 second bursts, stirring between each, until fully smooth and combined.
Work quickly once melted, the mixture will start to set as it cools.
Step 3: Mix in the Rice Krispies
Add 1½ cups of Rice Krispies to your melted Peep mixture and stir quickly until every piece is fully coated in the coloured marshmallow. You want an even, sticky mixture with no dry cereal remaining.
Step 4: Press Your First Layer
Spoon the mixture into your prepared tin, spreading it out in an even layer and pressing down firmly with the back of a spoon or your fingertips. The more firmly you press, the neater your final slices will be. Don't worry about being too precise at this stage, you'll trim the edges later.
Step 5: Repeat with Each Colour
Repeat steps 2-4 with each remaining colour, working fairly quickly and pressing each new layer firmly on top of the last. The layers will stick together beautifully as they cool and set. By the time you've done all four colours, you'll have a gorgeous striped block of pastel Rice Krispie treat.
Step 6: Cool Completely
Leave the tin to cool at room temperature for at least 30 minutes, or pop it in the fridge for 15-20 minutes to speed things up. The mixture needs to be fully set and firm before you slice, if it's still warm it will crumble rather than cut cleanly.
Step 7: Turn Out and Slice
Once fully set, turn the block out onto a sheet of wax paper. You'll see those beautiful pastel layers, they're really something. Using a sharp knife, trim the edges so they're neat and straight (these trimmings are extremely good eating, just so you know), then slice into even squares or rectangles, each one showing all four coloured layers.
For popsicles, slice them slightly taller than wide so there's enough depth for the stick to sit securely.
Step 8: Add the Sticks
Push a popsicle stick firmly into the base of each slice, pressing until it reaches approximately halfway up the treat. If the mixture is properly set this should hold securely without any additional fixing.
Step 9: Package and Gift
Place each popsicle into a clear cellophane bag, tie with a pastel ribbon, and attach one of the free printable tags below. Done, you have the most beautiful, thoughtful Easter gift imaginable.
Tips for Perfect Peeps Popsicles
Work quickly with each colour. Melted Peep mixture sets fast, have your Rice Krispies measured out and ready to go before you melt each batch so you can mix and press without rushing.
Press each layer really firmly. This is the most important step for neat slices. The firmer you press each layer, the more cohesive the finished block will be and the cleaner your cuts will look.
Use a hot knife for slicing. Run your knife under hot water and dry it briefly before slicing, it cuts through the set marshmallow much more cleanly than a cold or room temperature blade. Repeat between cuts for the neatest results.
Don't rush the cooling. It's tempting to slice too early, but an underchilled block will crumble and your layers won't hold together. Give it the full time to set properly.
Make more than you think you need. These go extraordinarily quickly. A double batch takes barely any extra effort and means you'll have enough to gift, display, and still have some left to actually eat.
Colour order matters aesthetically. For the most beautiful layered effect, alternate light and darker colours rather than going rainbow order. Pink, yellow, purple, blue gives a more visually interesting result than going in spectrum order.
Make It Your Own
Try different flavour combinations. Peeps come in several flavours beyond the classic, strawberry, vanilla, and chocolate-dipped versions all melt beautifully and give different flavour layers.
Add sprinkles between layers. A small scattering of pastel sprinkles or mini chocolate eggs between layers adds a lovely surprise element when sliced.
Make them for other holidays. This technique works for Halloween (orange and black layers), Christmas (red and green), or any occasion where you can find suitably coloured marshmallows.
Display them instead of gifting. Propped up in a glass jar or displayed in a row on a cake stand, these make a gorgeous Easter table centrepiece. Beautiful enough to be decoration, delicious enough to be dessert.
Frequently Asked Questions
Where can I buy Peeps in the UK?
The easiest way is Amazon UK, search “Peeps marshmallow chicks” and you'll find several options, usually in multi-colour packs. Novelty sweet shops and American candy stores sometimes stock them too. Order a week ahead to ensure they arrive in time.
Can I use regular marshmallows instead of Peeps?
Yes, regular marshmallows will work as a substitute, though you'll lose the naturally vibrant colours. If using plain white marshmallows, you can add a drop of gel food colouring to each bowl to achieve the same pastel effect. Gel colouring (rather than liquid) gives the most vivid results.
How long do these keep?
Stored in an airtight container or individually wrapped in cellophane, these keep well for 3-4 days at room temperature. They don't need to be refrigerated. Don't stack them unwrapped as they'll stick together.
Can I freeze them?
Yes, wrap each popsicle individually in cling film and freeze for up to 1 month. Defrost at room temperature for about 30 minutes before serving or gifting.
Can children help make these?
Absolutely, pressing the layers, adding the sticks, and decorating the bags are all perfect tasks for little helpers. The melting stage involves the microwave and hot mixture so is best done by an adult, but everything else is very child-friendly.
What size should I slice them?
Approximately 5-6cm tall and 4-5cm wide works well for a popsicle that's generous but not unwieldy. You want the stick to sit securely, so don't go too small on the height.
How to Store
At room temperature: Individually wrapped in cellophane or stored in an airtight container for up to 4 days. Keep away from direct sunlight and heat.
In the freezer: Wrap individually in cling film and freeze for up to 1 month. Defrost at room temperature before serving.
Free Printable Easter Gift Tags
I've designed a set of free printable Easter gift tags exclusively for My Life From Home readers, perfect for tying onto your Peeps Popsicle gifts this spring. They're simple, beautiful, and very easy to use.
Print on white card, cut out, punch a hole in the corner, and thread through your ribbon. That's it, your handmade gift just got even more special.
4x 12-packs Peeps marshmallow chicksone per colour
4tbspbutter1 per colour
6cupsRice Krispies cereal1½ cups per colour
12popsicle sticks
Clear bags and ribbon to package
Equipment
4 microwave-safe bowls one for each colour
Muffin tin or square baking tin
Foil to line the tin
Wax paper or baking parchment
Sharp knife
Wooden spoon or spatula for mixing
Small scissors
Method
Line a muffin tin or baking tin with foil.
Melt one pack of Peeps with 1 tbsp butter in the microwave for 45 seconds. Stir until smooth.
4 x 12-packs Peeps marshmallow chicks, 4 tbsp butter
Mix in 1½ cups Rice Krispies until fully coated. Press firmly into the tin as the first layer.
6 cups Rice Krispies cereal
Repeat with each remaining colour, pressing each layer firmly on top of the last.
Cool for 30 minutes until fully set.
Turn out, trim edges, and slice into rectangles showing all four layers.
Insert popsicle sticks, wrap in cellophane, tie with ribbon, and add a gift tag.
12 popsicle sticks, Clear bags and ribbon to package
Notes
Work quickly once each colour is melted. Press layers firmly for clean slices. Use a hot knife for the neatest cuts.
Made these for Easter? I'd love to see them, tag me on Instagram or leave a comment below. And don't forget to download your free printable gift tags above!


This is so cute and yummy. Love it.