How to Transform a Glass and Metal Coffee Table with Rub ‘n Buff


There's something about a glass and metal coffee table that just works. It keeps a room feeling open, lets a beautiful rug or flooring do the talking, and adds a quiet elegance without competing with everything else in the space. The problem? Finding one in the exact finish you want, at a price that doesn't make you wince, can feel like an impossible task. That's where Rub ‘n Buff comes in, and honestly, it might be the best-kept secret in the world of furniture upcycling.
Rather than spending hundreds on a brand new gold metallic coffee table or settling for whatever finish happens to be on sale, there's a much smarter approach: find a secondhand glass and metal coffee table in the right shape and size, then transform the metallic finish yourself. The whole project takes less than an hour, costs next to nothing, and the results look genuinely expensive. This is everyday luxury at its most satisfying.
What is Rub ‘n Buff?
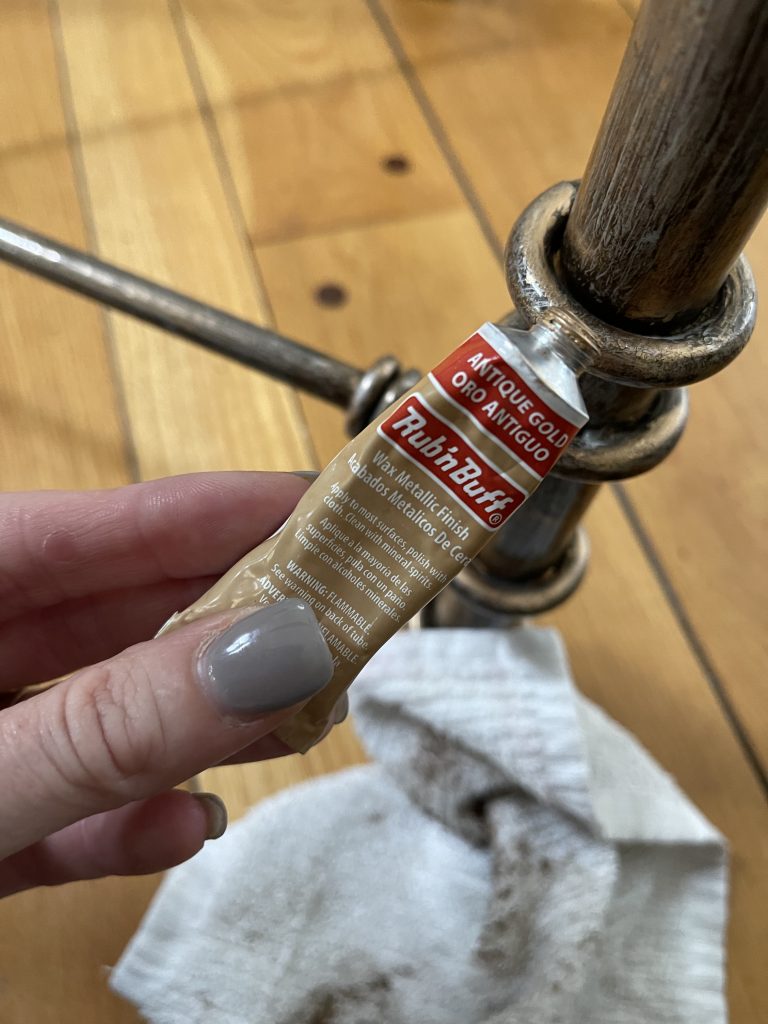
Before diving into the how-to, it's worth explaining what this product actually is, because it's not paint and it doesn't behave like paint. Rub ‘n Buff is a metallic wax finish made from carnauba waxes, fine metallic powders, and pigments. It comes in a small tube, and you apply it with your finger or a soft cloth, then buff it to a lustre. The result is a depth of finish that spray paint or metallic craft paint simply cannot replicate. It looks like real metal, not like something that's been painted to look like metal, which is a crucial difference when you're going for a high-end look.
One tube covers roughly 20 square feet, which is far more than you'll need for a coffee table. The colour range includes everything from Silver Leaf and Pewter through to Antique Gold, Grecian Gold, European Gold, and Gold Leaf. For a warm, lived-in look that reads as expensive without being too shiny, Antique Gold is a beautiful choice. It has that tarnished, antique brass quality that works brilliantly with both modern and traditional interiors.
Why a Glass and Metal Coffee Table Works in Almost Any Room
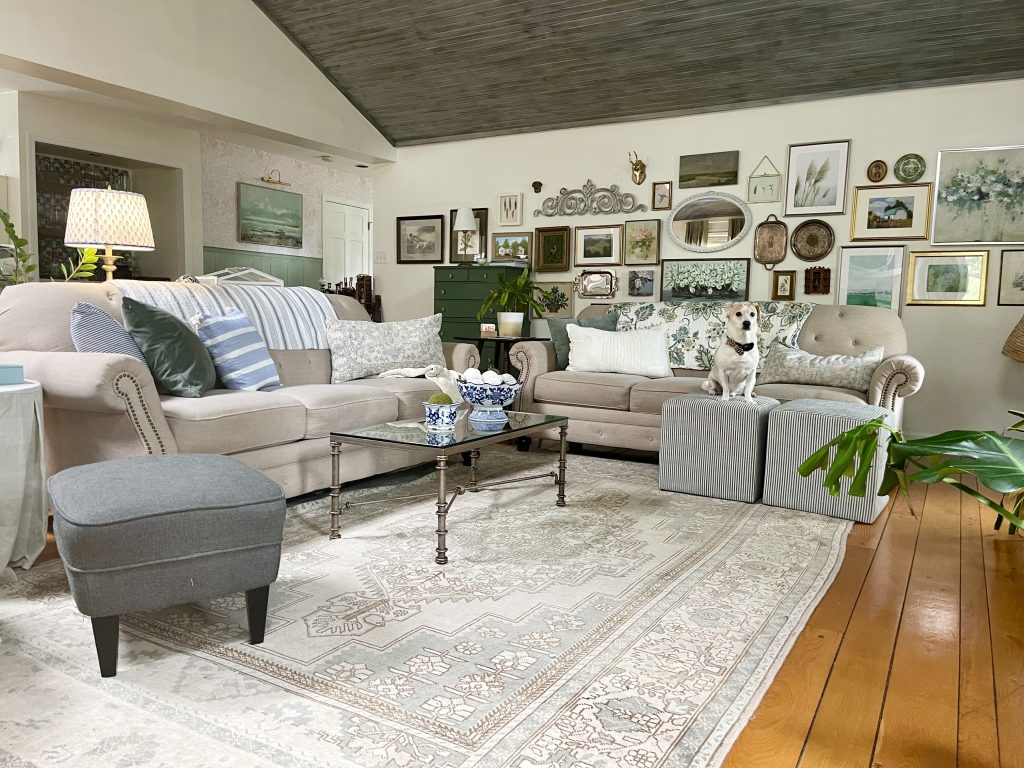
Choosing a metal and glass table over a solid wood or upholstered option isn't just an aesthetic decision; it's a practical one too. Glass tops create the illusion of more space, which is particularly useful in smaller living rooms or rooms where there's already a lot going on visually. If you've invested in a gorgeous rug, interesting flooring, or layered textiles on your sofas, a glass top lets all of that breathe rather than blocking the view with another solid surface.
The metal frame, meanwhile, adds structure and warmth in a way that acrylic or all-glass tables simply can't match. Ornate metal table legs bring character and craftsmanship to a room. Whether they're scrolled, geometric, or delicately curved, they become a design feature in their own right. The key is making sure the metallic finish complements the rest of the room, and that's exactly what Rub ‘n Buff allows you to do.
Finding the Right Table
Here's where a little patience pays off enormously. Brand new glass and metal coffee tables from high street retailers can easily run to £200 or more for anything with decent detailing. Facebook Marketplace, Gumtree, charity shops, and local selling pages are absolute goldmines for this kind of piece. The frame shape, the glass condition, and the size are what matter. The colour of the metal is completely irrelevant, because you're about to change it.
When shopping secondhand, look for tables with interesting metalwork. Ornate metal table legs, scrollwork, or architectural details will give the finished piece a much more expensive look than a plain, straight-legged frame. Check that the glass is free from chips and deep scratches, and make sure the frame is sturdy with no wobble. Beyond that, don't be put off by a finish that looks dated. A chrome table from the early 2000s, a tired-looking brass piece, or even a black metal frame can all be completely transformed.
What You'll Need
The beauty of this project is how little it requires. Here's everything:
- Rub ‘n Buff in your chosen colour (one tube is more than enough for a standard coffee table)
- A soft, lint-free cloth for buffing (an old cotton t-shirt works perfectly)
- Rubbing alcohol or white spirit for cleaning the metal before you start
- Painter's tape if you want to protect the glass edges, though this is optional
- Kitchen roll or newspaper to protect your work surface
That's it. No primer, no brushes, no spray booth, no drying time between coats. This is genuinely one of the simplest DIY upgrades you can do.
How to Apply Rub ‘n Buff to a Metal Coffee Table
Step 1: Clean the Metal Thoroughly
Start by giving the entire metal frame a proper clean. Use rubbing alcohol or a little white spirit on a cloth to remove any dust, grease, fingerprints, or residue. This step matters because Rub ‘n Buff adheres best to a clean, dry surface. Let the frame dry completely before moving on. If there are any areas of flaking paint or rough texture, a light sand with fine-grit sandpaper will help create a smoother base.
Step 2: Apply a Very Small Amount
Squeeze the tube gently until a tiny amount of product appears at the opening. Seriously, tiny. The most common mistake with Rub ‘n Buff is using too much at once, which creates streaks rather than a smooth, even finish. Pick up a very small amount on your fingertip and begin rubbing it onto the metal in gentle, circular motions rather than long strokes.
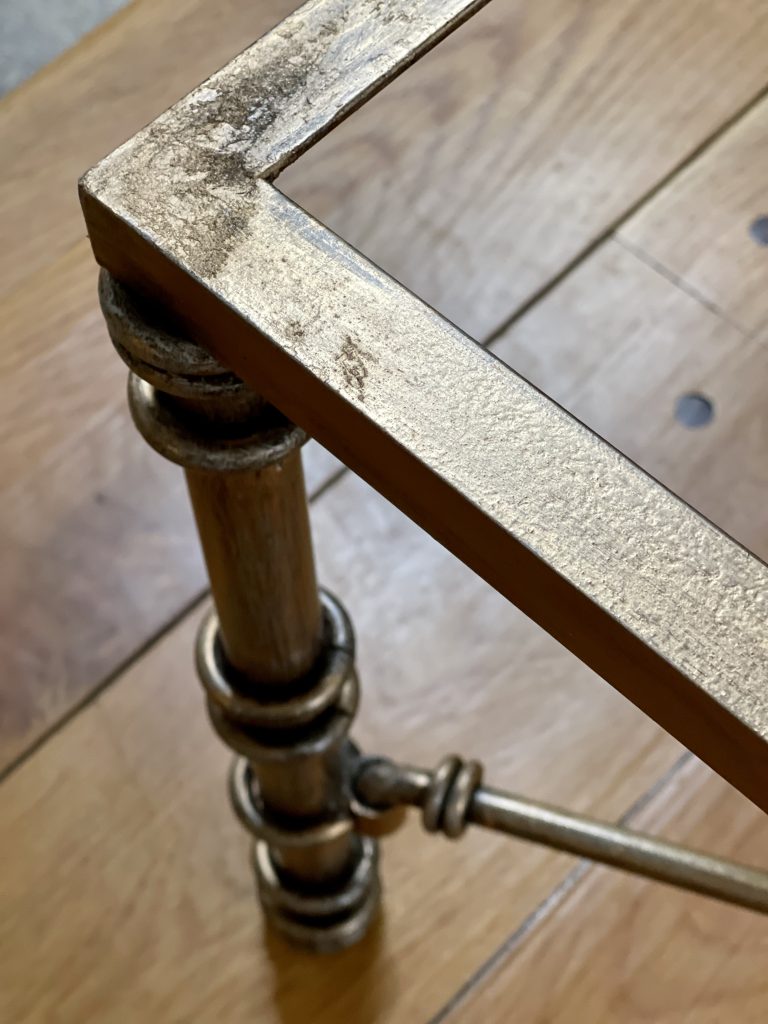
The warmth of your finger helps the wax glide on smoothly, and working in small sections gives you much more control over the coverage. Start with the most intricate areas first, such as any scrollwork, joins, or decorative detailing on the legs. These are harder to reach once the surrounding areas are done, and you'll get a cleaner result by tackling them while your fingers are still clean.
Step 3: Work in Sections
Move methodically around the frame, doing one leg or one section at a time. Apply the wax, let it sit for just a few seconds, then buff it gently with your cloth. You'll see the lustre develop immediately, which is incredibly satisfying. If any area looks too light after the first pass, simply add a second thin layer once the first has been buffed. Building up the colour gradually always gives a better result than trying to get full coverage in one heavy application.
Step 4: Buff to Your Desired Finish
This is where the magic happens. Once the wax has been applied to the entire frame, go back over it with a clean section of your cloth and buff firmly. The more you buff, the more shine you'll achieve. For a warm, antique look, a gentle buff is enough. For a higher shine, put a bit more elbow into it. The beauty of Rub ‘n Buff is that you control the final finish completely, and you can adjust it even after the initial application.
Step 5: Let It Cure
While Rub ‘n Buff dries to the touch almost immediately, it does benefit from being left alone for a day or two to fully cure and harden. During this time, try not to handle the frame too much. Once it's cured, the finish is surprisingly durable for everyday use, though it's worth knowing that it can wear over time on areas that get a lot of contact. The good news is that touch-ups take seconds; just dab on a little more wax and buff.
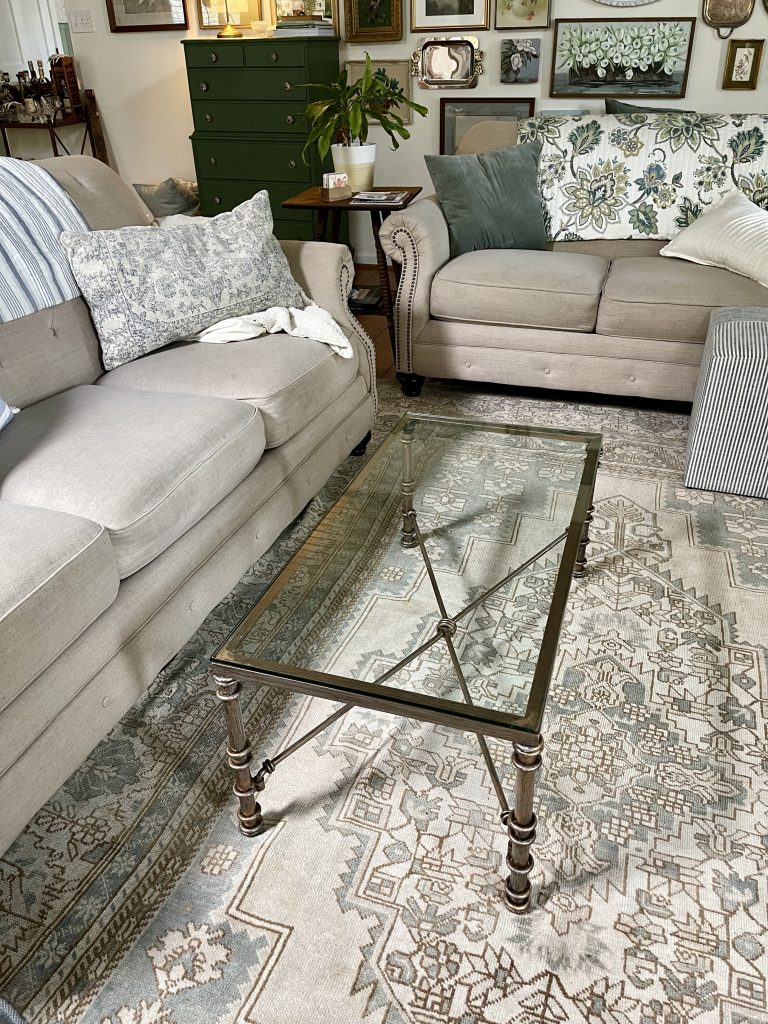
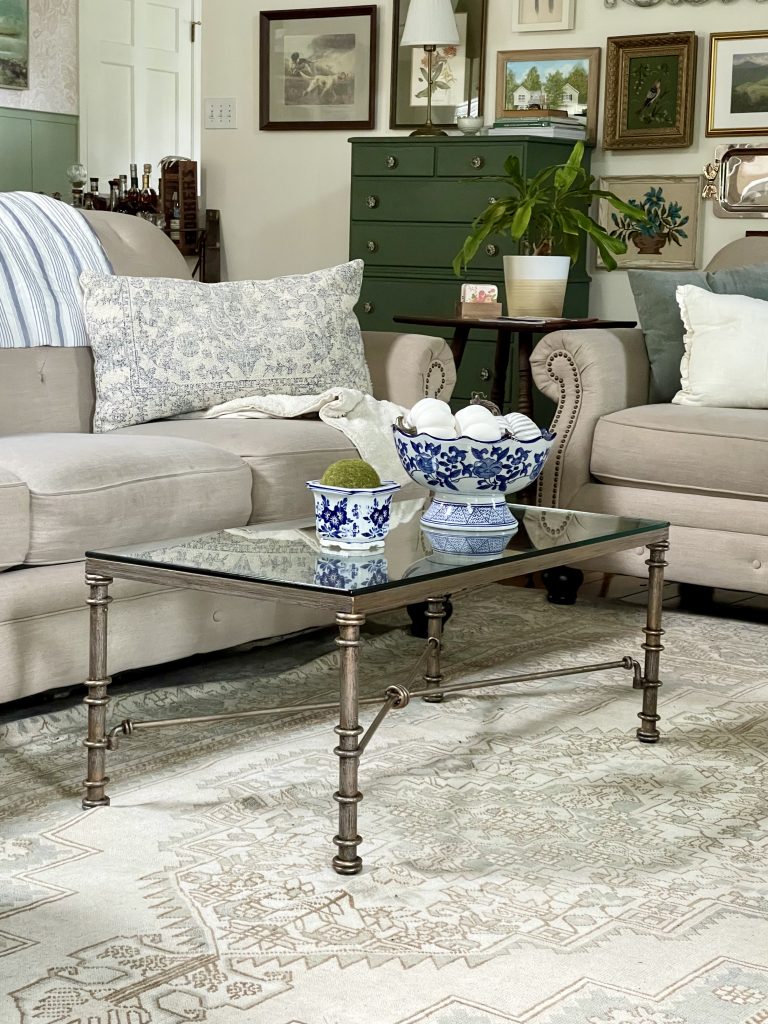
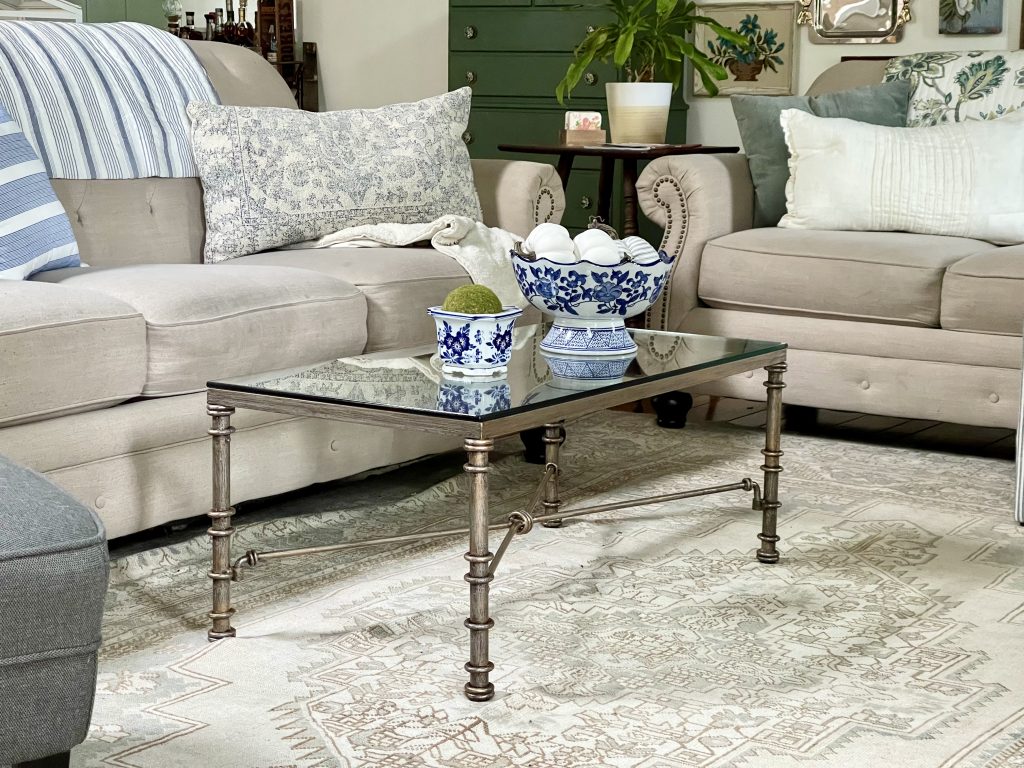
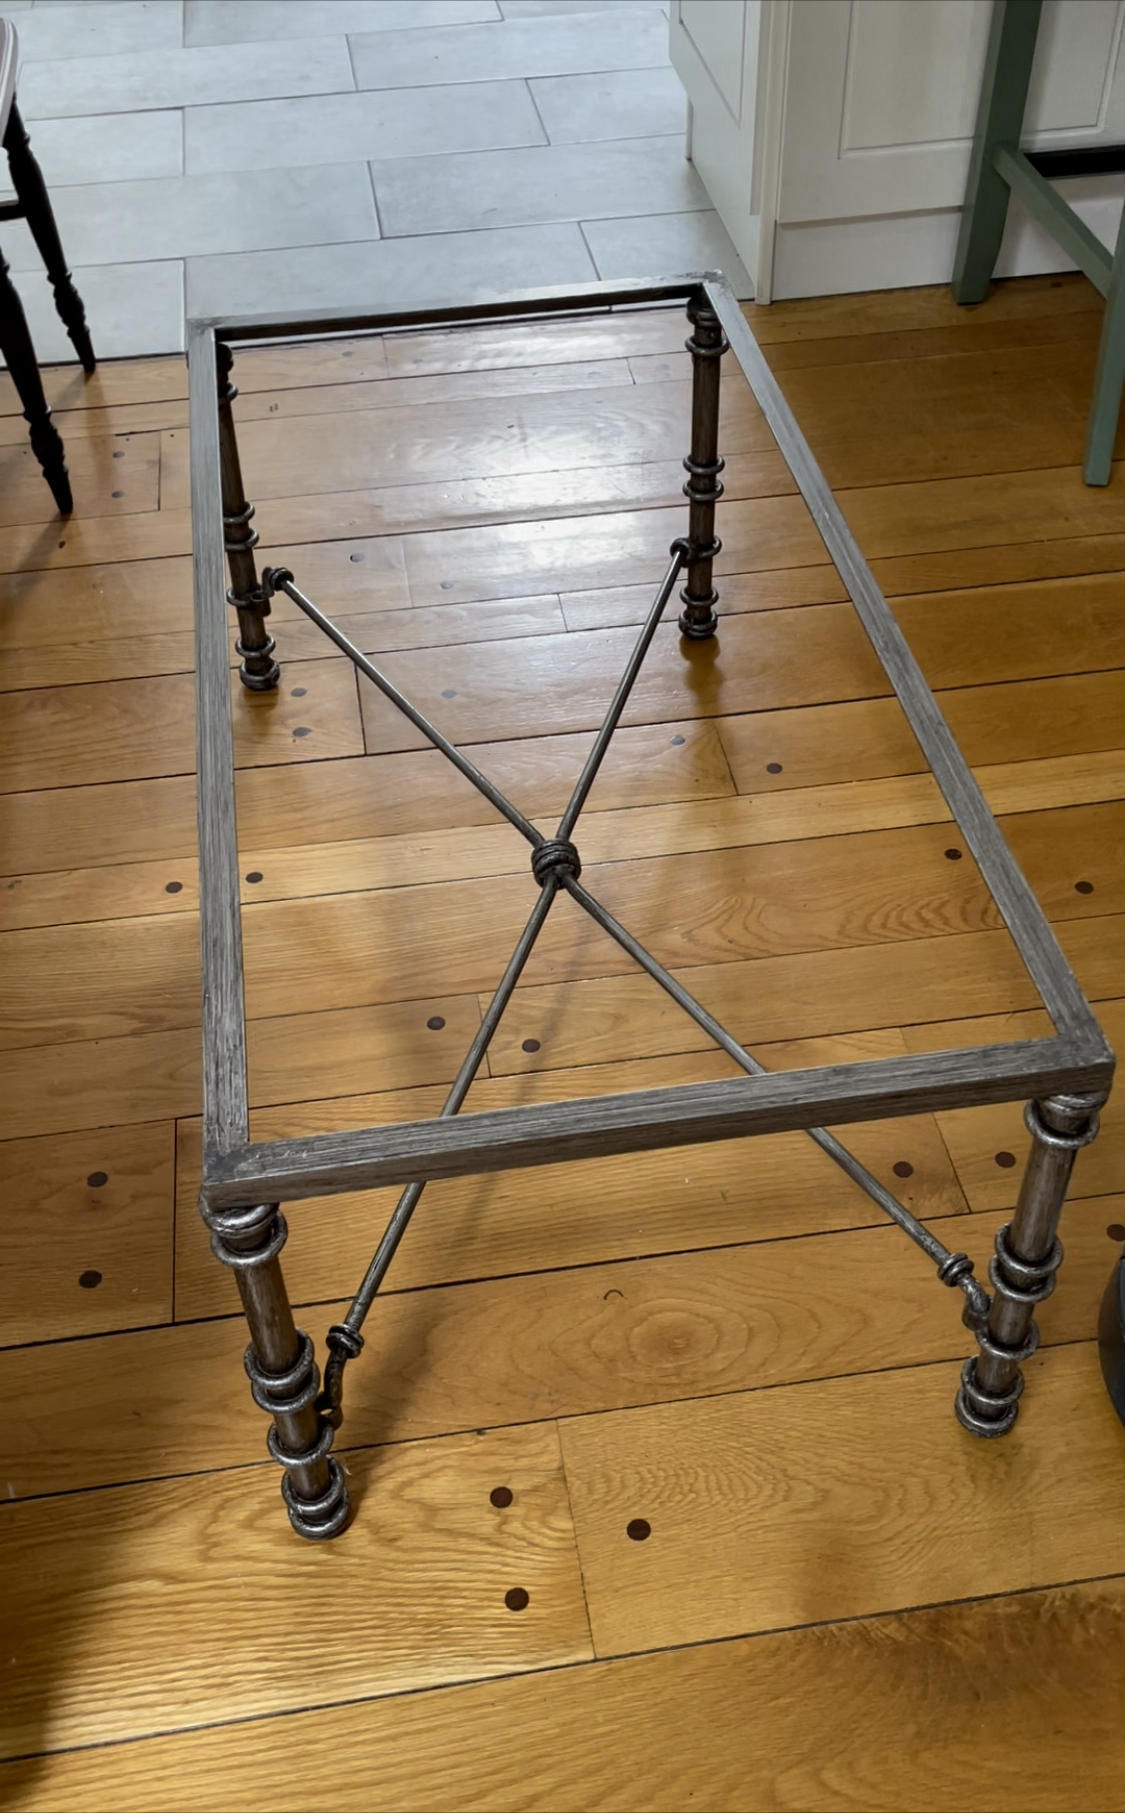
The Before and After
The difference between a dated silver metal frame and a warm, antique gold finish is remarkable. What was once a perfectly functional but forgettable coffee table becomes something that looks like a considered, deliberate design choice. The kind of piece that visitors assume you found in a beautiful interiors shop, not on Facebook Marketplace for a fraction of the price.
Tips for Getting the Best Results with Rub ‘n Buff on Metal
Go slow with the product. Less really is more with Rub ‘n Buff. You can always add another layer, but removing excess is much trickier. If you do apply too much and get streaks, a tiny bit of white spirit on a cloth will help you remove the excess before it sets.
Choose your colour carefully. Antique Gold gives a warm, sophisticated look that suits most interiors. Gold Leaf is much brighter and shinier, which can look stunning in the right setting but may read as too shiny in a more understated room. European Gold sits somewhere between the two. If you're unsure, Antique Gold is the safest choice for a gold metallic coffee table finish.
Consider your base colour. The underlying colour of the metal will affect the final tone. A dark base (black or dark bronze) underneath Antique Gold creates a beautiful depth. A light base (chrome or silver) will give a slightly different character. Neither is wrong; just be aware that the base colour contributes to the overall look.
Use it on more than just tables. Once you have a tube of Rub ‘n Buff, you'll start seeing opportunities everywhere. Picture frames, lamp bases, drawer pulls, mirror frames, candle holders: anything with a metal surface that looks a bit tired or doesn't match your decor can be transformed in minutes. It's genuinely addictive.
Protect high-wear areas. For a coffee table that gets daily use, applying a thin coat of clear paste wax or a spray sealer over the Rub ‘n Buff once it's cured will extend the life of the finish significantly. This is particularly worth doing on any areas where you tend to rest drinks or set things down.
Other Ways to Style Your Glass and Metal Coffee Table
Once your table is finished, styling it is the fun part. Glass and metal coffee tables look particularly beautiful with a curated tray arrangement: think a small stack of coffee table books, a candle, and a single stem in a bud vase. The transparency of the glass means you can see your rug or flooring through and beneath it, so keep the styling relatively minimal. Overstacking a glass table defeats the purpose of choosing one in the first place.
For a seasonal refresh, simply swap out the tray contents. Dried stems and amber glass in autumn, fresh greenery and white ceramics in spring, a beautiful bowl of citrus fruits in summer. The metal finish you've created with Rub ‘n Buff in Antique Gold works with virtually any colour palette, which makes seasonal updates effortless.
Is This Project Worth the Effort?
Absolutely. For less than £10 in materials and under an hour of your time, you can take a secondhand glass and metal coffee table and make it look like something from a high-end interiors catalogue. The finish is beautiful, the process is forgiving, and the results speak for themselves. If you've been putting off updating a piece of furniture because you assumed it would involve sanding, priming, painting, and a weekend of effort, Rub ‘n Buff will change your mind entirely.
This is the kind of small, satisfying project that makes a disproportionately big difference to how a room feels. And once you've done it, you'll find yourself eyeing up every piece of metalwork in the house.
If you enjoyed this project, you might want to browse more of my home interiors posts for more ideas on creating a space that feels thoughtfully pulled together without spending a fortune.
Leave a Reply
The Sunday Letter
Most Sundays, once the house has gone quiet and it's edging towards nine, a letter goes out. It's the one I'd write to a friend with good taste and not nearly enough time: one thing worth reading, one thing worth buying, and one thing to skip. No noise, no pressure to spend, just the considered version of what I've actually been using, loving, or quietly sending back.
If you like the sort of recommendation that still holds up six months later, leave your email below and I'll write to you on Sunday.


Amy- your table turned out amazing!! Looks just perfect in your room. That rug is absolutely beautiful btw- I can see why you would want to showcase it. The table you chose really compliments everything well. Great find!! And thank you for sharing that rub on product you used. So transformative!! Looks great- the whole room. (I especially love the last picture with your dog posing for the camera!! He is too cute also!!) Thanks for sharing…
Angela
Thank you, Angela! It might be the easiest update I’ve ever done! It’s great for frames too if you want to change the look of them.