Thrift Store Makeover Challenge: Sisal Rope Basket

You may remember that back in December a bunch of bloggers decided to do a Secret Santa/ Thrift store flip blog hop. If you want to see the fun gifts I received from my Secret Santa, you can see them HERE. I absolutely loved what I got and have rearranged my whole vintage camera collection just because of the new one I received. I'll be sharing more about that later, but today is the thrift store challenge reveal day!
As much as I liked my personal gifts, I was quite unsure about my thrift store flip items 🙂 The criteria for the flip items was that the item/ items be $5 and under.
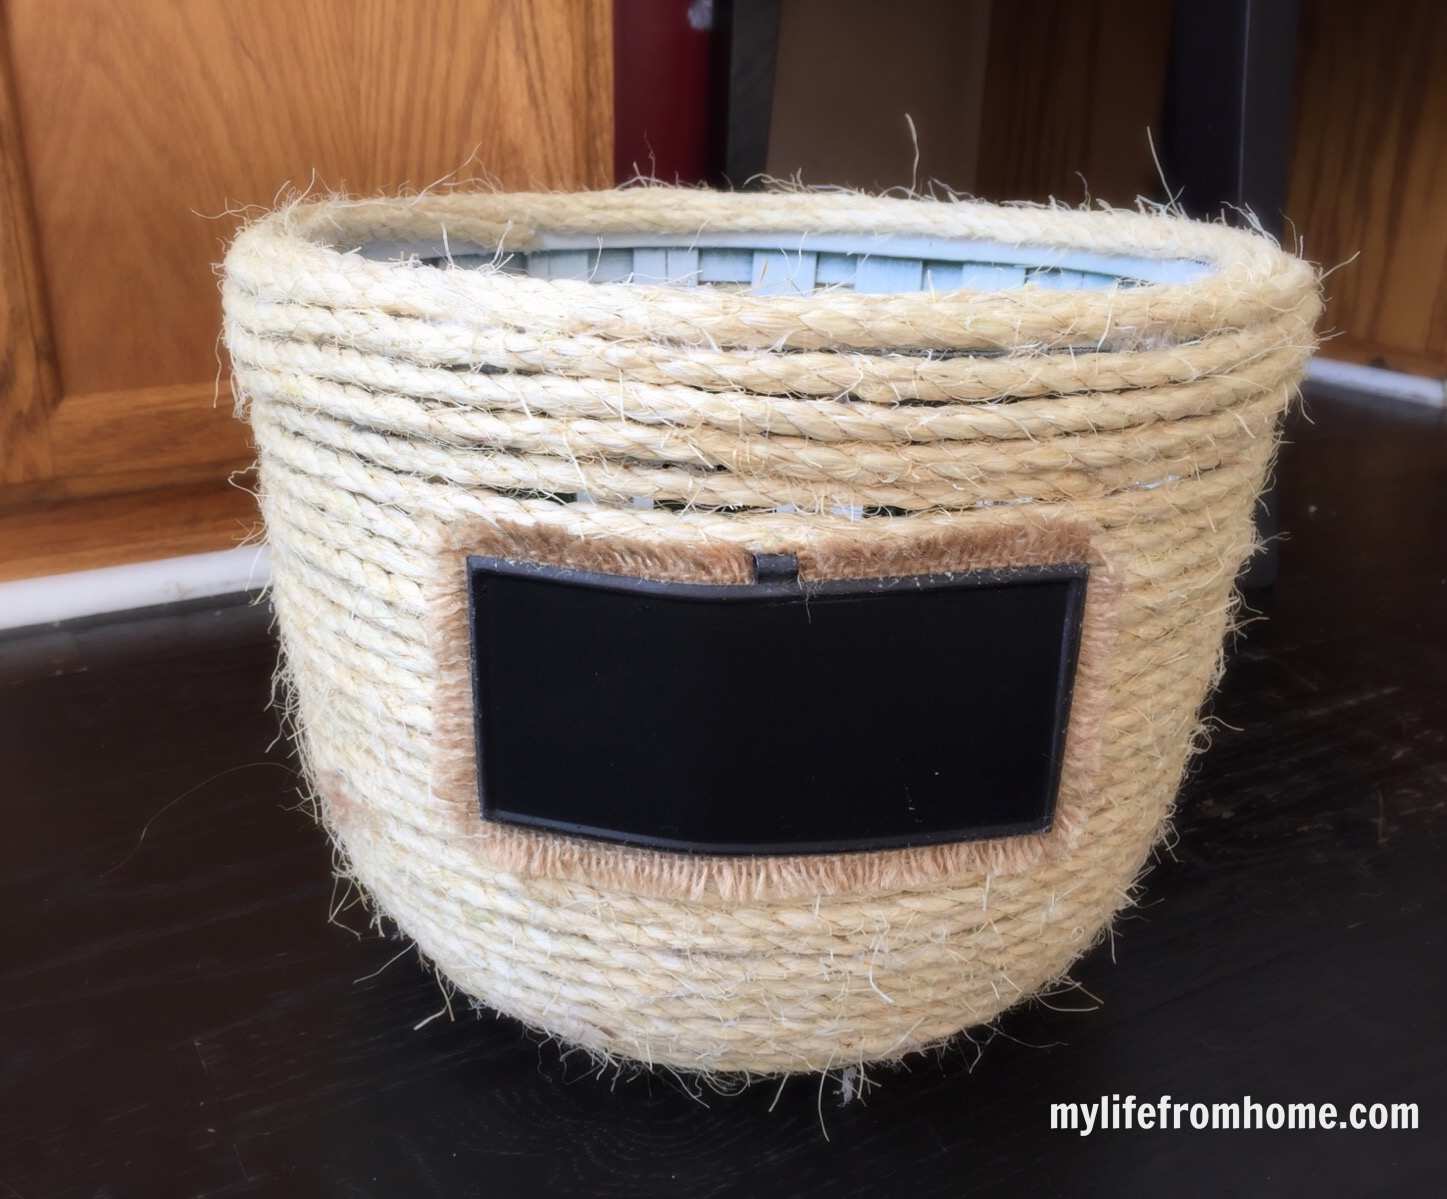
My item was this green basket.
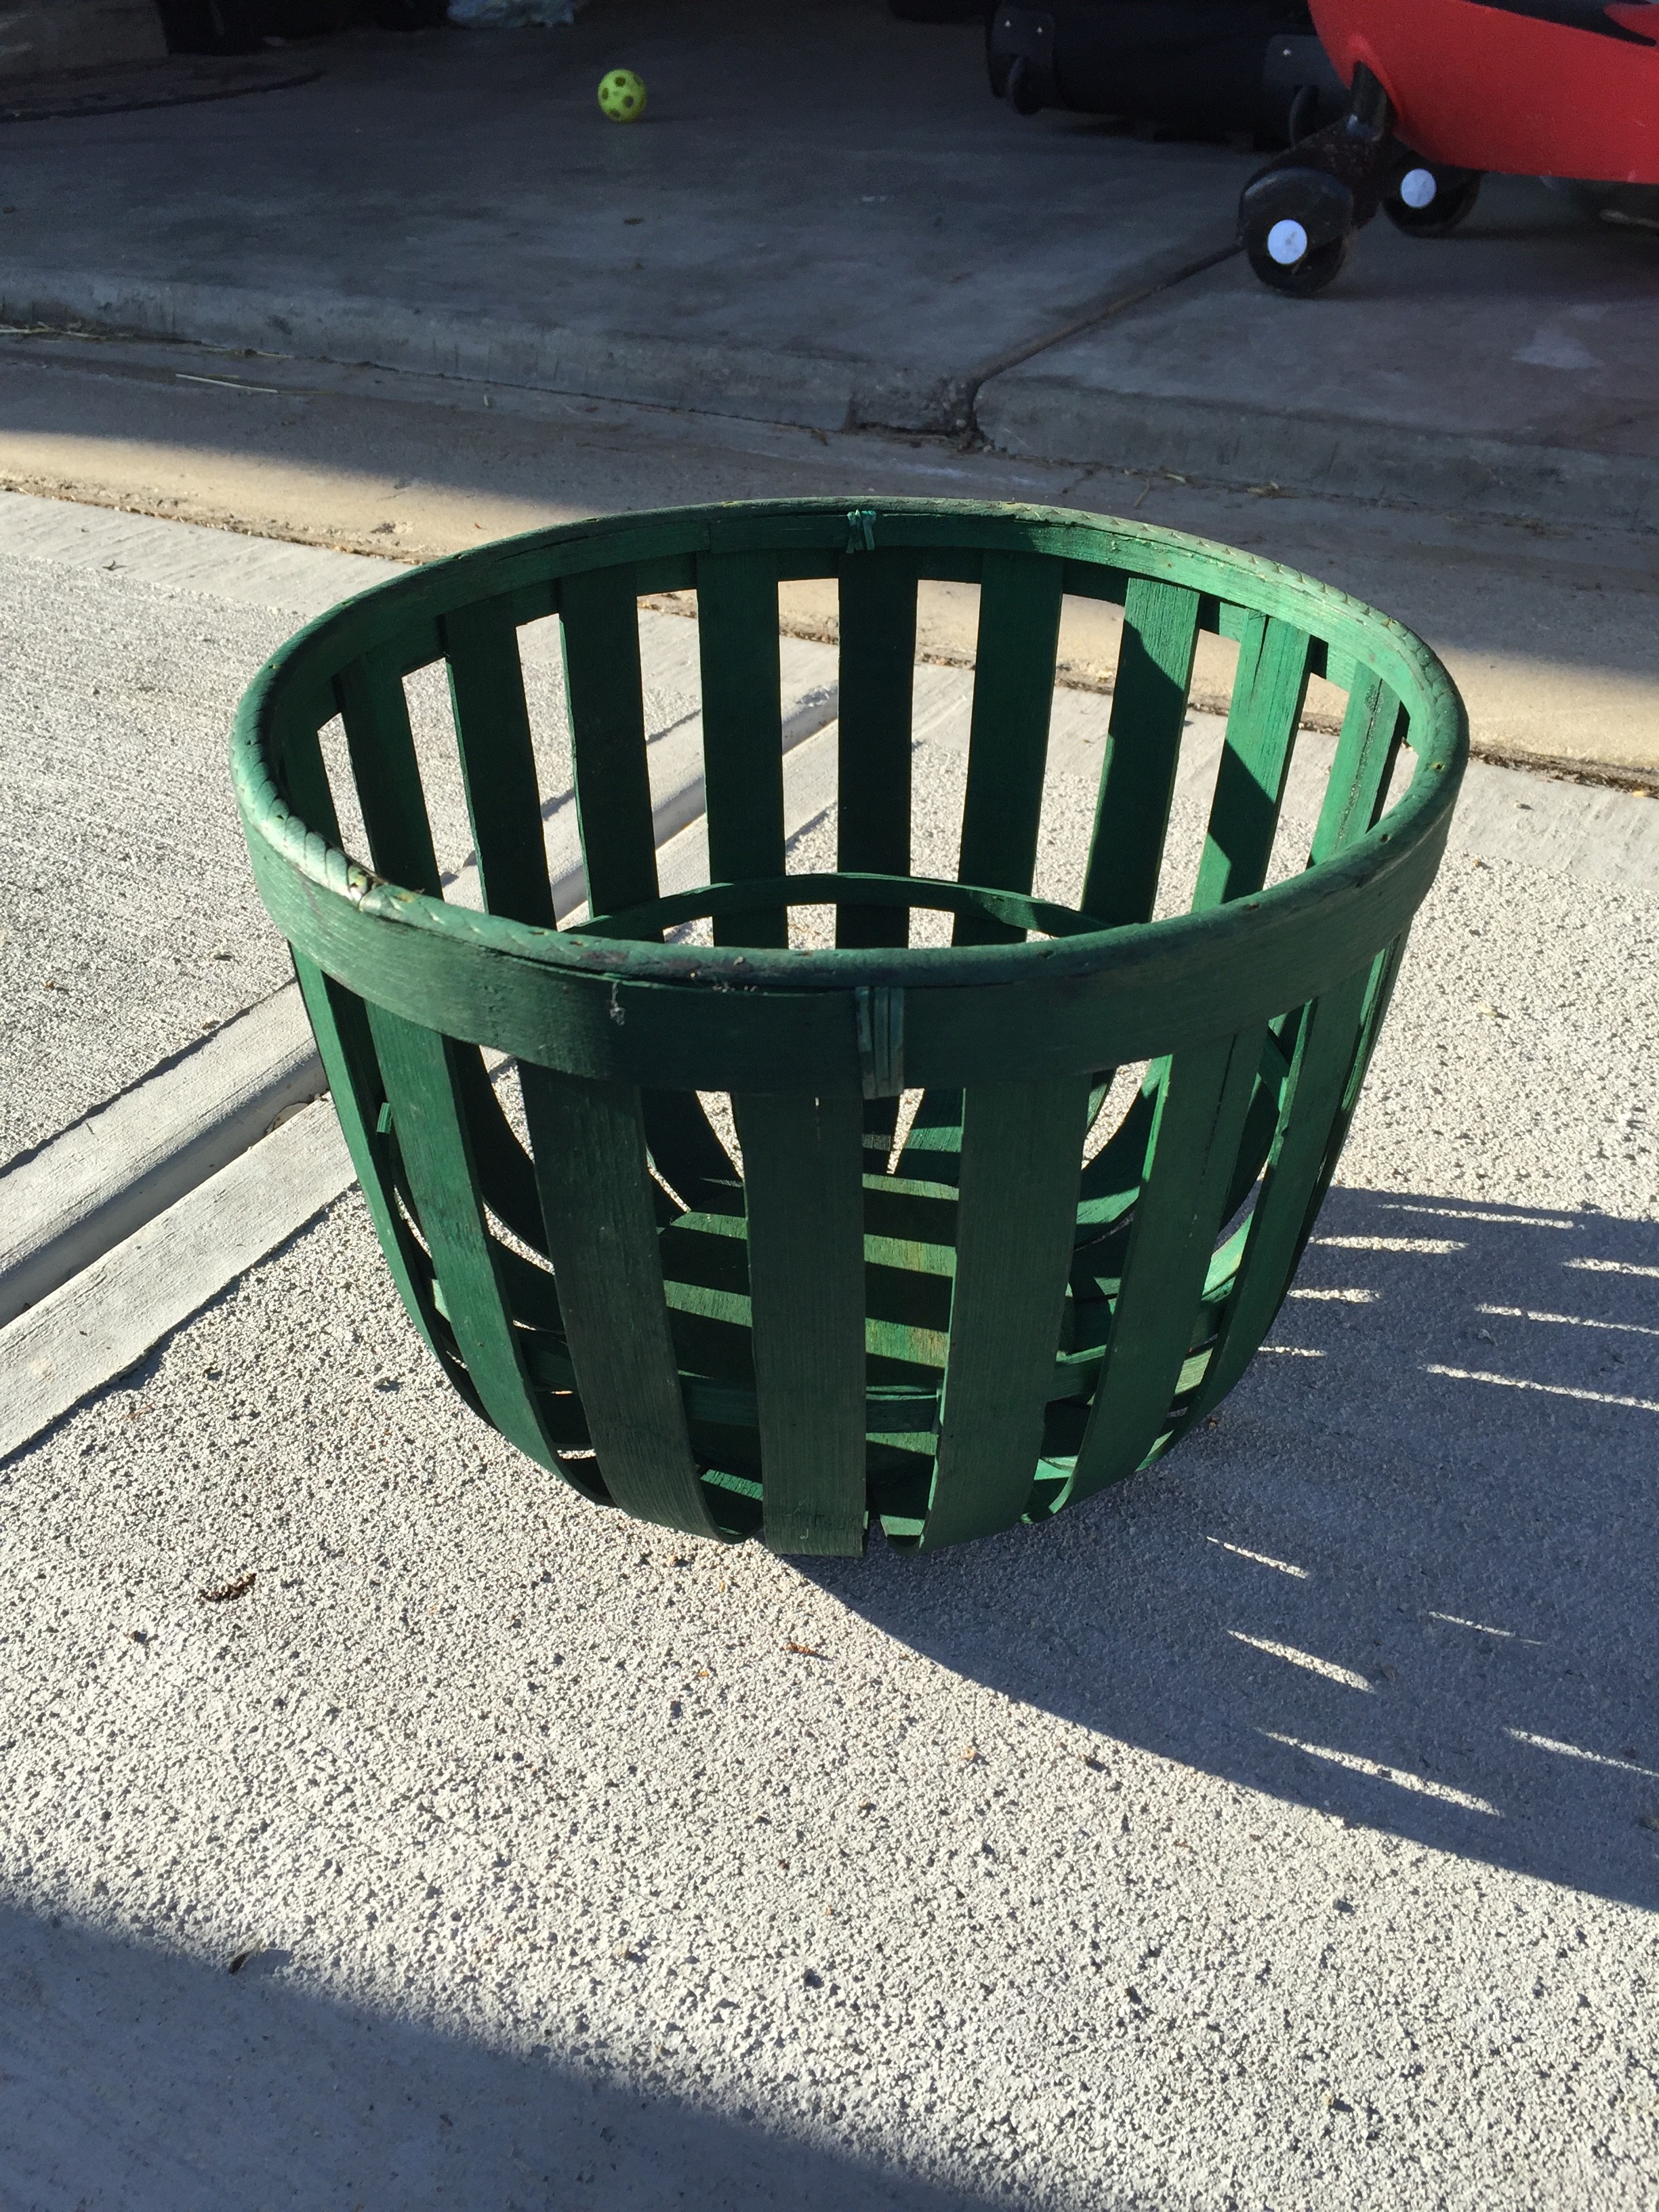
After pondering what to do with this green machine, I came up with a good plan and got to work on it right away. I love baskets and use them all over my house to stash a variety of things from pillows, blankets, craft project to books. I decided to try to make this ugly duckling fit in with the many other baskets I have around the house. Most of my existing baskets are rope or brown wicker. Since it was a nice size, I could easily see it being used to house small items.
I decided to wrap the entire thing in sisal rope! This required a lot of patience, but not expertise.
Here are the steps I took to upcycle this into a brand new basket.
SISAL ROPE BASKET MAKEOVER
Items Needed for Project:
spray paint
sisal rope
hot glue gun and LOTS of glue sticks
Chalkboard (optional)
1. I decided to spray paint the inside white. I didn't bother with the outside because I knew it would be covered, but I did not want the inside which you would see to be the green, so instead I opted for white.

2. After letting the spray paint dry, turn basket over and begin hot glueing rope around the bottom.
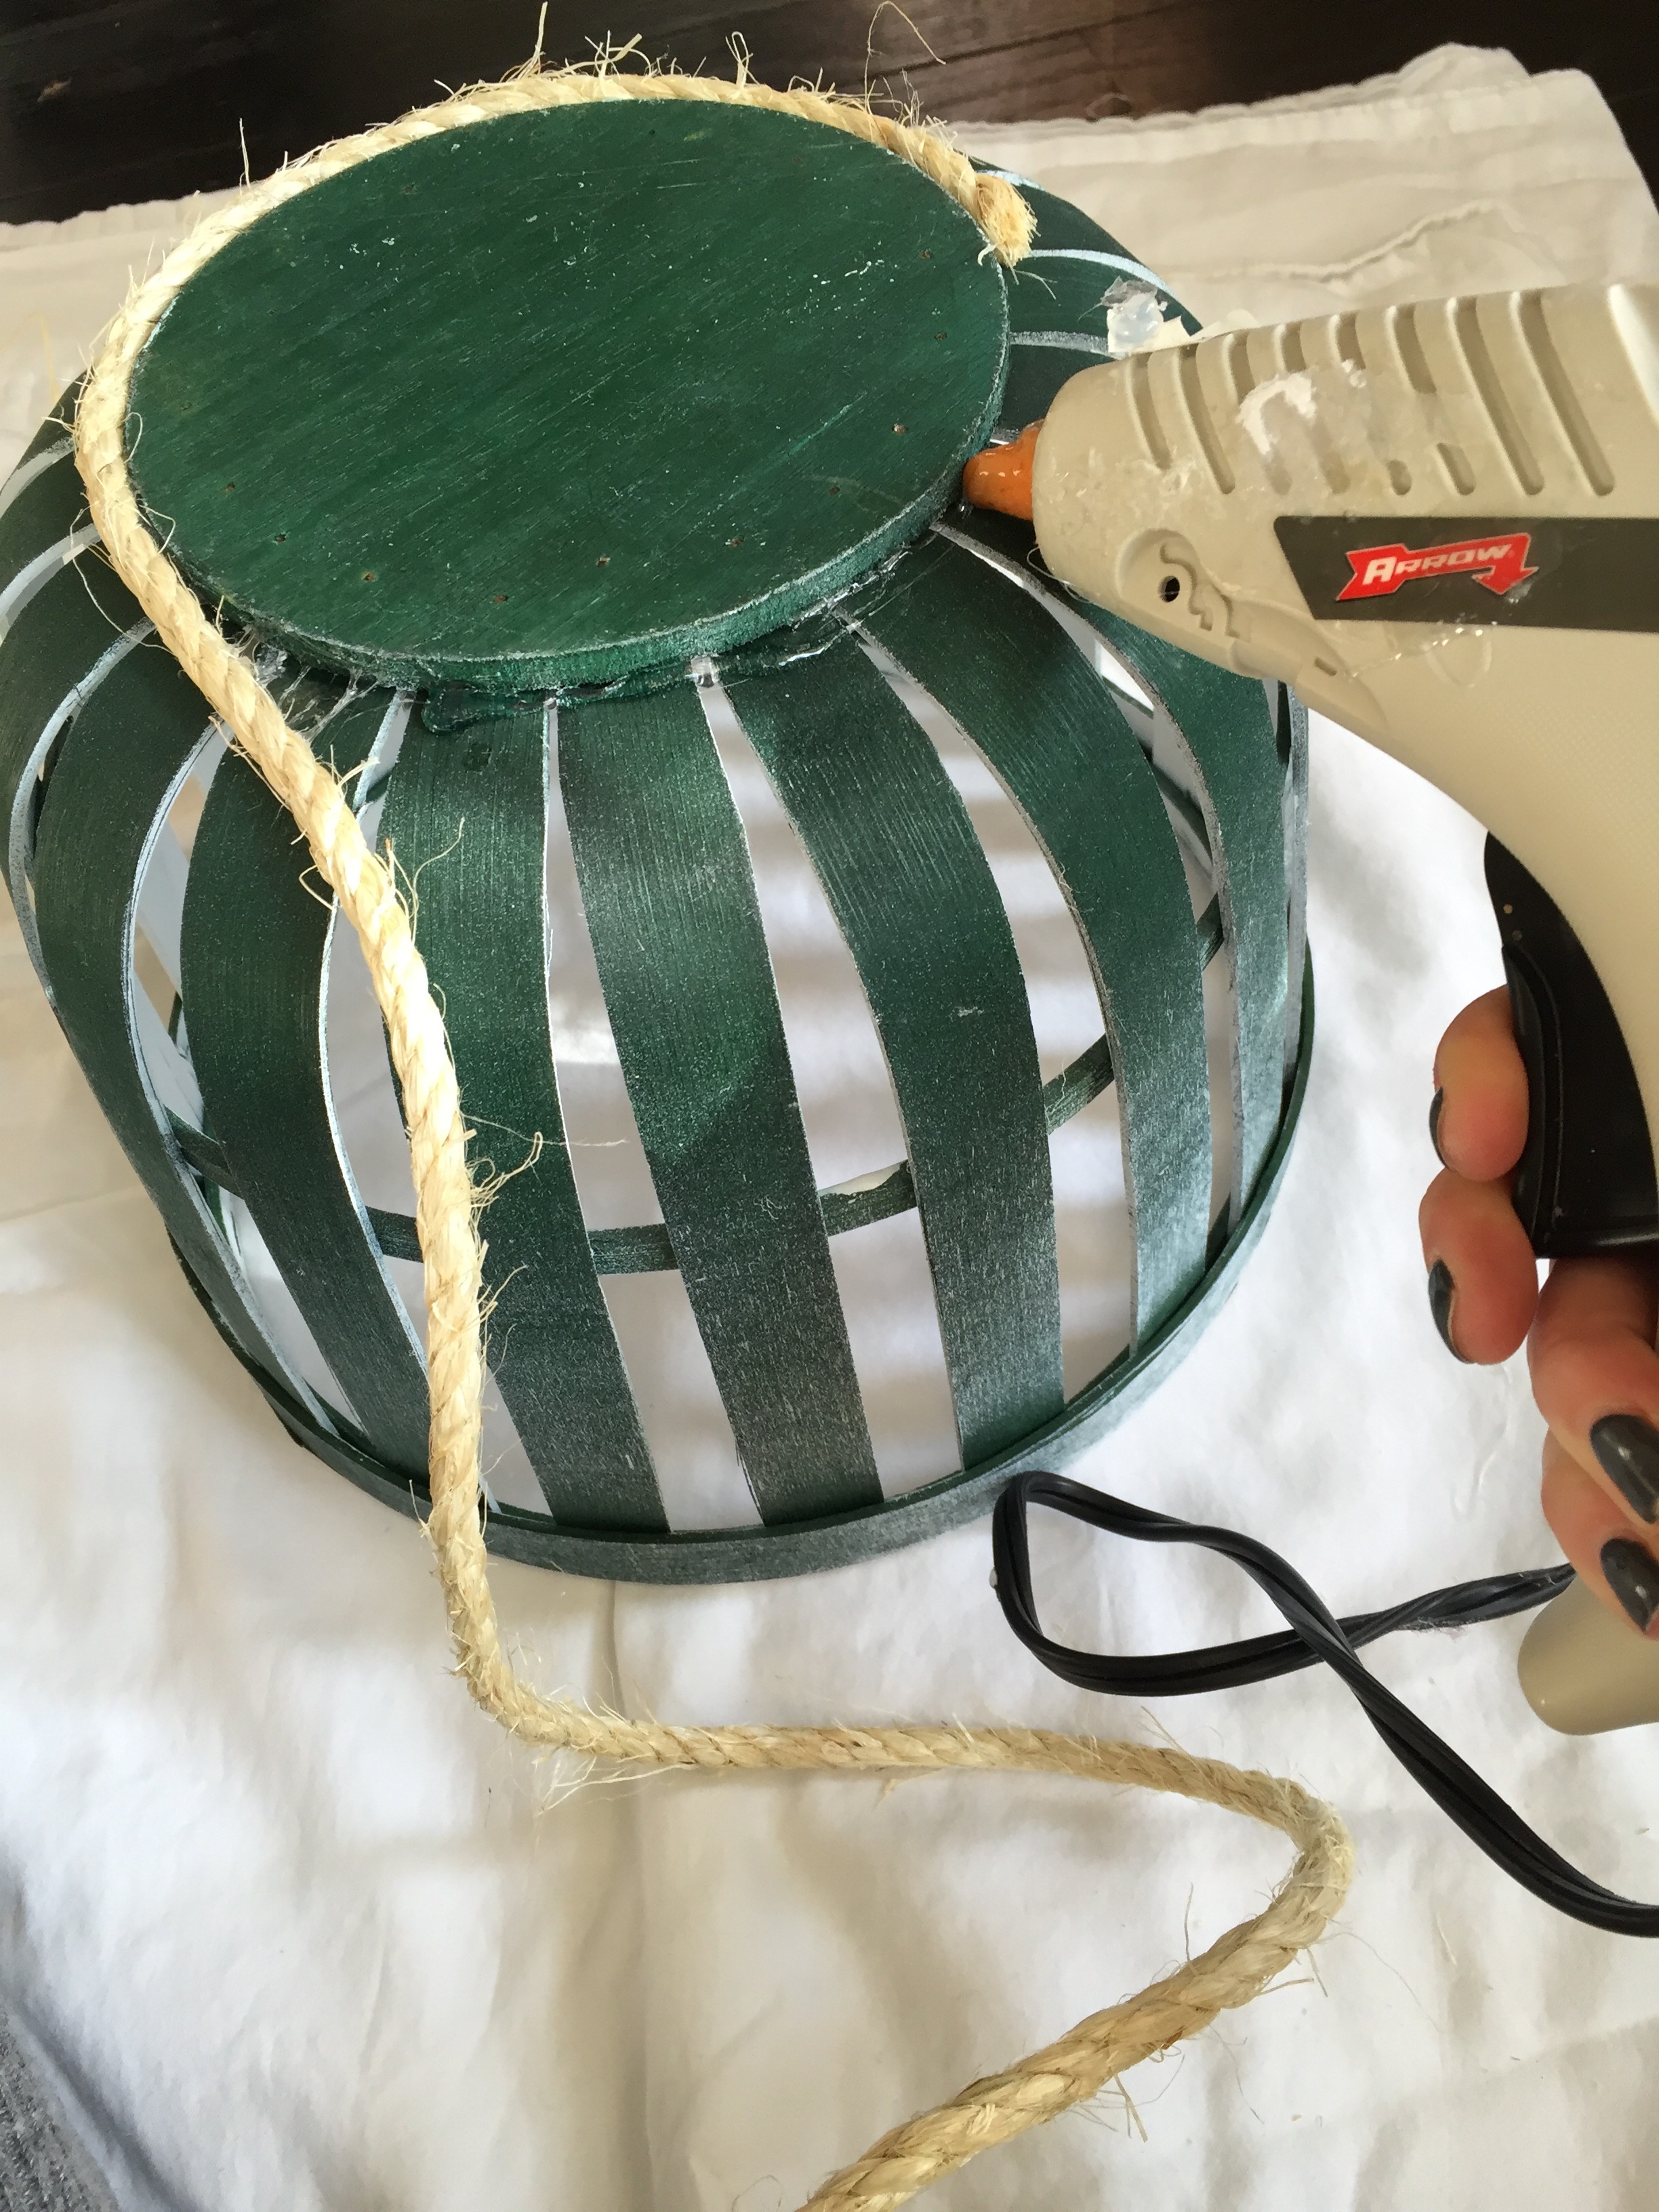
3. Use a lot of glue both on the basket and the rope in the row above. The goal is to get it to stick not only to the basket but to the row above so there is not a gap between rows.
4. Continue working your way around and up the basket row by row gluing as you go. One trick I used was after gluing one section, I would push it as close to the one above as I could and then move on to the next section.
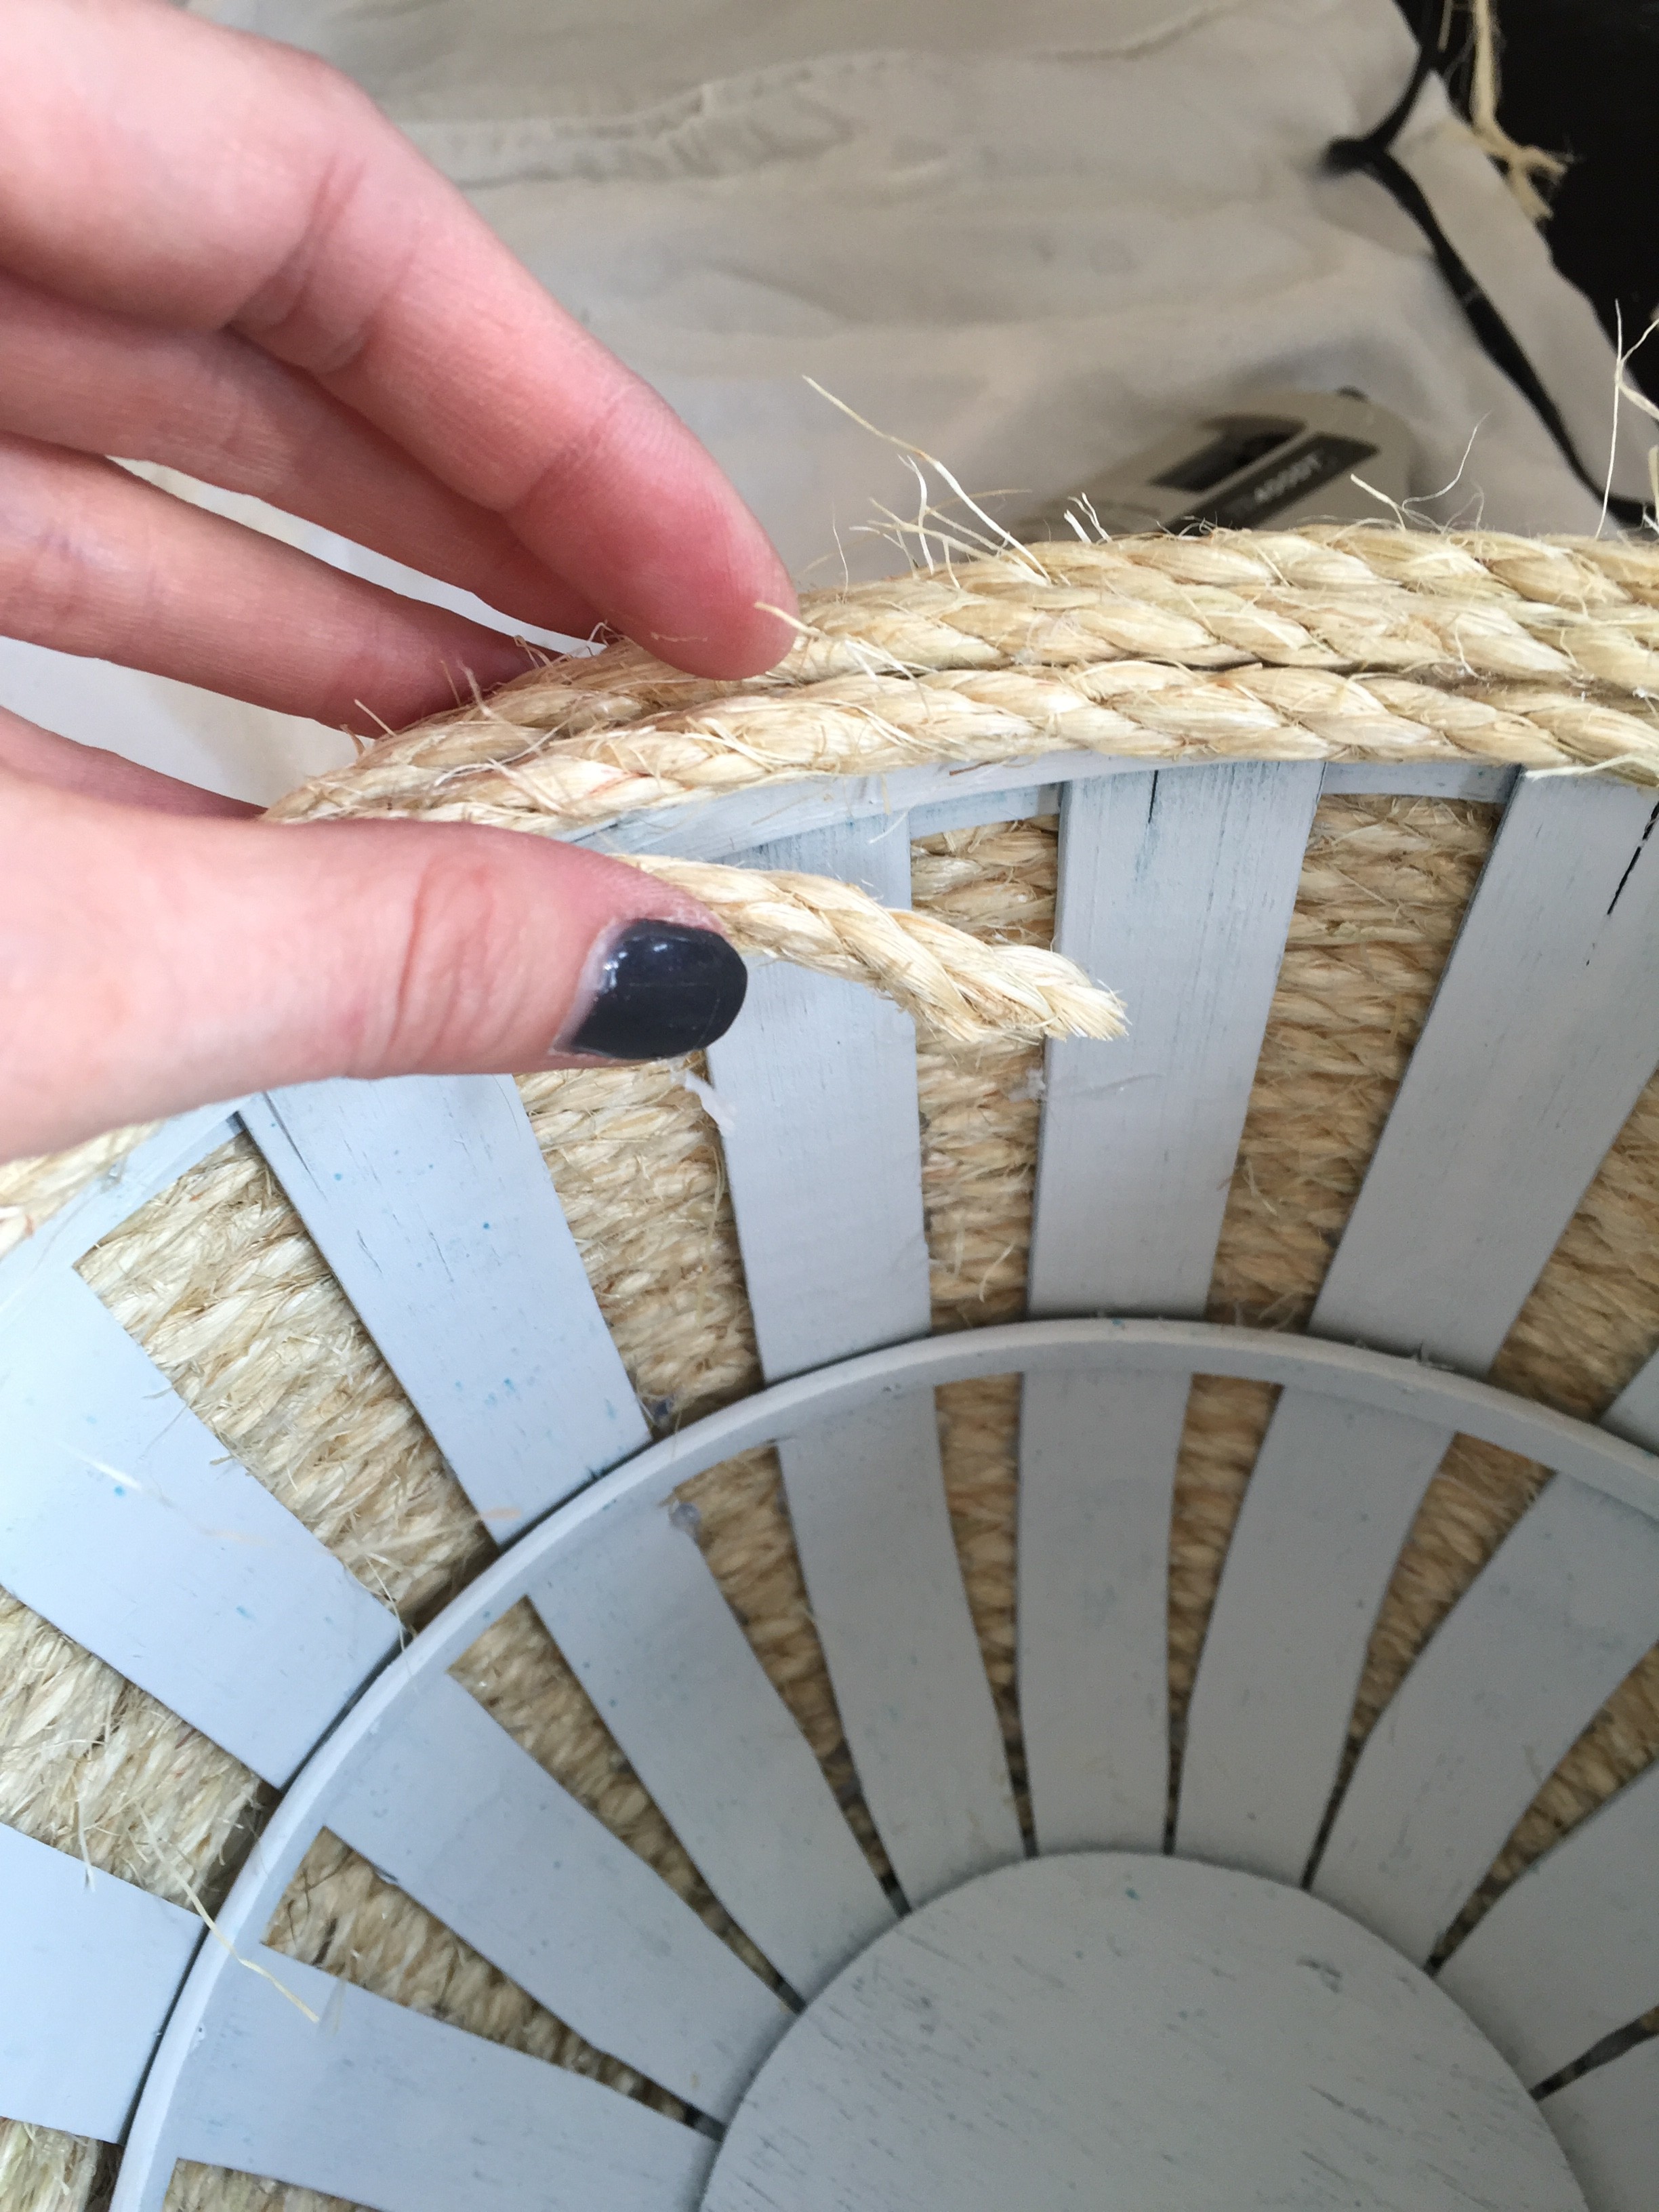
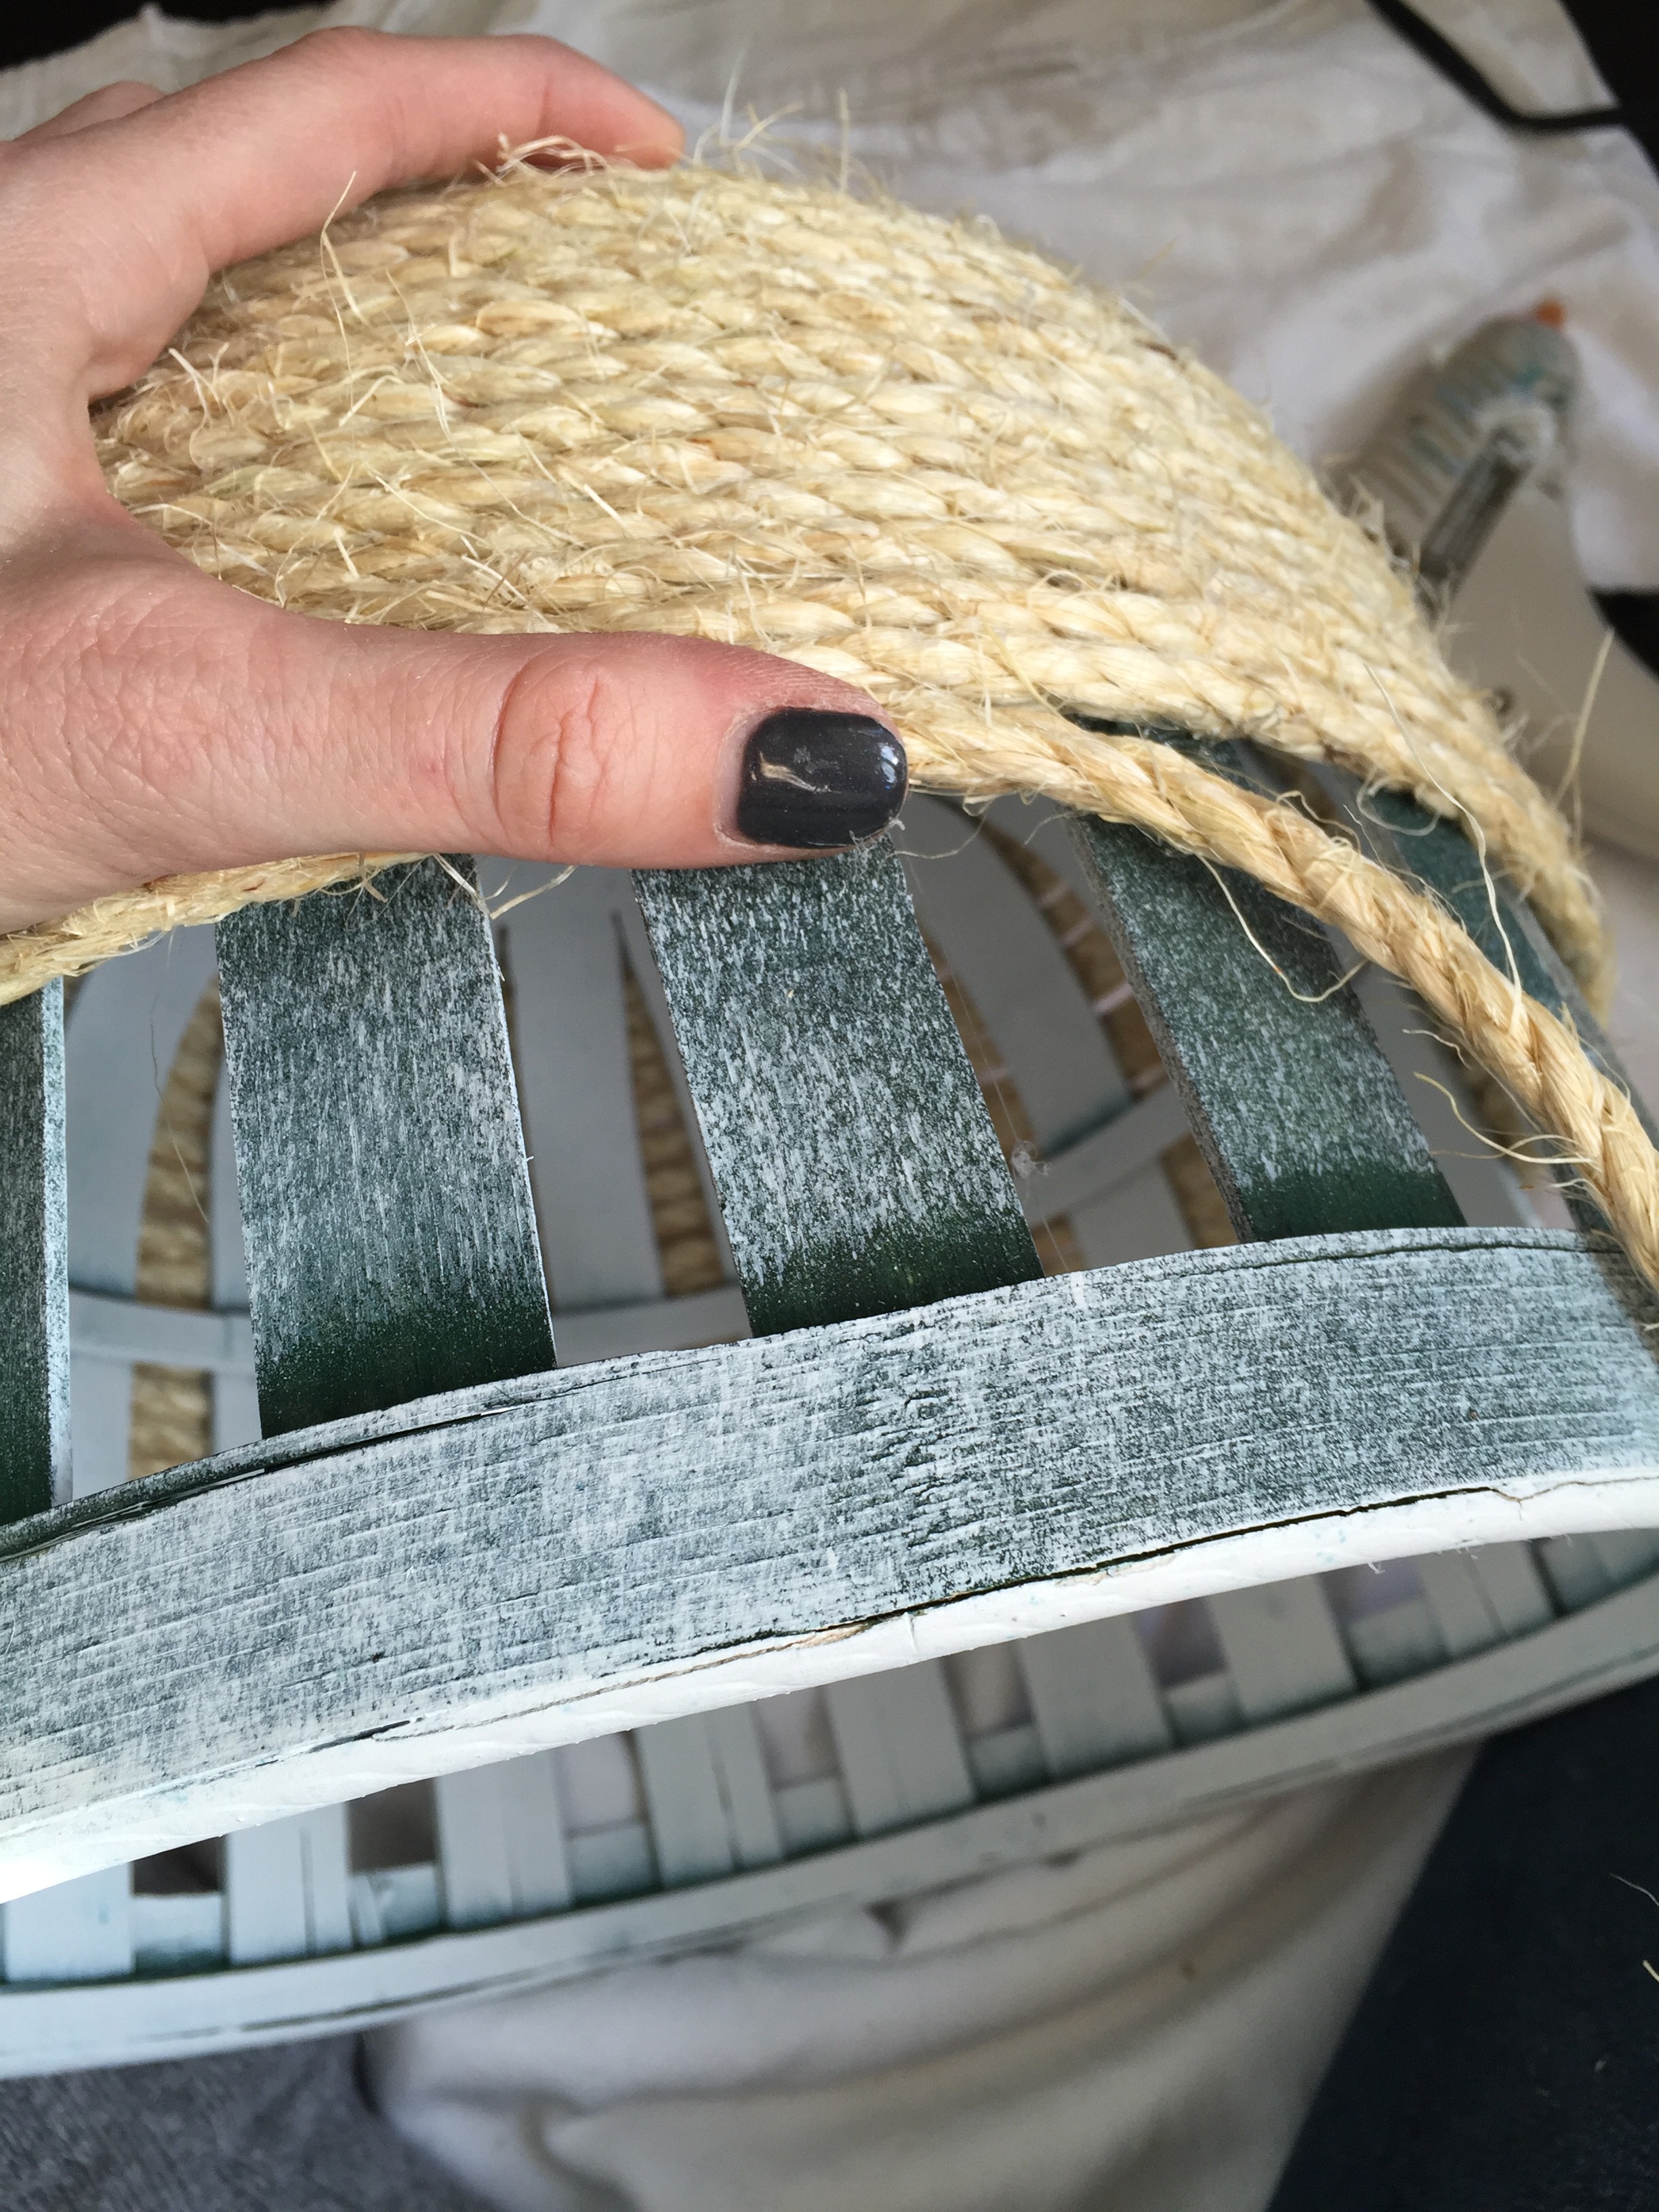
5. I decided to take the rope all the way around the lip of the basket and cut the strand off at an angle. Tuck and glue the finishing piece up and under to complete the look.

To finish it off, I decided to add a small chalkboard that I picked up at Michaels. I cut off the loop and hot glued it on the front.
I found the perfect spot to house some small books that I frequently use in my reading chair.

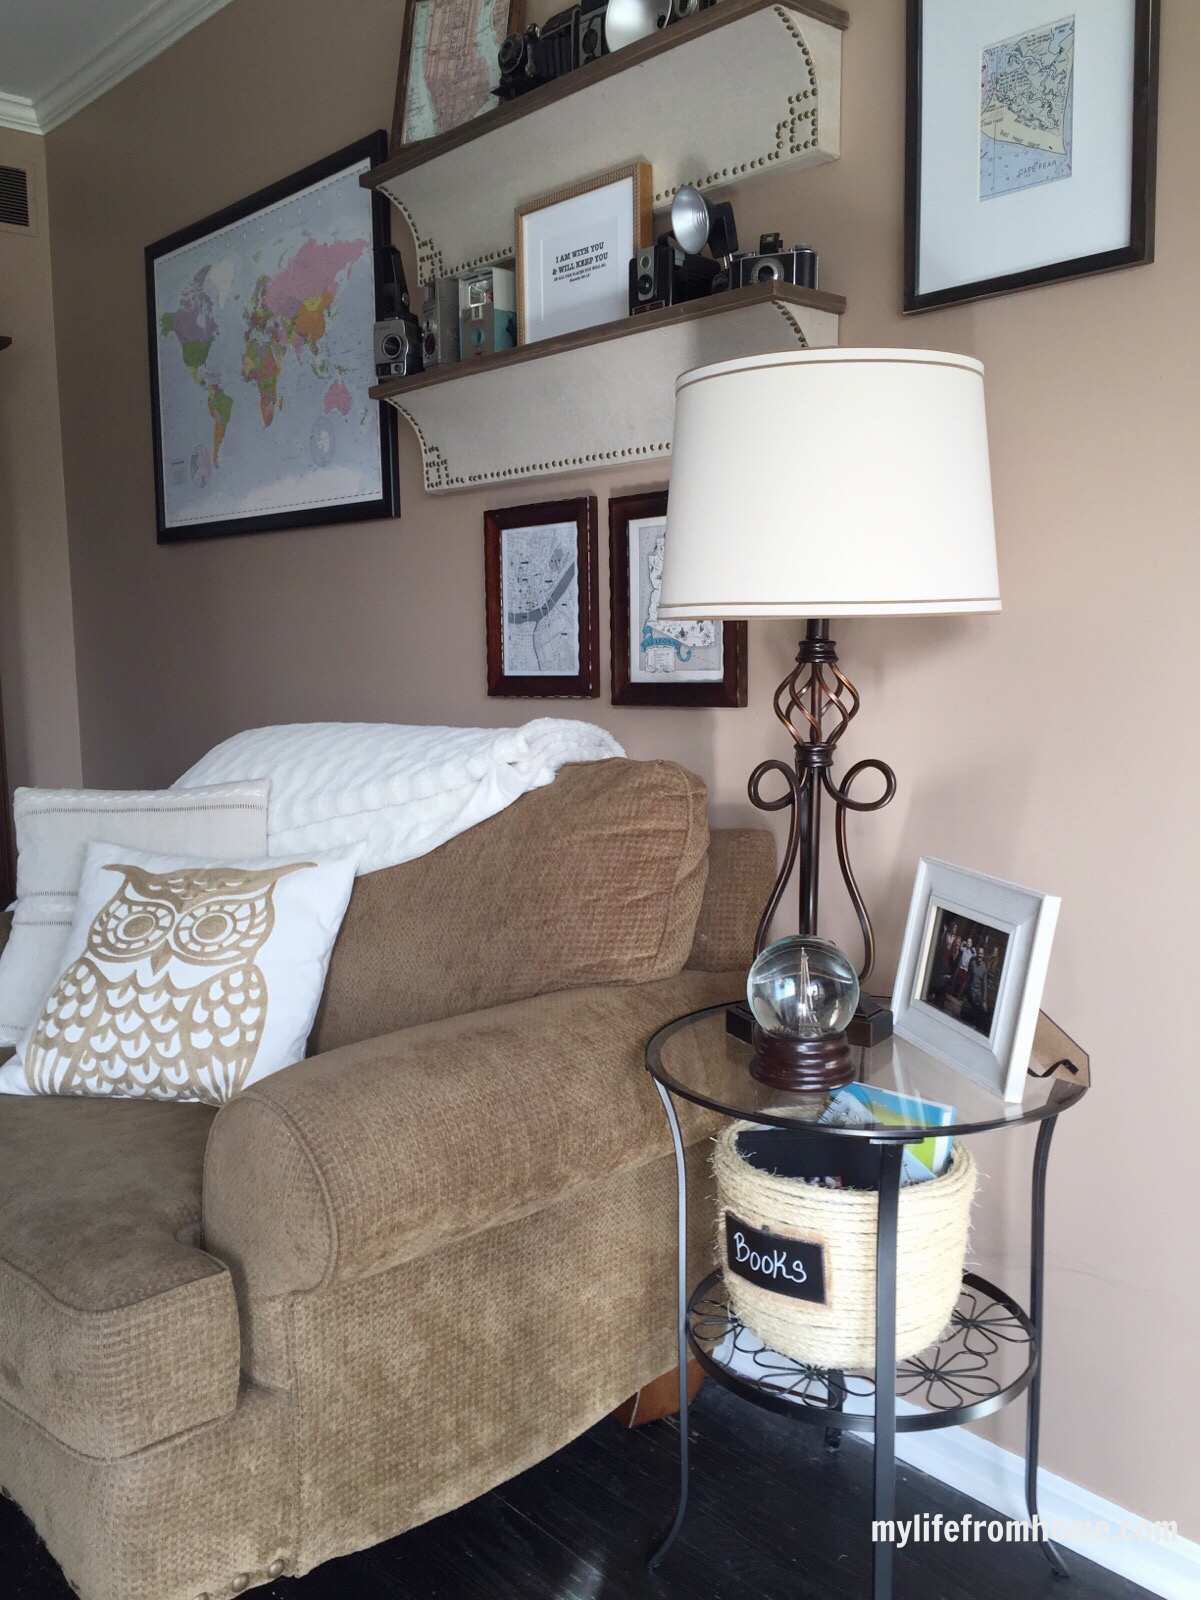
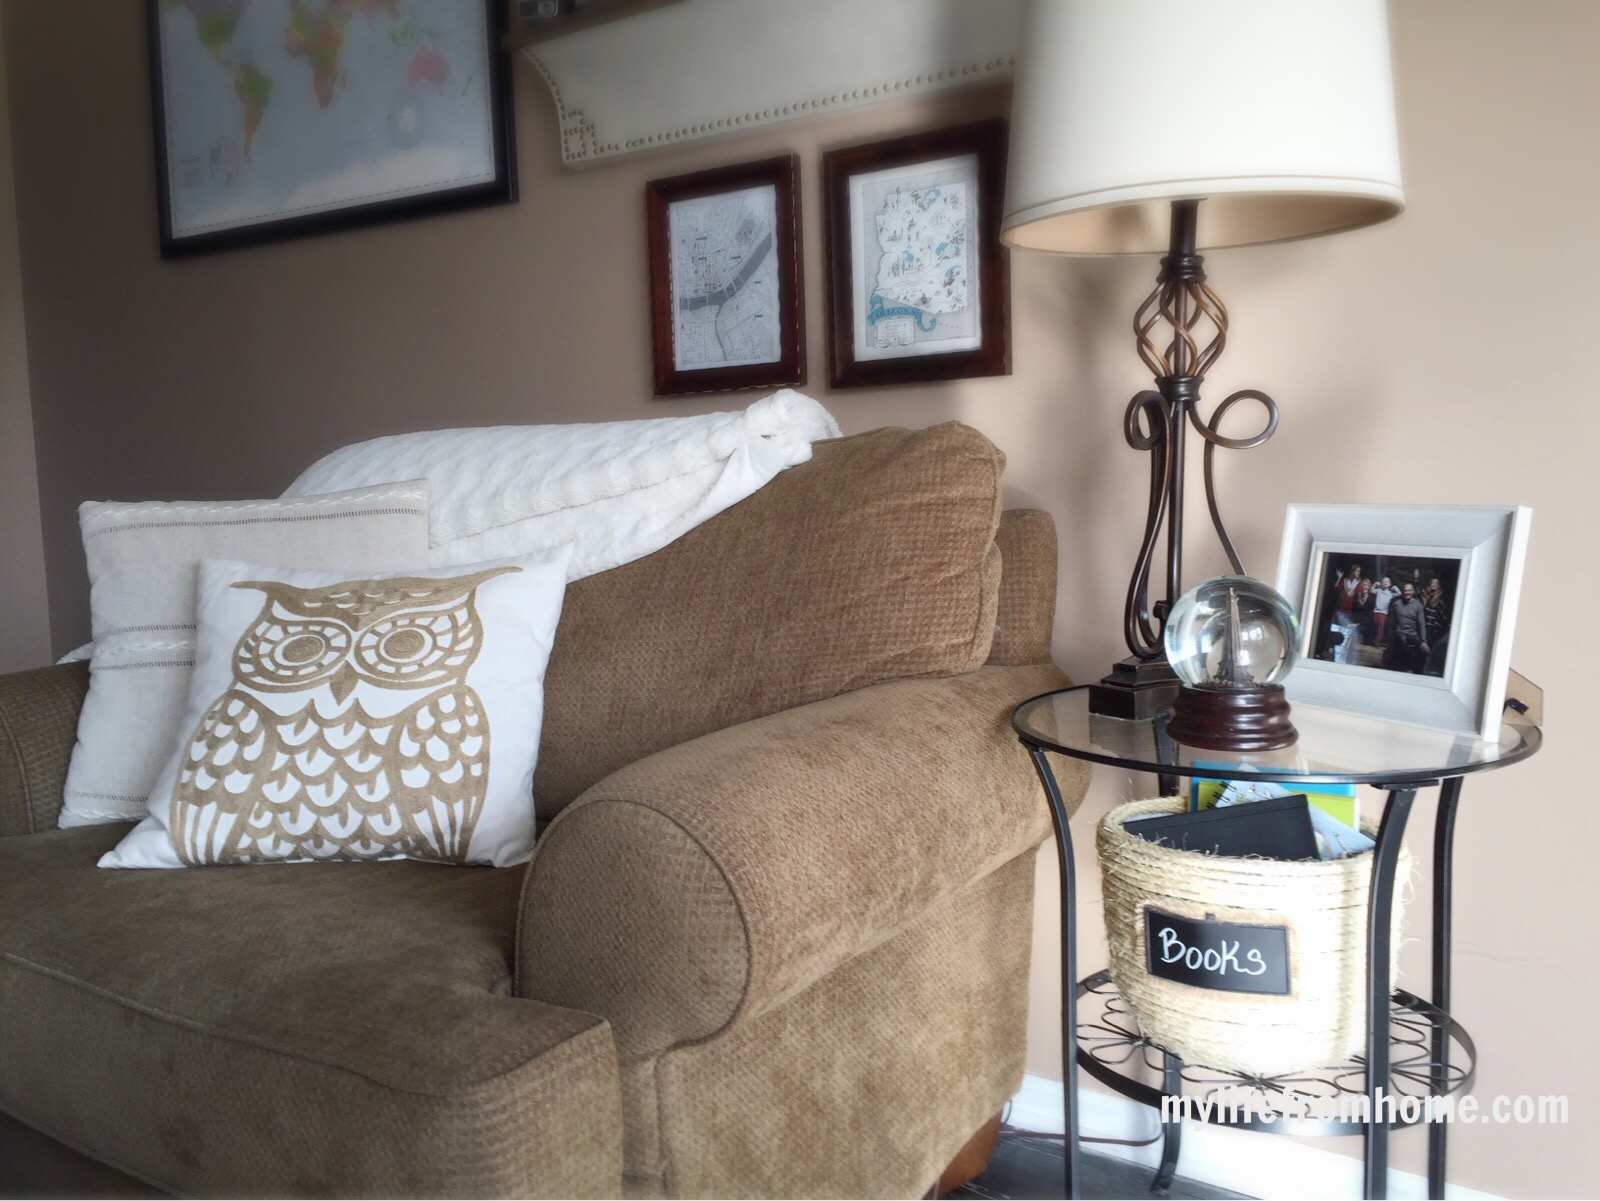
I couldn't be happier with how it turned out!
What do you think?
LOVE IT? PIN IT!

![]()
Want to See More?
 1. The Dean's List Blog // 2. Pretty Practical Home // 3. Casa Watkins 4. The Twin Cedars // 5. Our Crafty Mom // 6. Twelve on Main // 7. Creatively Homespun // 8. My Life From Home // 9. Hobnail House // 10. Domicile 37 // 11. Beauteeful Living // 12. Knock it off Crafts 13. Pocket of Posies 14. The Weathered Fox // 15. Shabby Grace Blog


Which chalkboard did you grab from Michael’s? Did it have a cloth backing? I want to make sure it would be able to curve to the basket. Thank you!
[…] Farmhouse Rope Basket – My Life From Home […]
how can a beginner person make Sisal Rope Basket at his home. Kindly guide me about this.
Numerous individuals mistakenly trust it is technology items without perusing its reviews. People should read the product reviews before buying.
Technology is quickly changing the way that business persons work each day. It is significant for buyers to play a vital part in understanding arising technology trends.
It turns out great, I think I can adapt too, thanks for sharing 🙂
[…] Sisal Rope Basket […]
[…] By taking a simple dollar store weaved or laundry basket, and wrapping it with a rope you can create a trendy storage piece. Via (My Life From Home) […]
[…] to make something new from those items. Isn’t that fun?! I participated in another similar challenge to this around Christmas time and I loved how it turned out. Such great ideas all […]
[…] purchased sisal rope for a DIY thrift store basket makeover I did last winter and I had some leftover just waiting to be used for something. The basket […]
[…] as well. Here is what we shared last month! Amy shared a DIY Thrift Store Basket Makeover. See Post Here Stephanie shared her DIY Moroccan Dessert Plates. See Post Here Sara posted her updated play […]
[…] Amy shared a DIY Thrift Store Basket Makeover. See Post Here […]
Amy, this makeover is fantastic! And I love the chalkboard that you added to the front – a perfect touch! (I am also in love with that gold owl pillow on your chair – where did you find that??)
Nicely executed…Love it and I totally would have done the same.
Thank you Jessica 🙂
I love it Amy! The funny thing is that didn’t come from the thrift store – the gas can did! Haha, I got the basket at Hobby Lobby to put the can in. How funny! I do LOVE how you transformed it, so much better than the original. Nice work!
You are killing me! Omg. I had no idea! I worked on that gas can forever. I haven’t given up on it. I am making it into a birdhouse but can’t get the roof to attach in the right way. I’ll have to still share it when it’s all done.
[…] Amy’s DIY Basket Makeover // The 4 Biggest Organizing Blunders // DIY Moroccan Dessert Plates by Stephanie // New Year, New Room by IrisNacole // Sara’s Updated Playroom […]
[…] See Post Here […]
This is so great! I love what you did with that basket! I totally need to do this. It was fun doing this blog hop with you!
Thank you Sara! 🙂
Oh, my, I am squealing with happiness to have discovered this. If you do it again, I’d love to participate! I just found you on the Merry Monday linky, where I just posted my bottomless bag made from thrifted men’s suits. (Not all projects need to be that involved.) I love upcycling!
http://bluecarpaintedgreen.com/2015/05/02/from-savers-suit-to-bottomless-bag/
Too cute! I’m a basket junkie, too–not much they aren’t good for!
Thank you Sharon! 🙂
Supa cute idea!! The chalkboard sign was the perfect touch! Thanks for participating!
Thank you Sara! 🙂
Beautiful Amy! We need some better book storage around our house and this is adorable! Thanks for sharing!
Cat
Thank you Cat! 🙂 It was a fun project to do!
It turned out so good! I love the look of rope. I did a lamp once that way and it was so time consuming but definitely worth it in the end. Great job!
Hi Amy, I can’t believe it only took 10 minutes to do this. Love how your basket turned out. Thanks for sharing.
Thank you Tee! 🙂
Amy, you nailed it! I so love this! I am totally going to keep my eye out now for one to create a few for my craft closet!
Thank you Michelle! 🙂
This is awesome! I want to make one 🙂
Thank you Meg! 🙂
Really fantastic! I’m certainly keeping this idea in my back pocket!
Thank you Chanell! 🙂